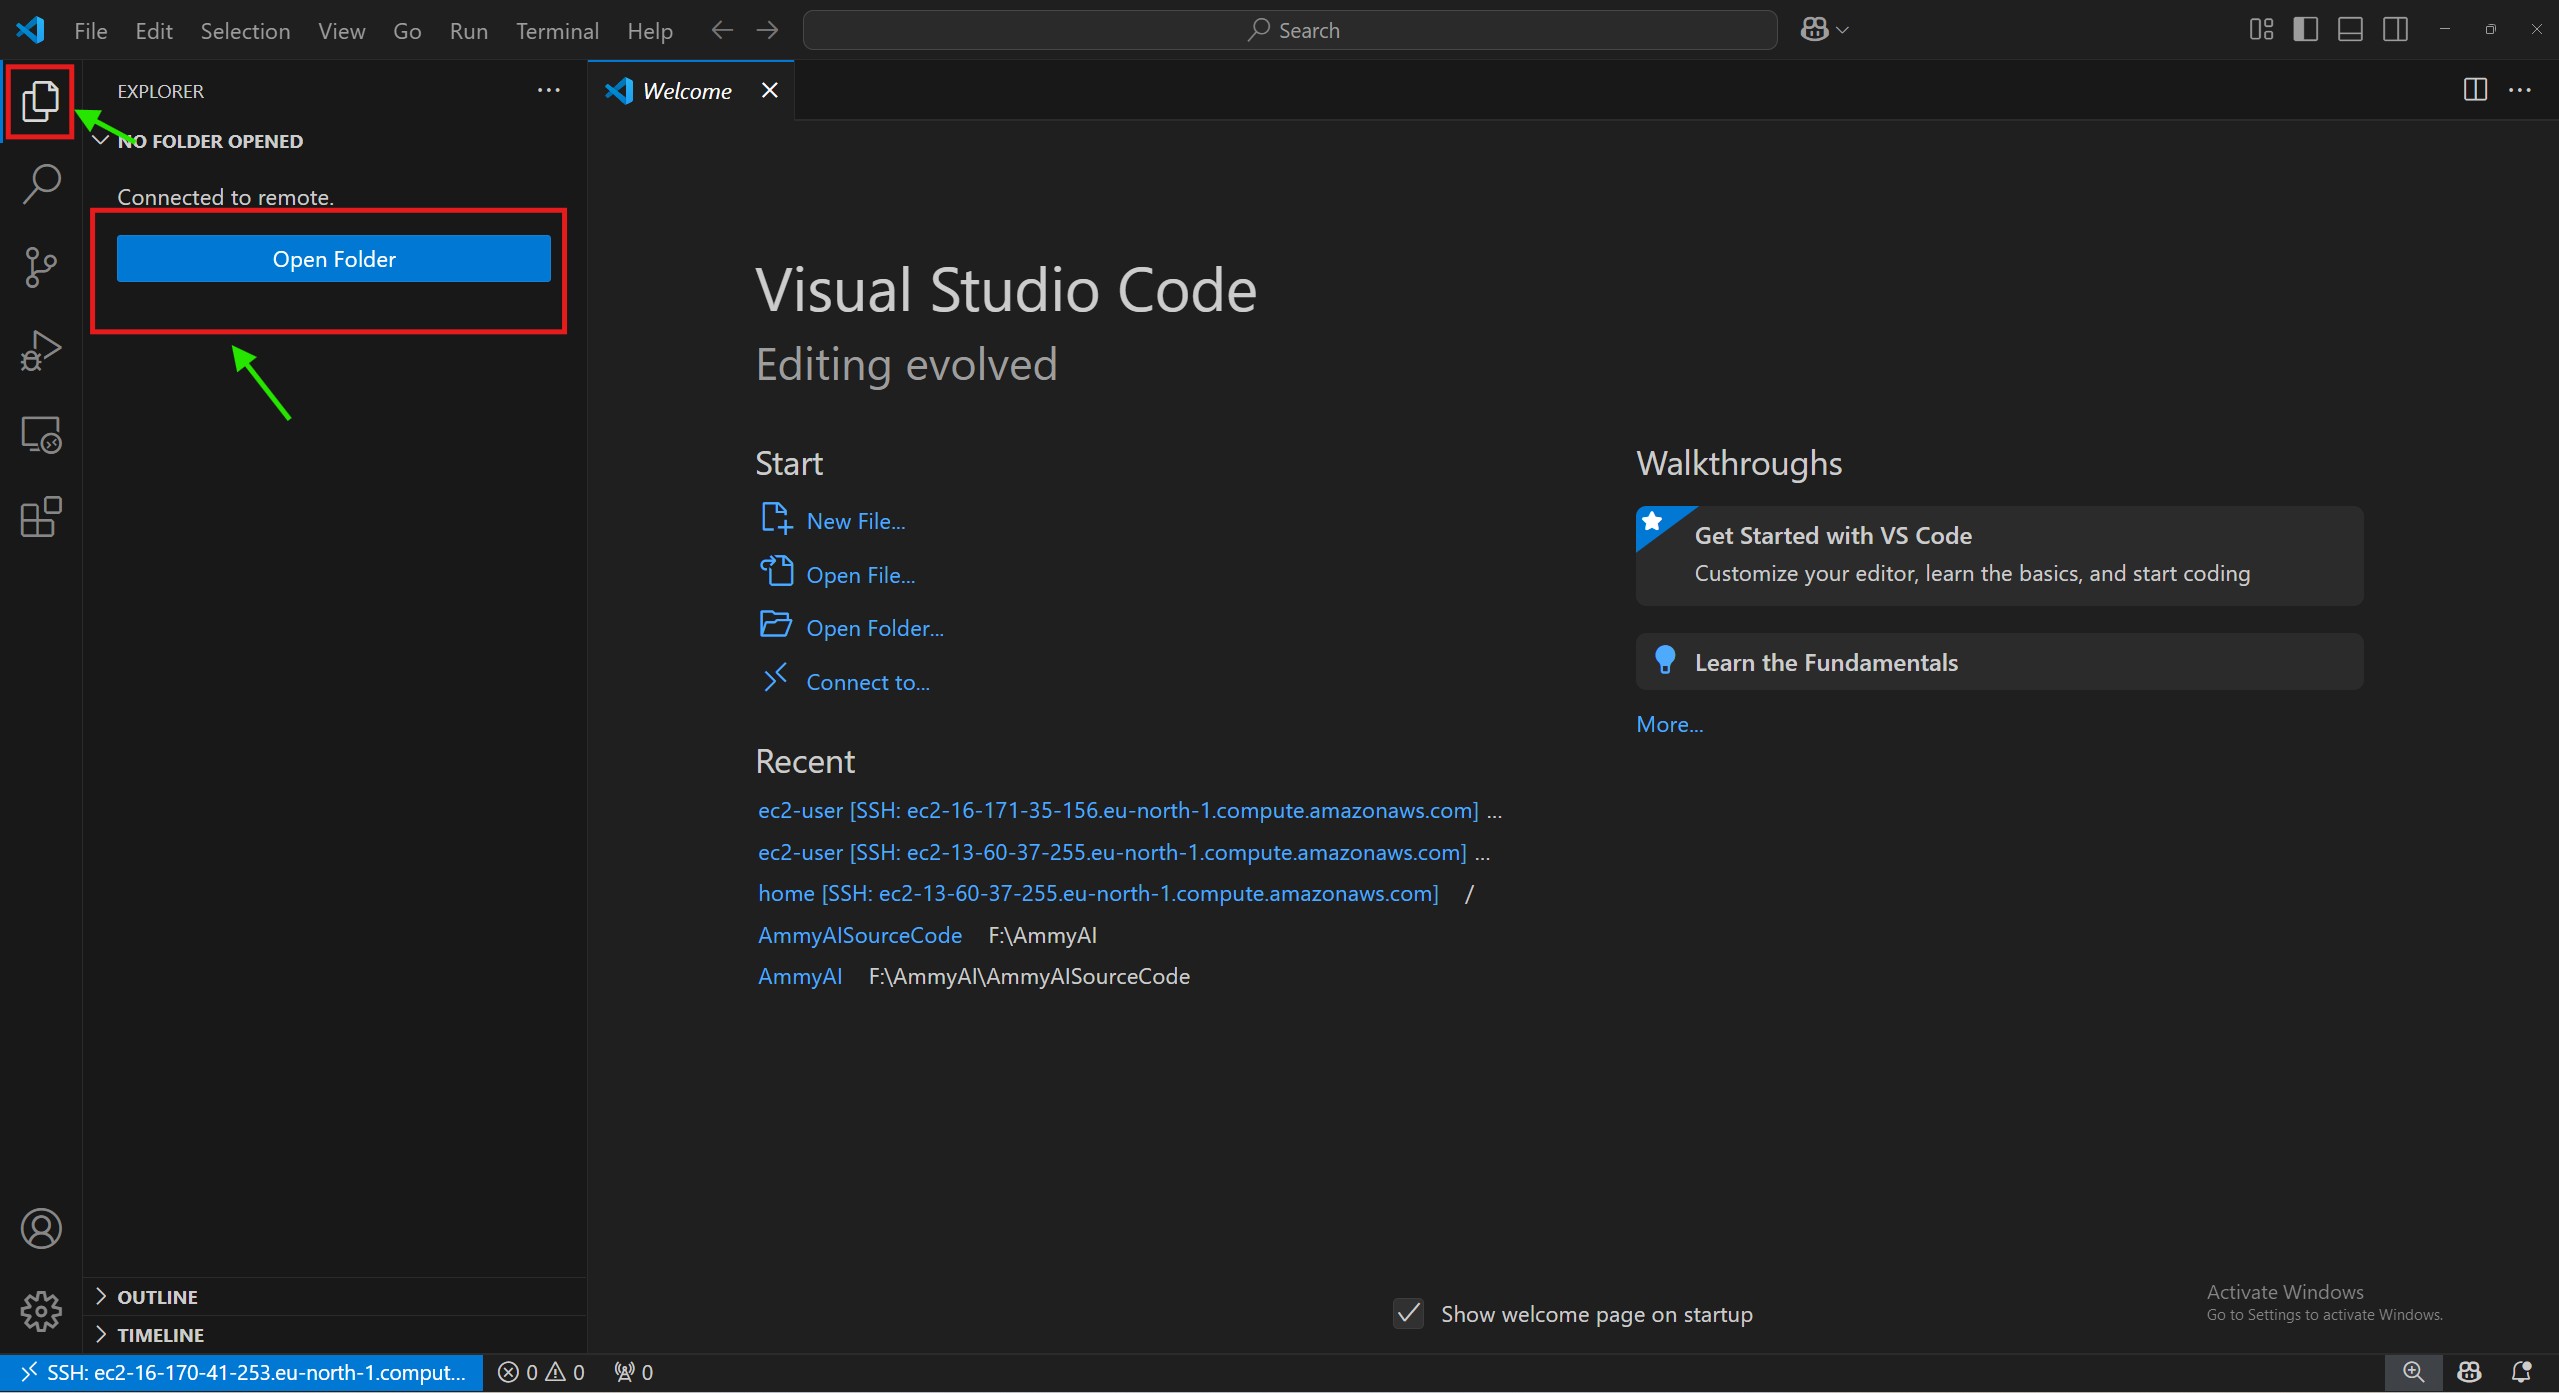
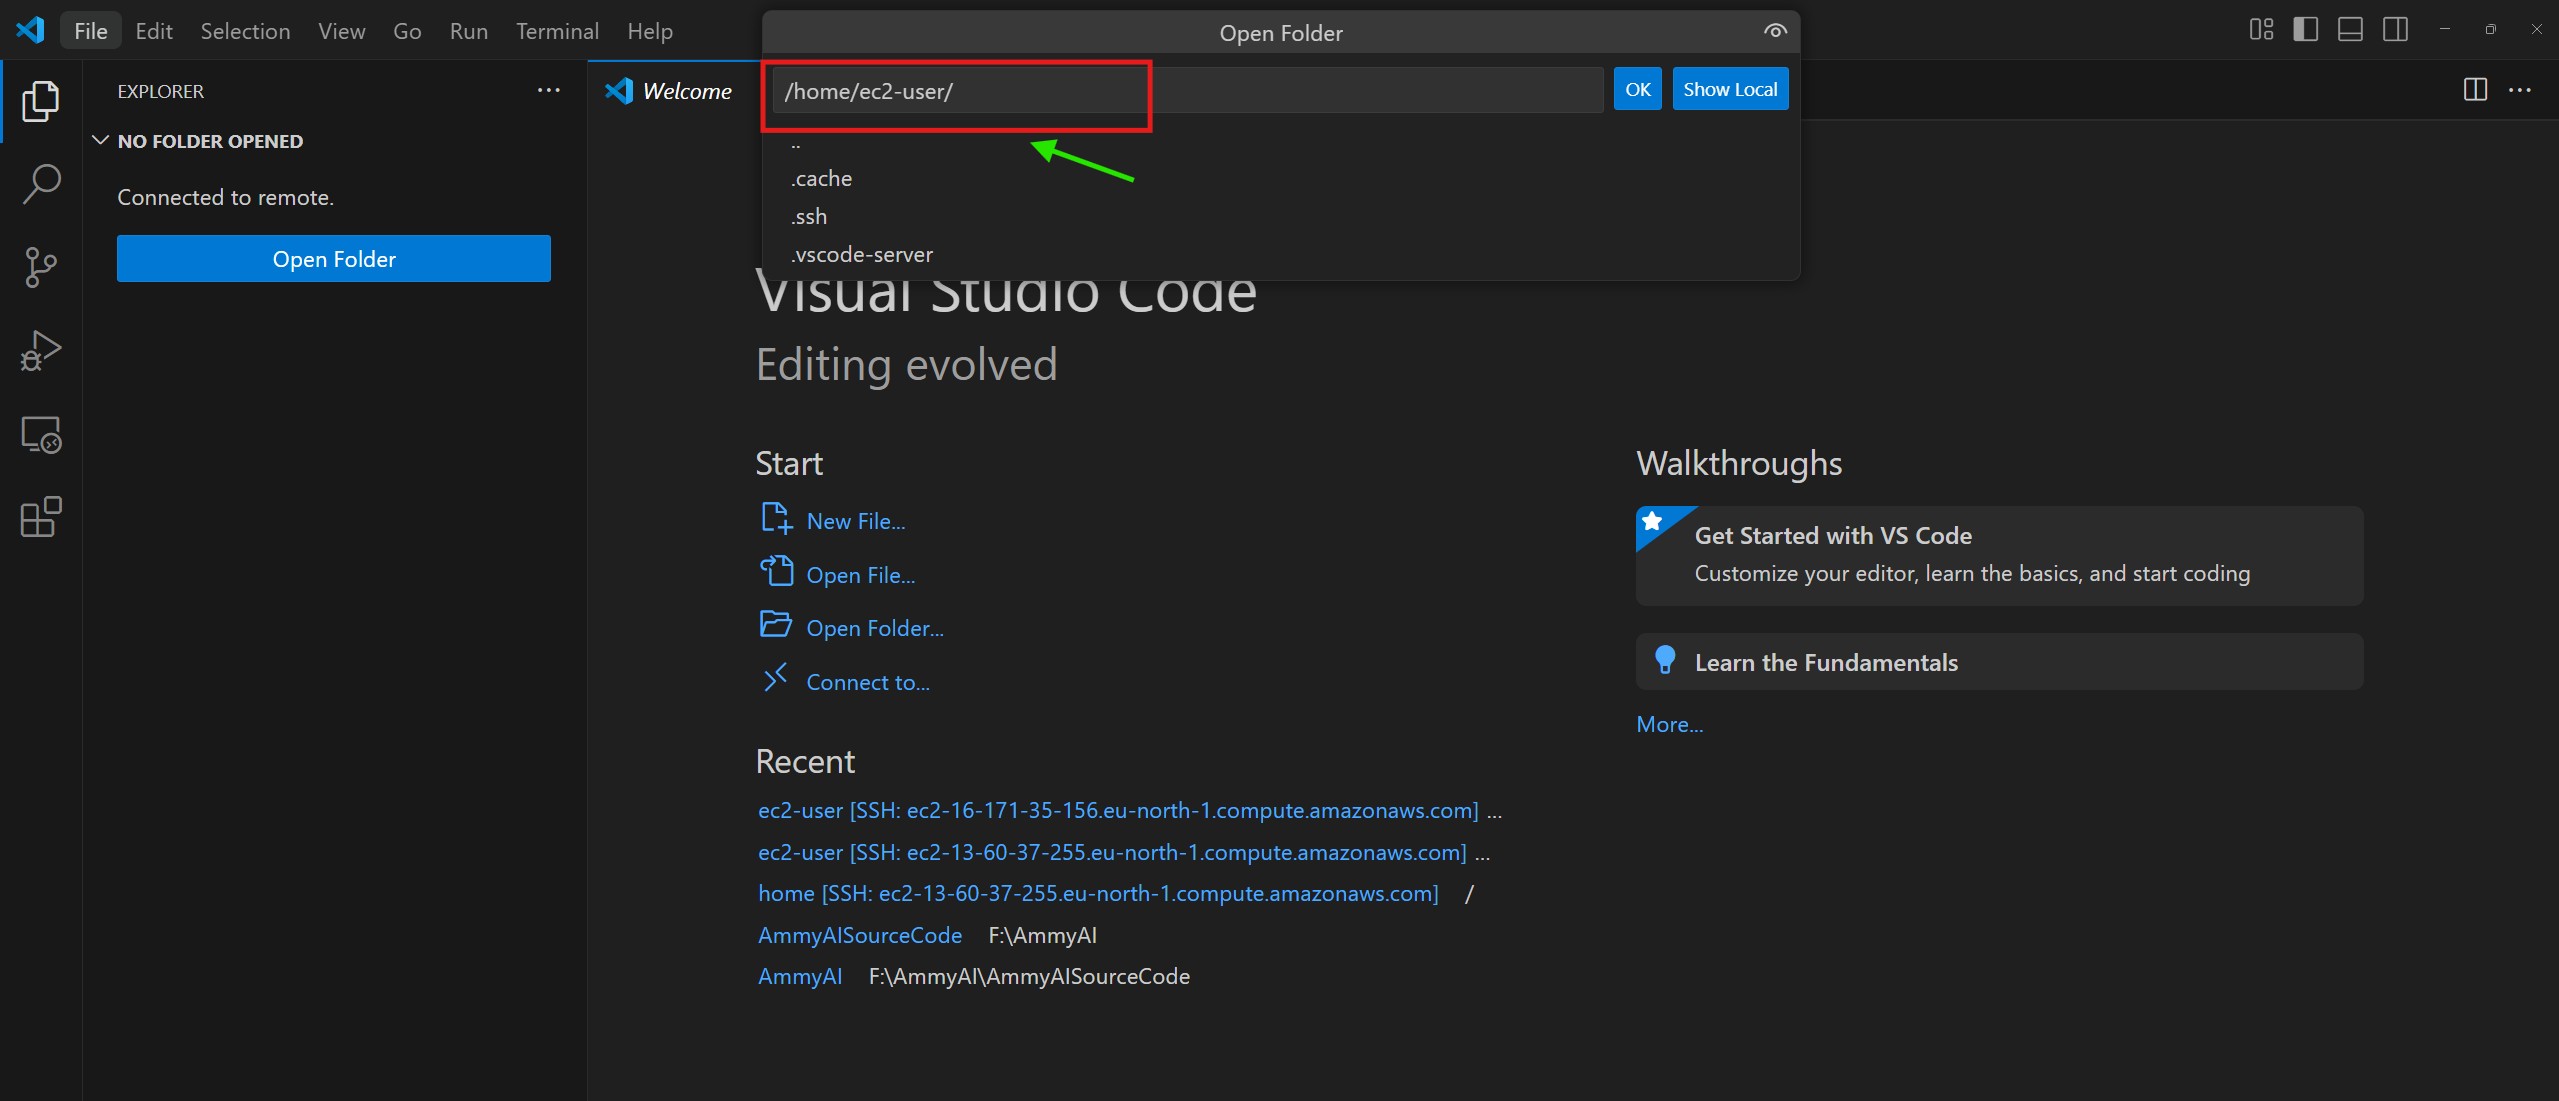
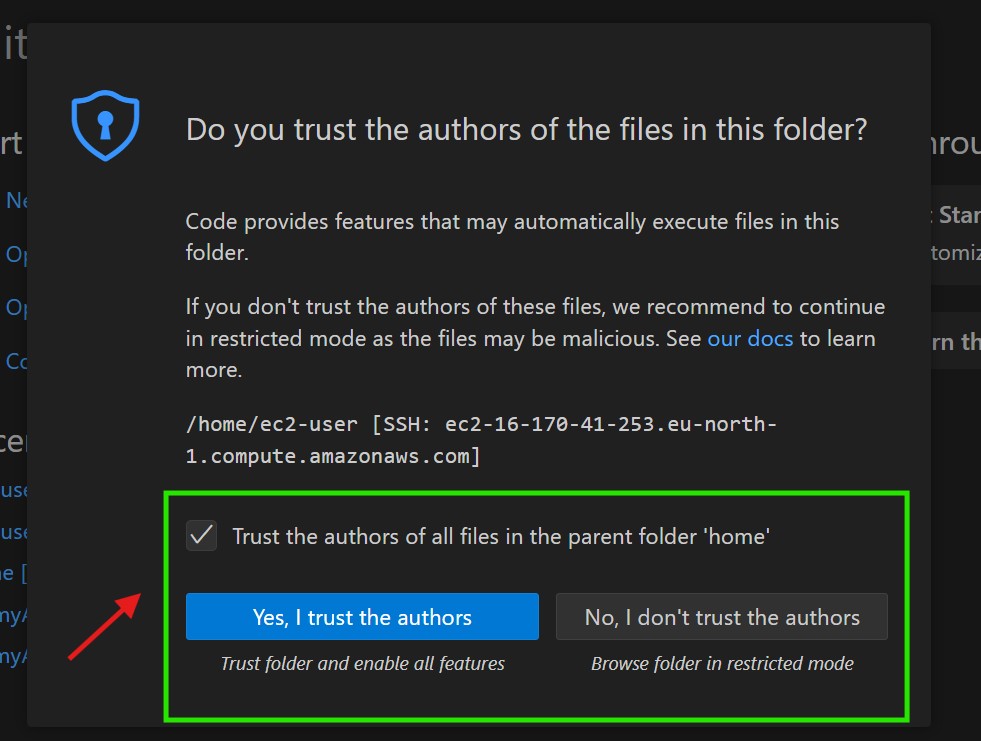
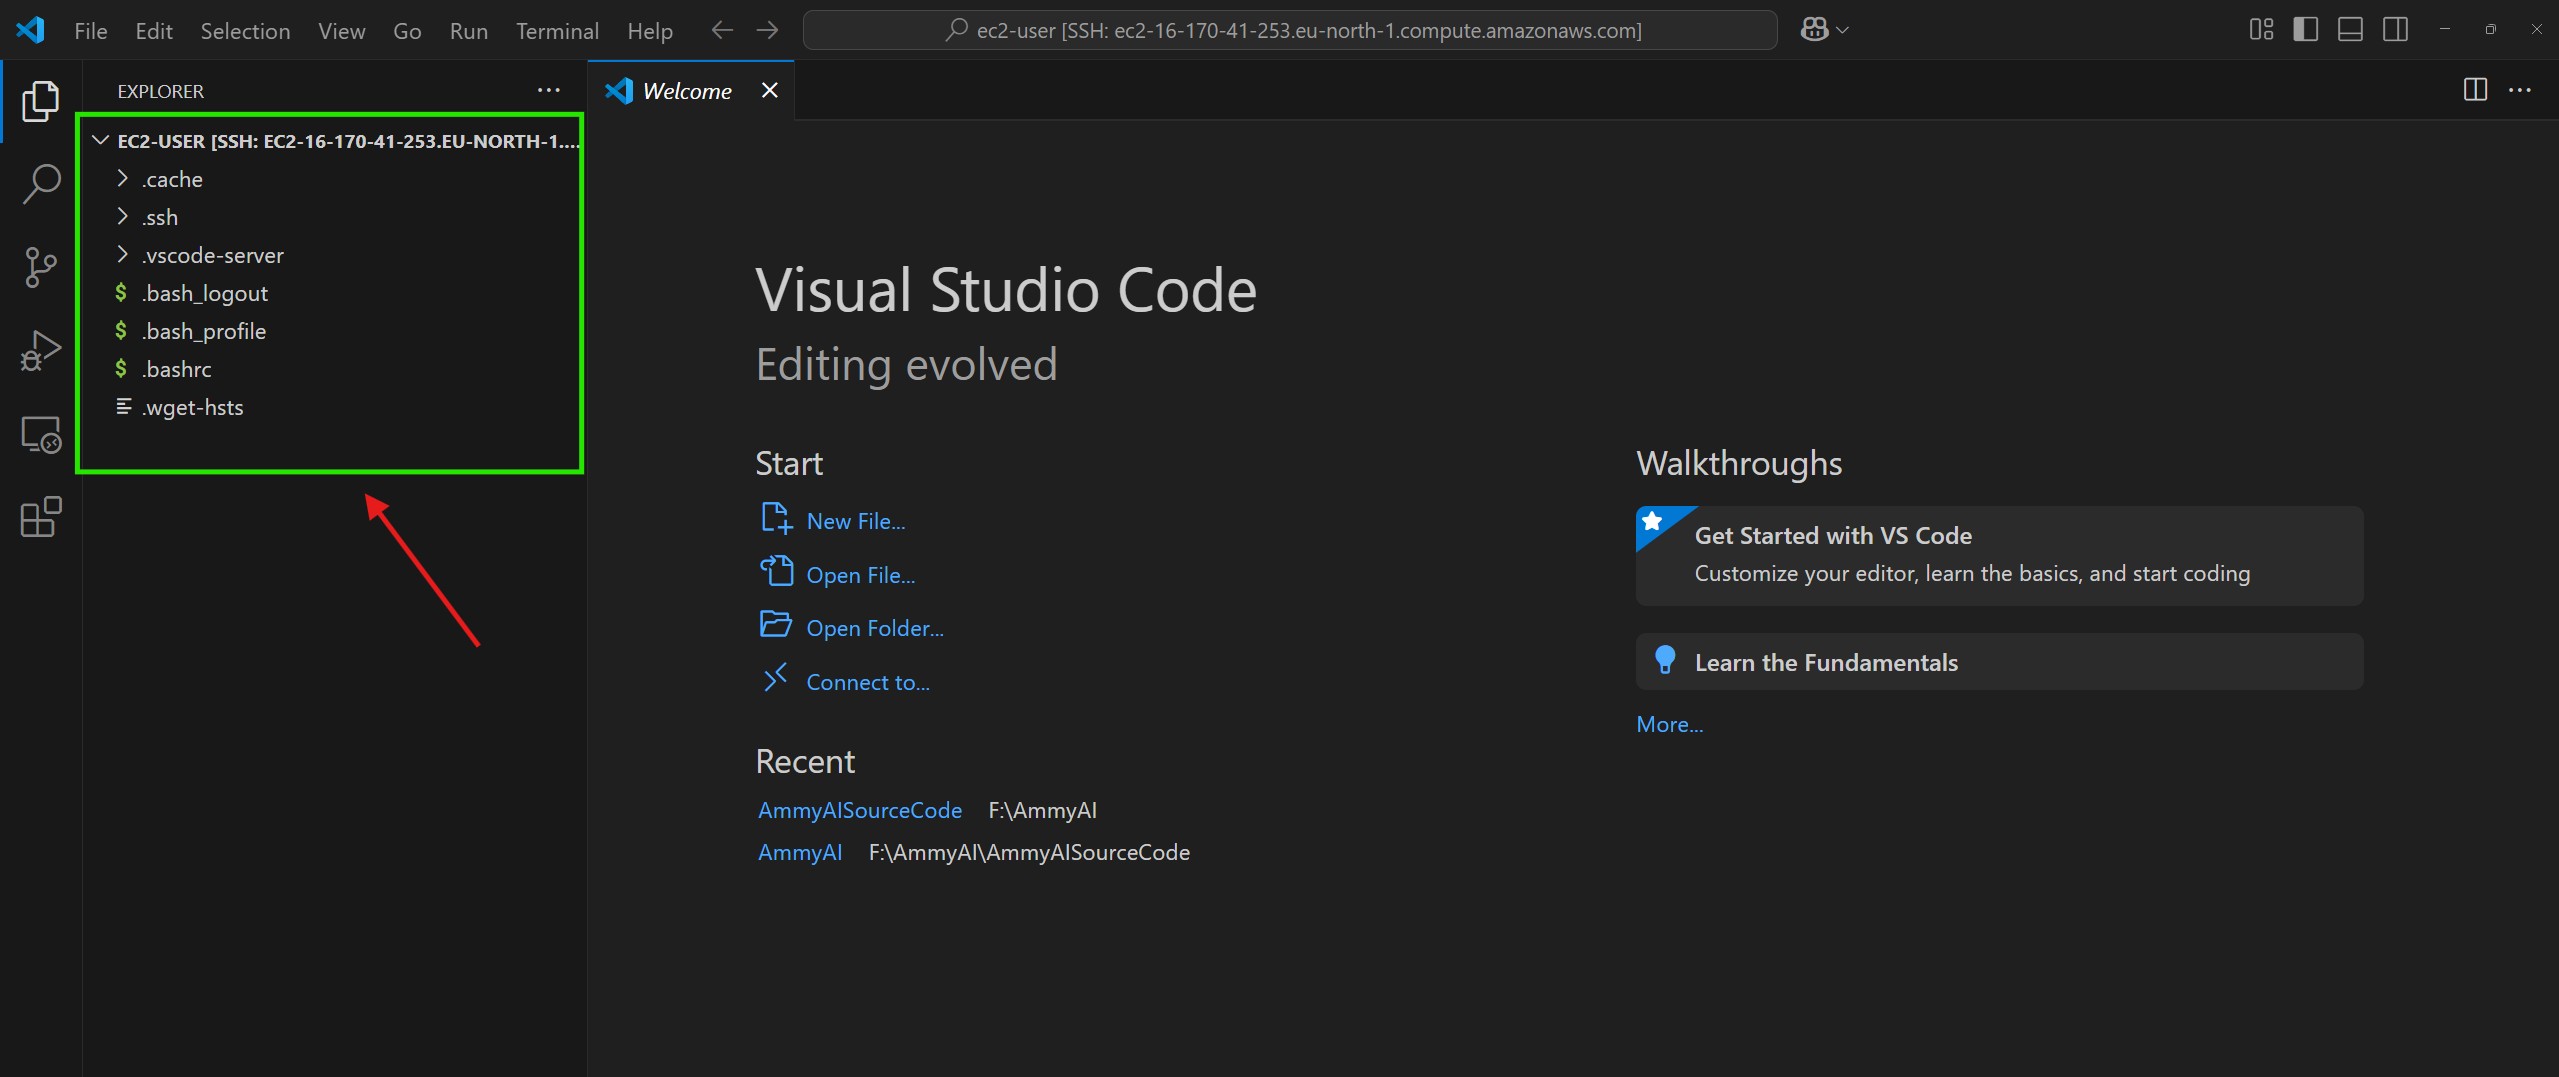
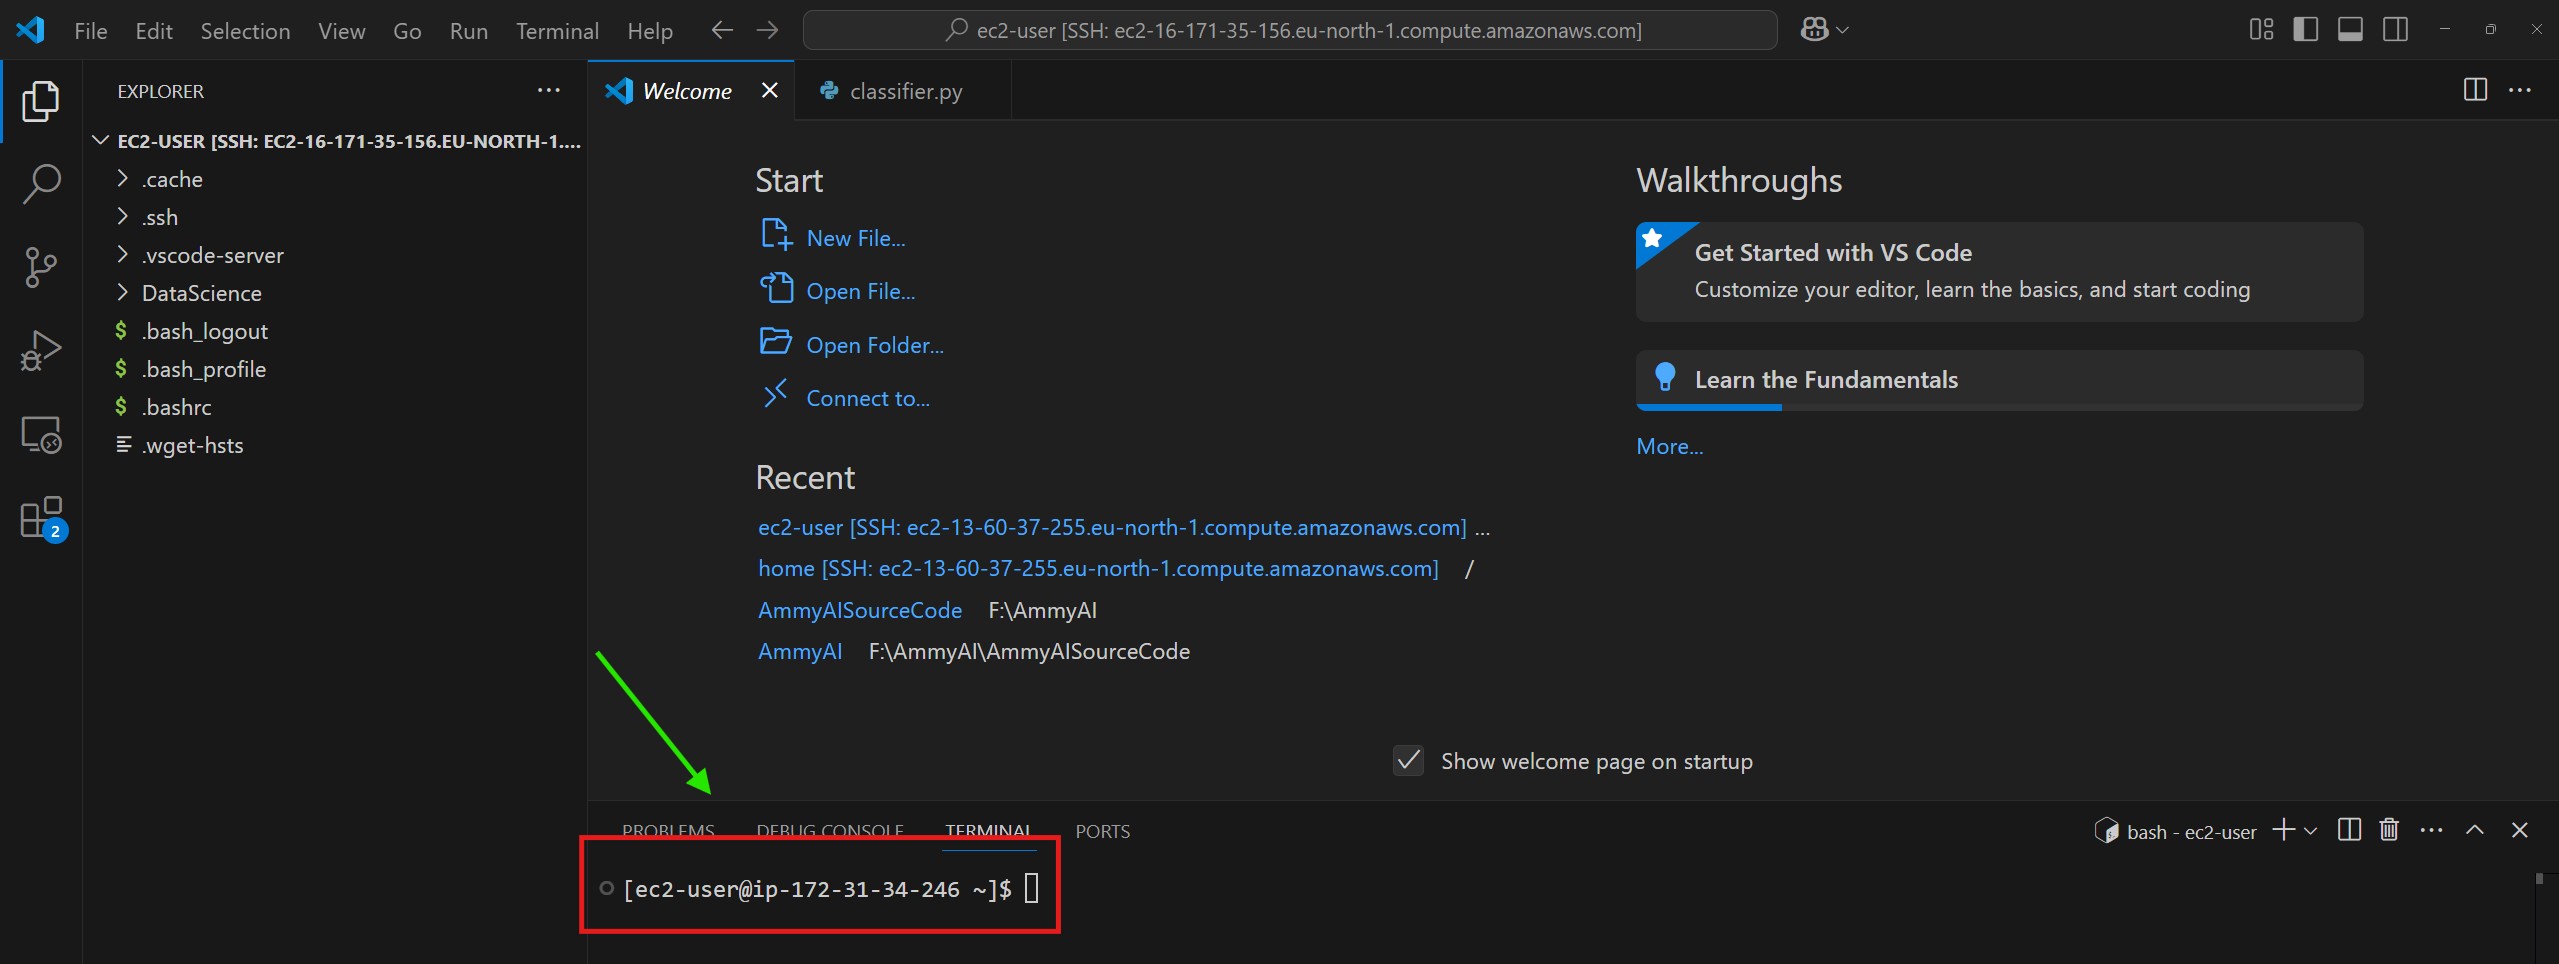
How To How To Connect To An EC2 Instance Through VS Code?
How To Assign A Static IP To An EC2 Instance ?
How To Check If Python Is Installed Or Not In Newly Created EC2 ?
How To Install “PIP” In An EC2 Instance ?
How To Create A Virtual Environment In EC2 Instance ?
(1) How To How To Connect To An EC2 Instance Through VS Code?
(2) How To Assign A Static IP To An EC2 Instance ?
Your EC2 instance’s public DNS (ec2-13-60-26-161.eu-north-1.compute.amazonaws.com) changes every time you restart or stop/start the instance because AWS assigns a new public IP address dynamically.
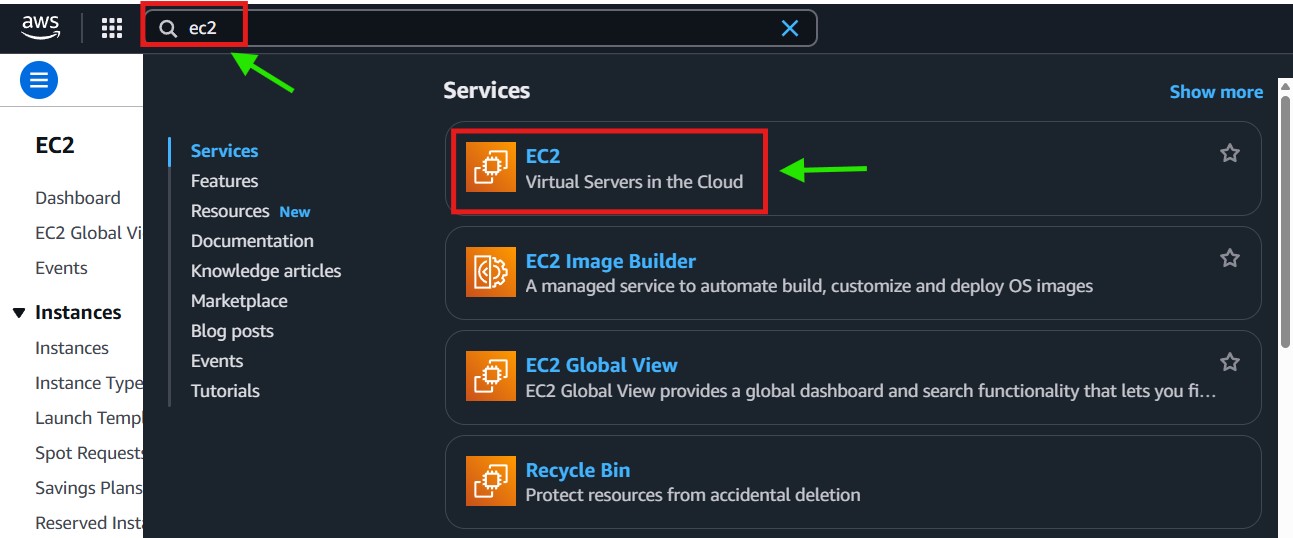
Step-1: Go to AWS EC2 Dashboard →
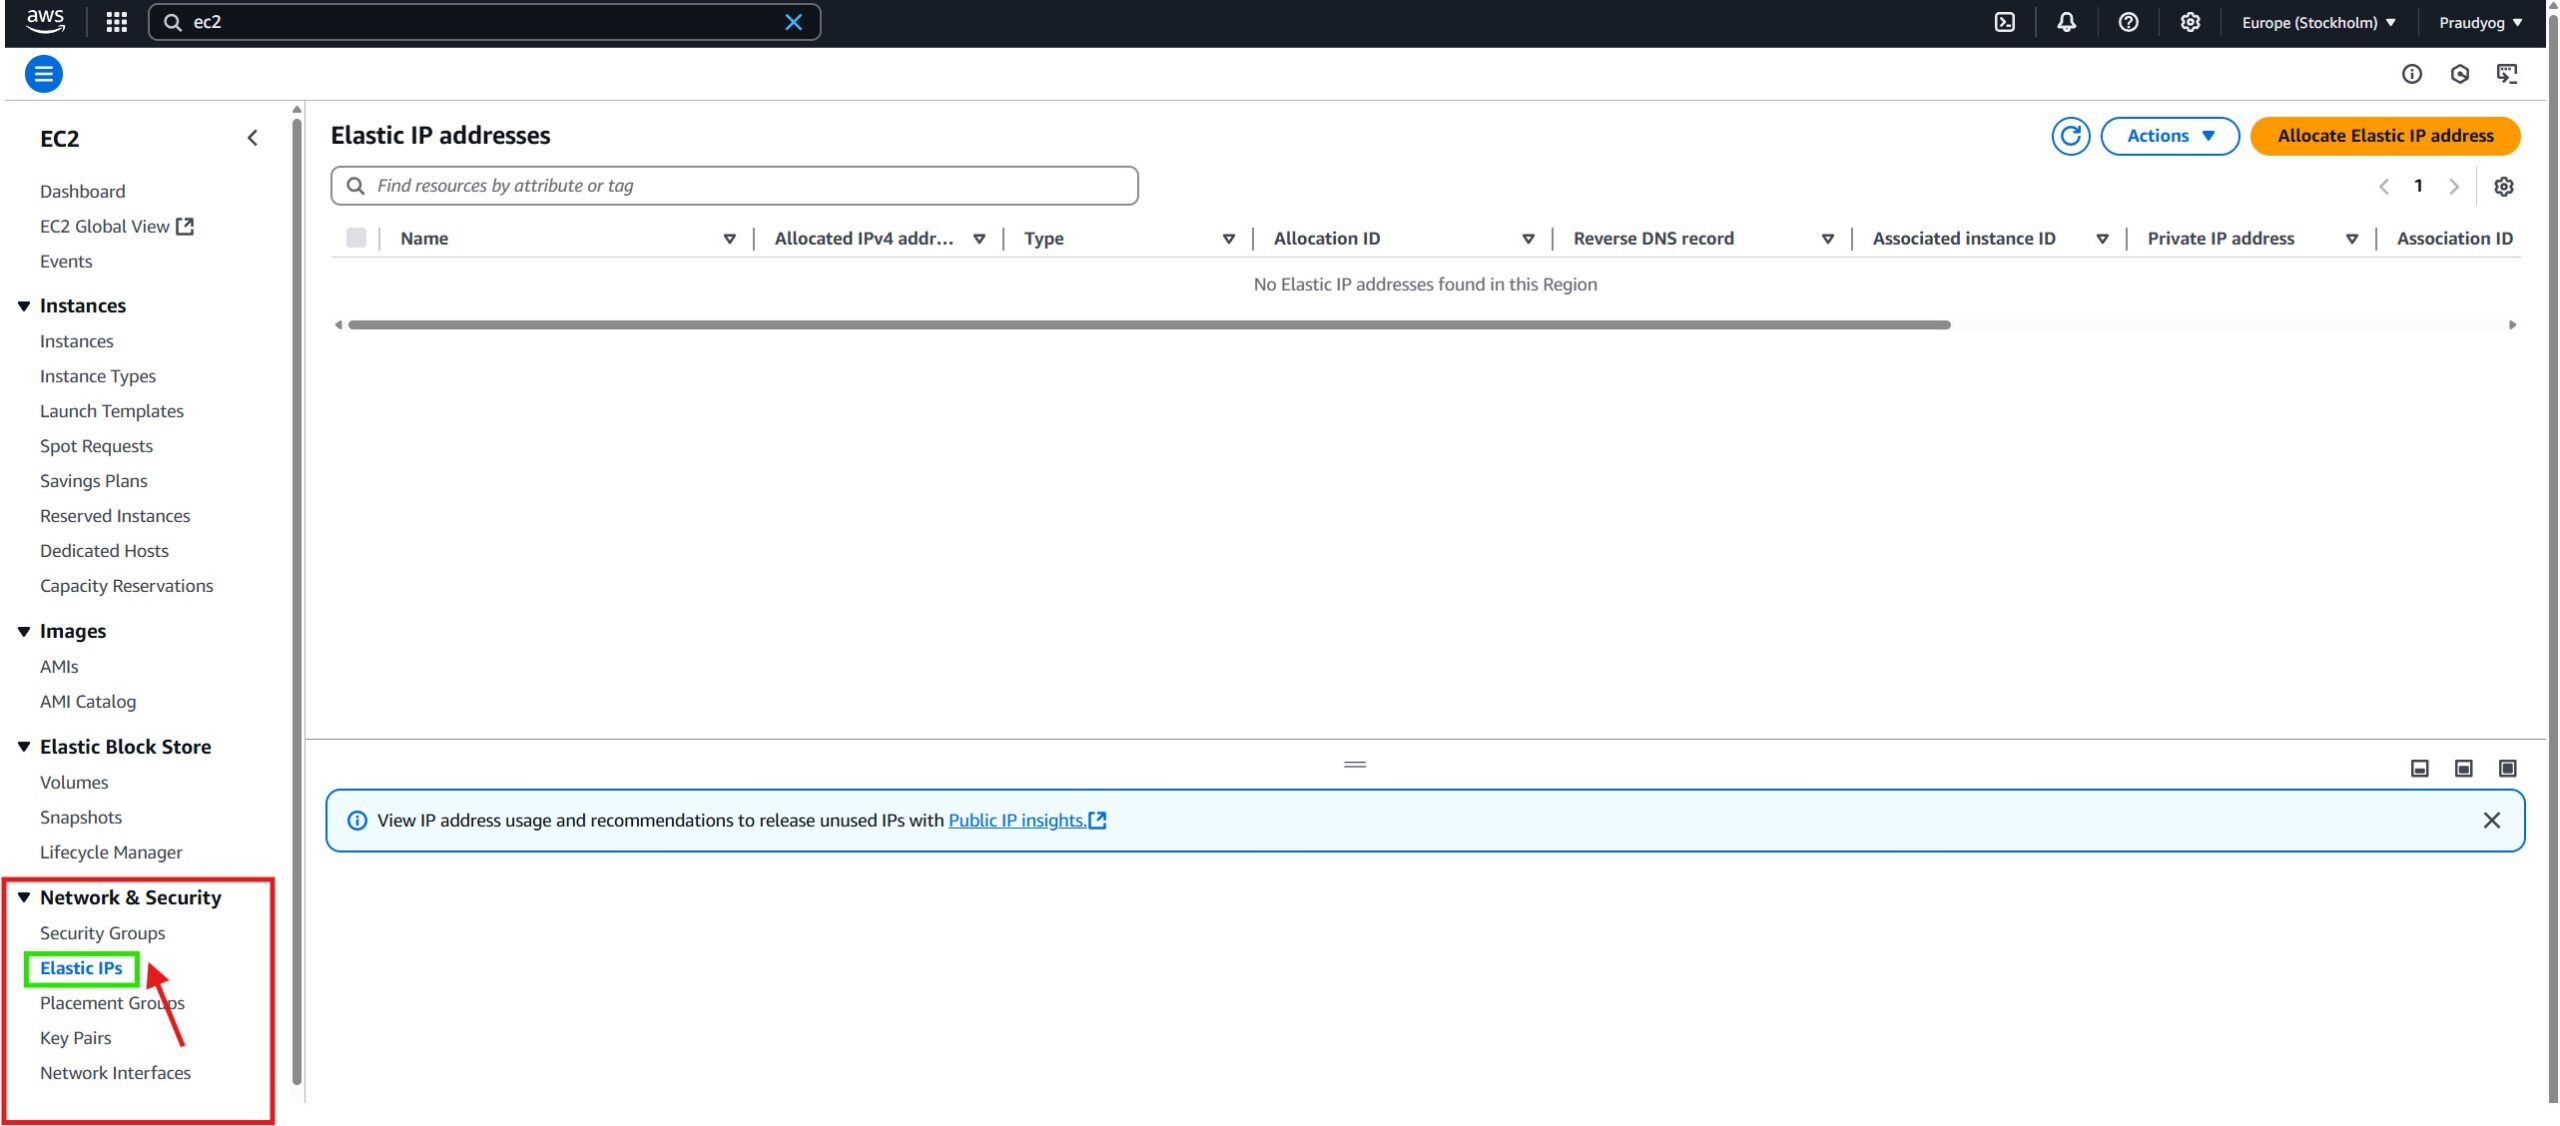
Step-2: Click on Elastic IPs (under “Network & Security”).
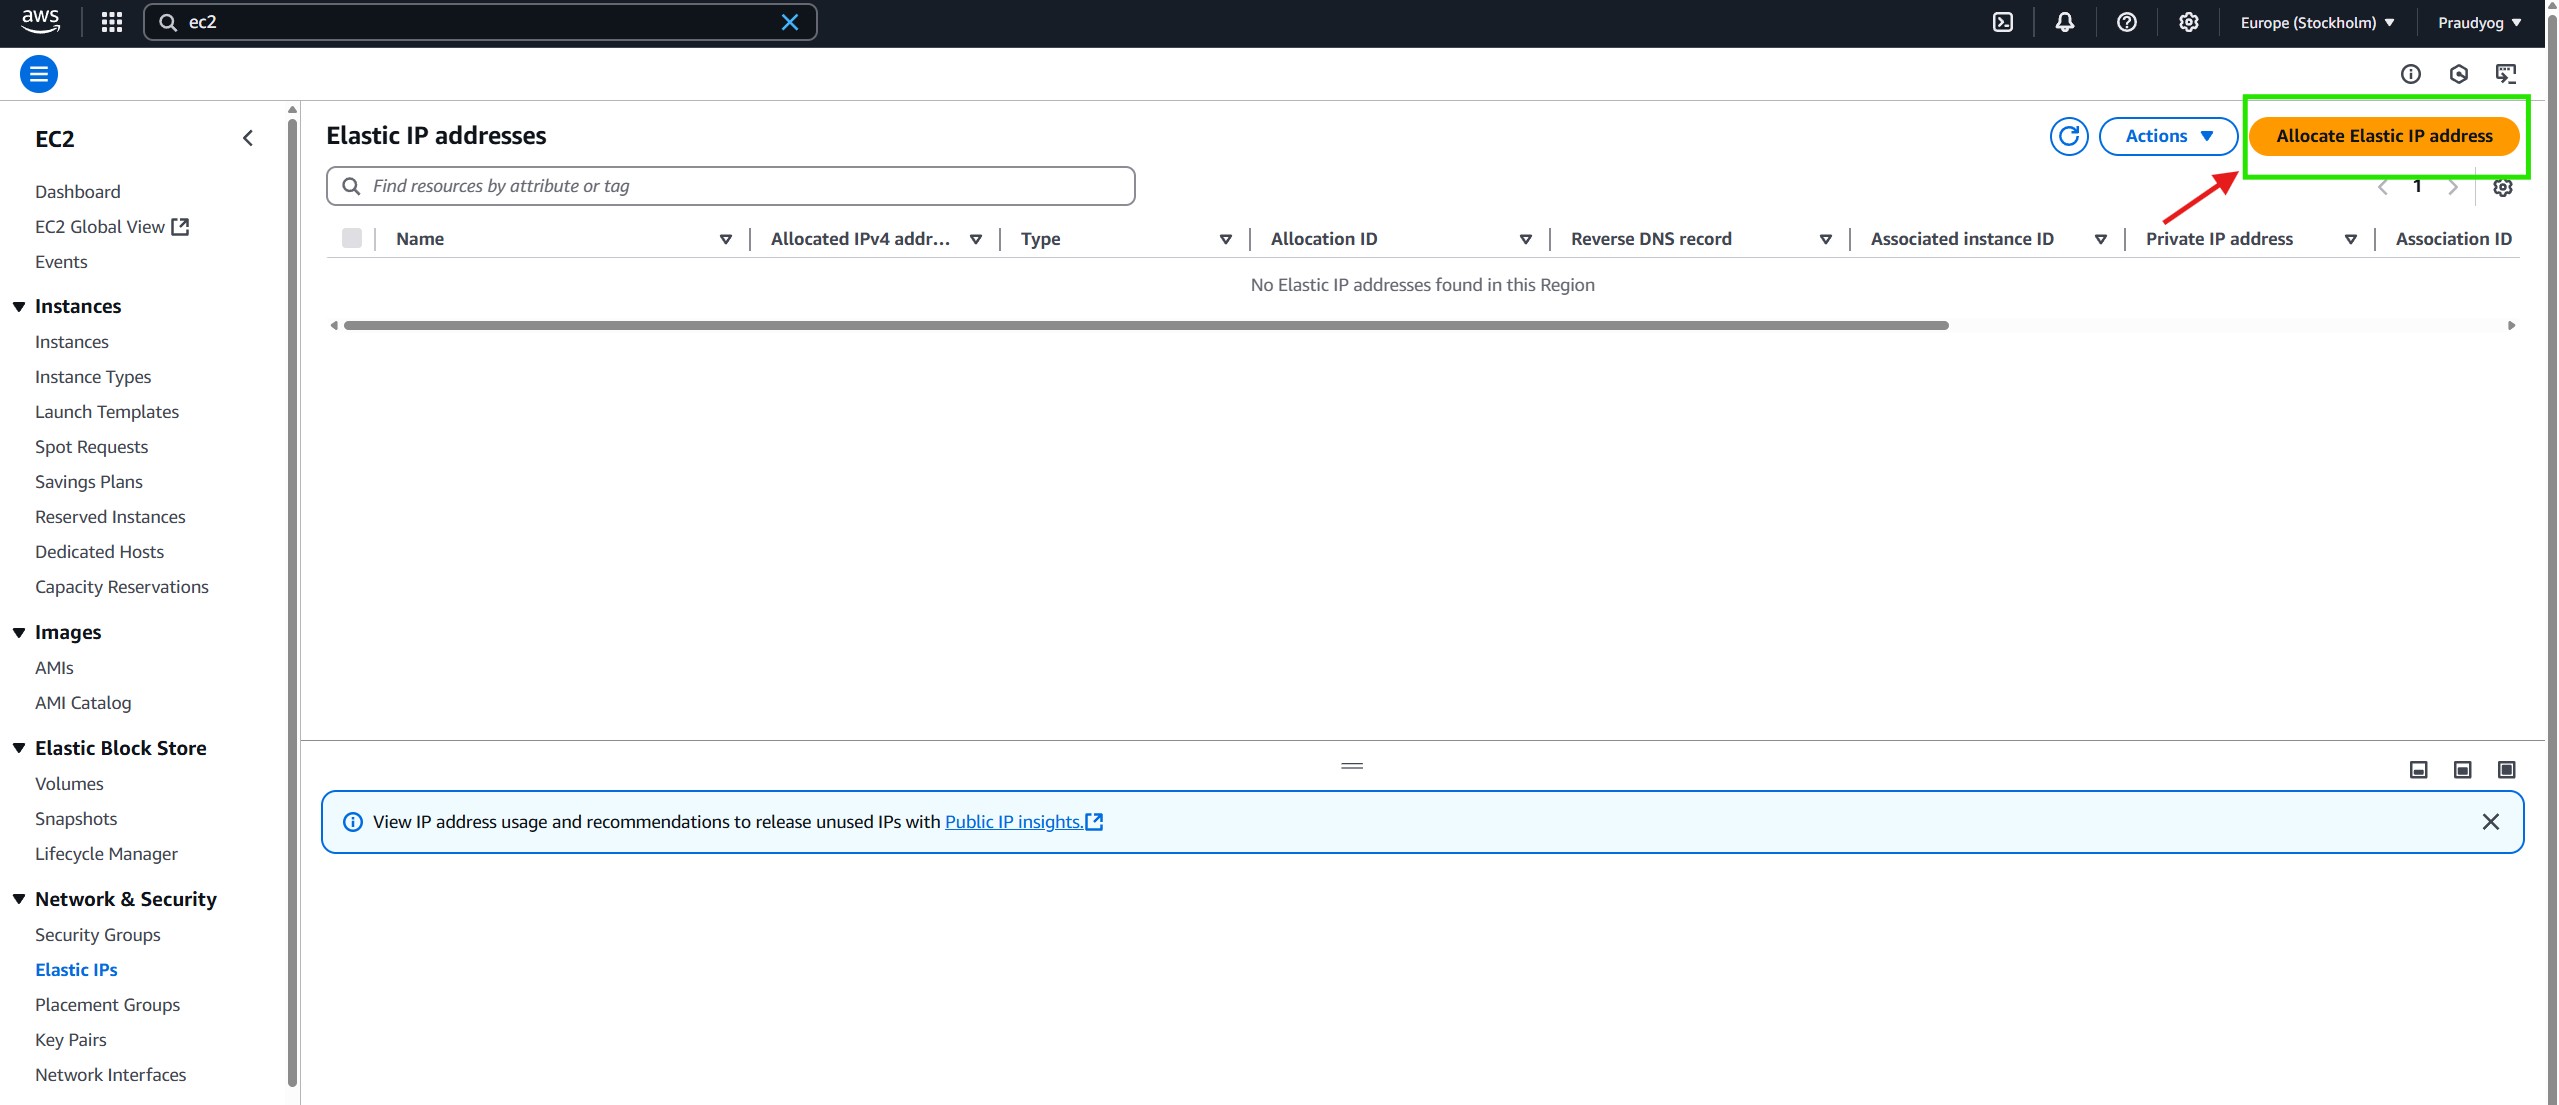
Step-3: Click on Allocate Elastic IP Address.
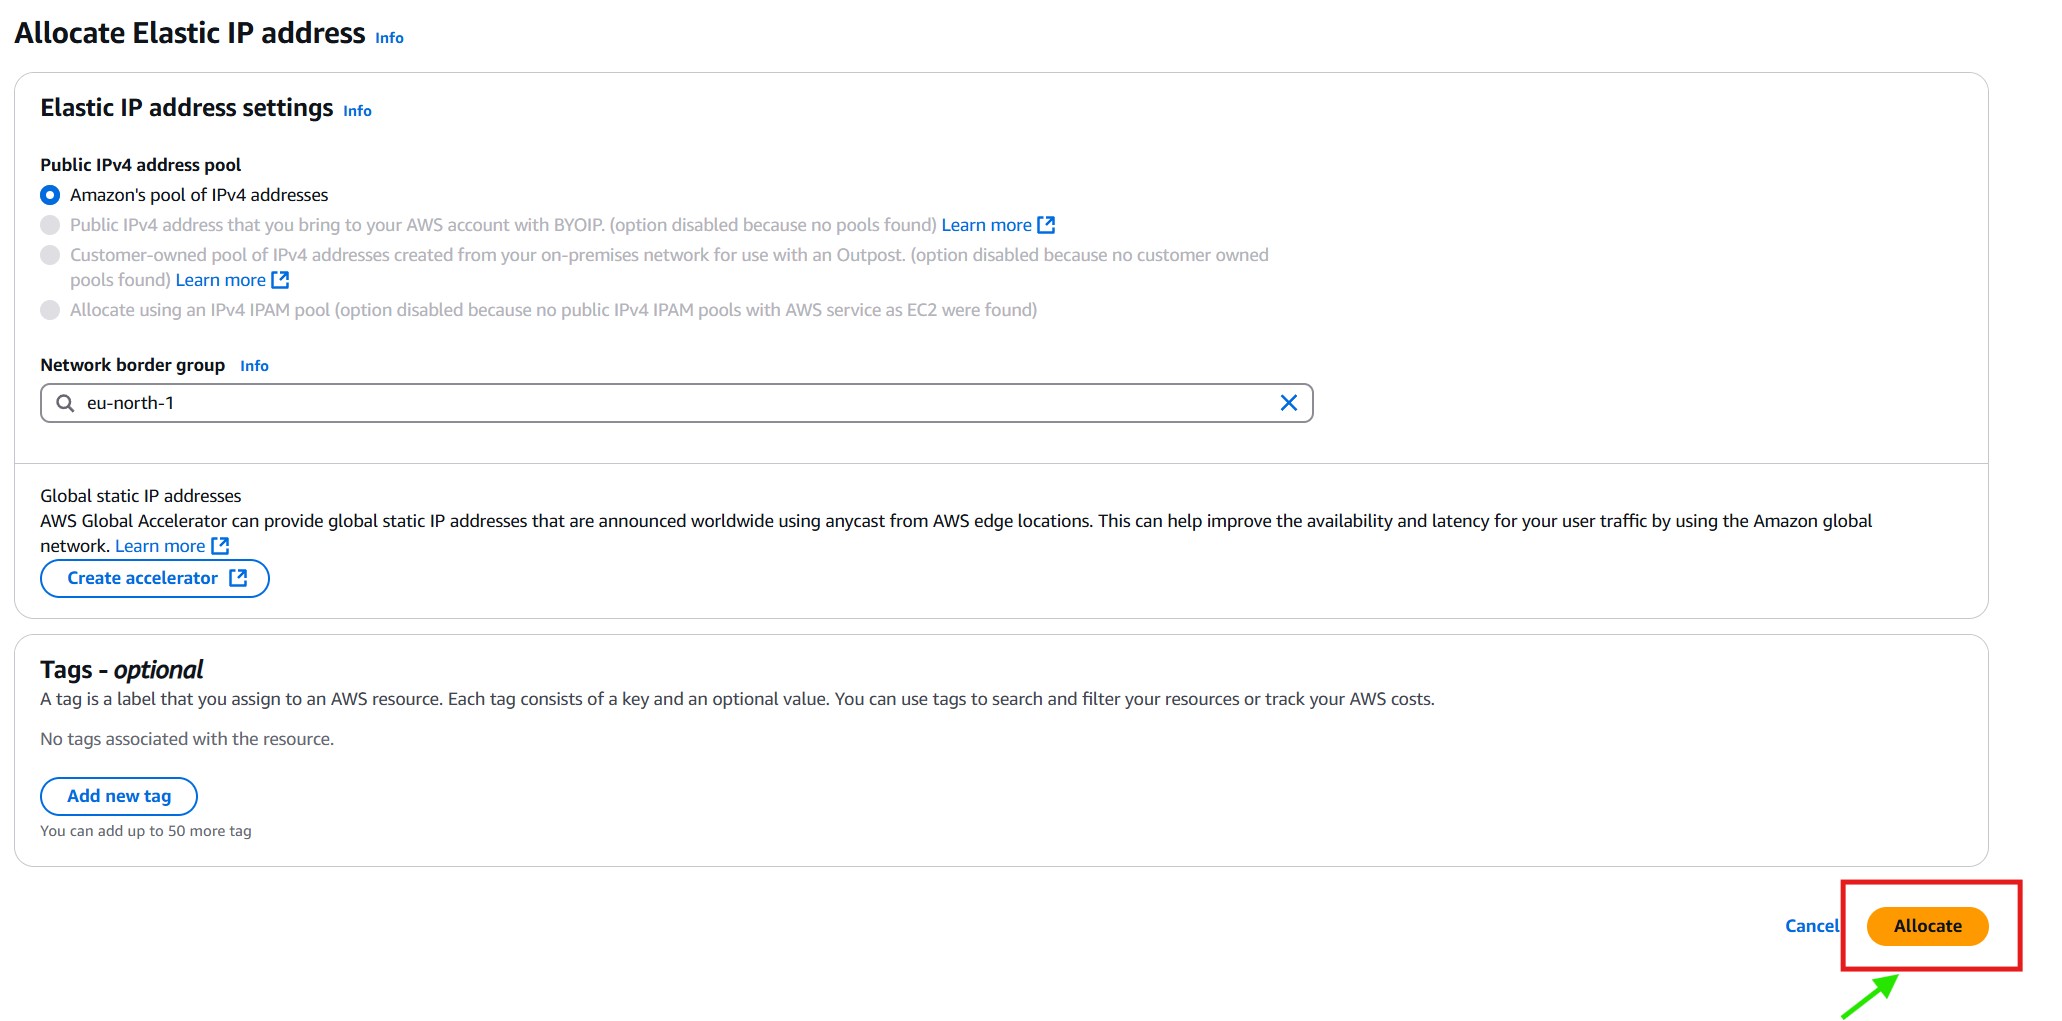
Step-4: Allocate New Elastic IP
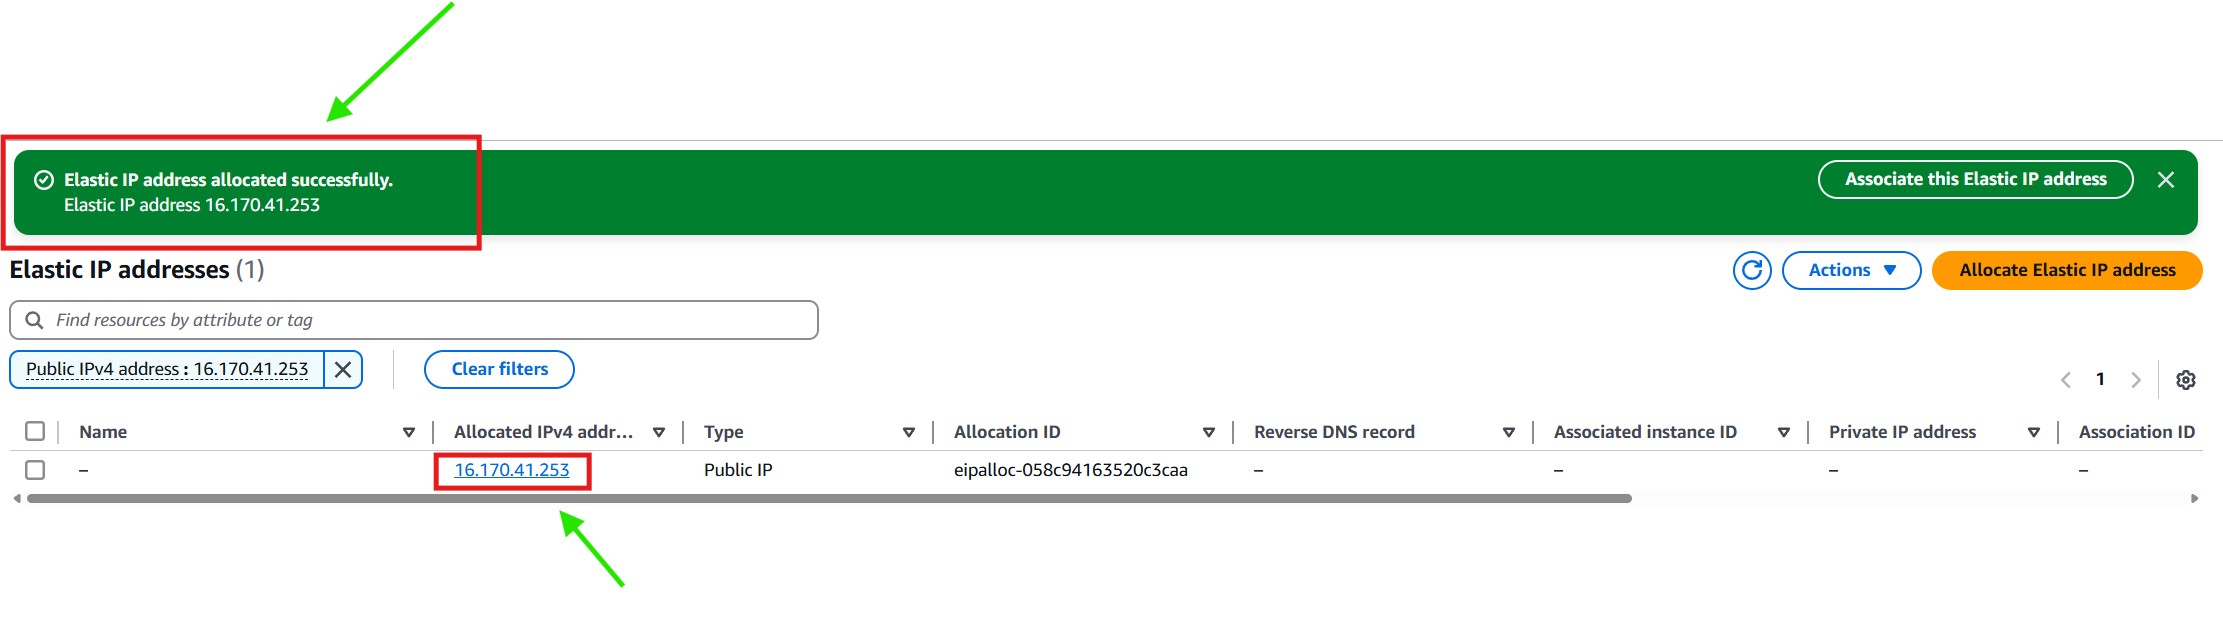
Step-5: IP Allocation Successful
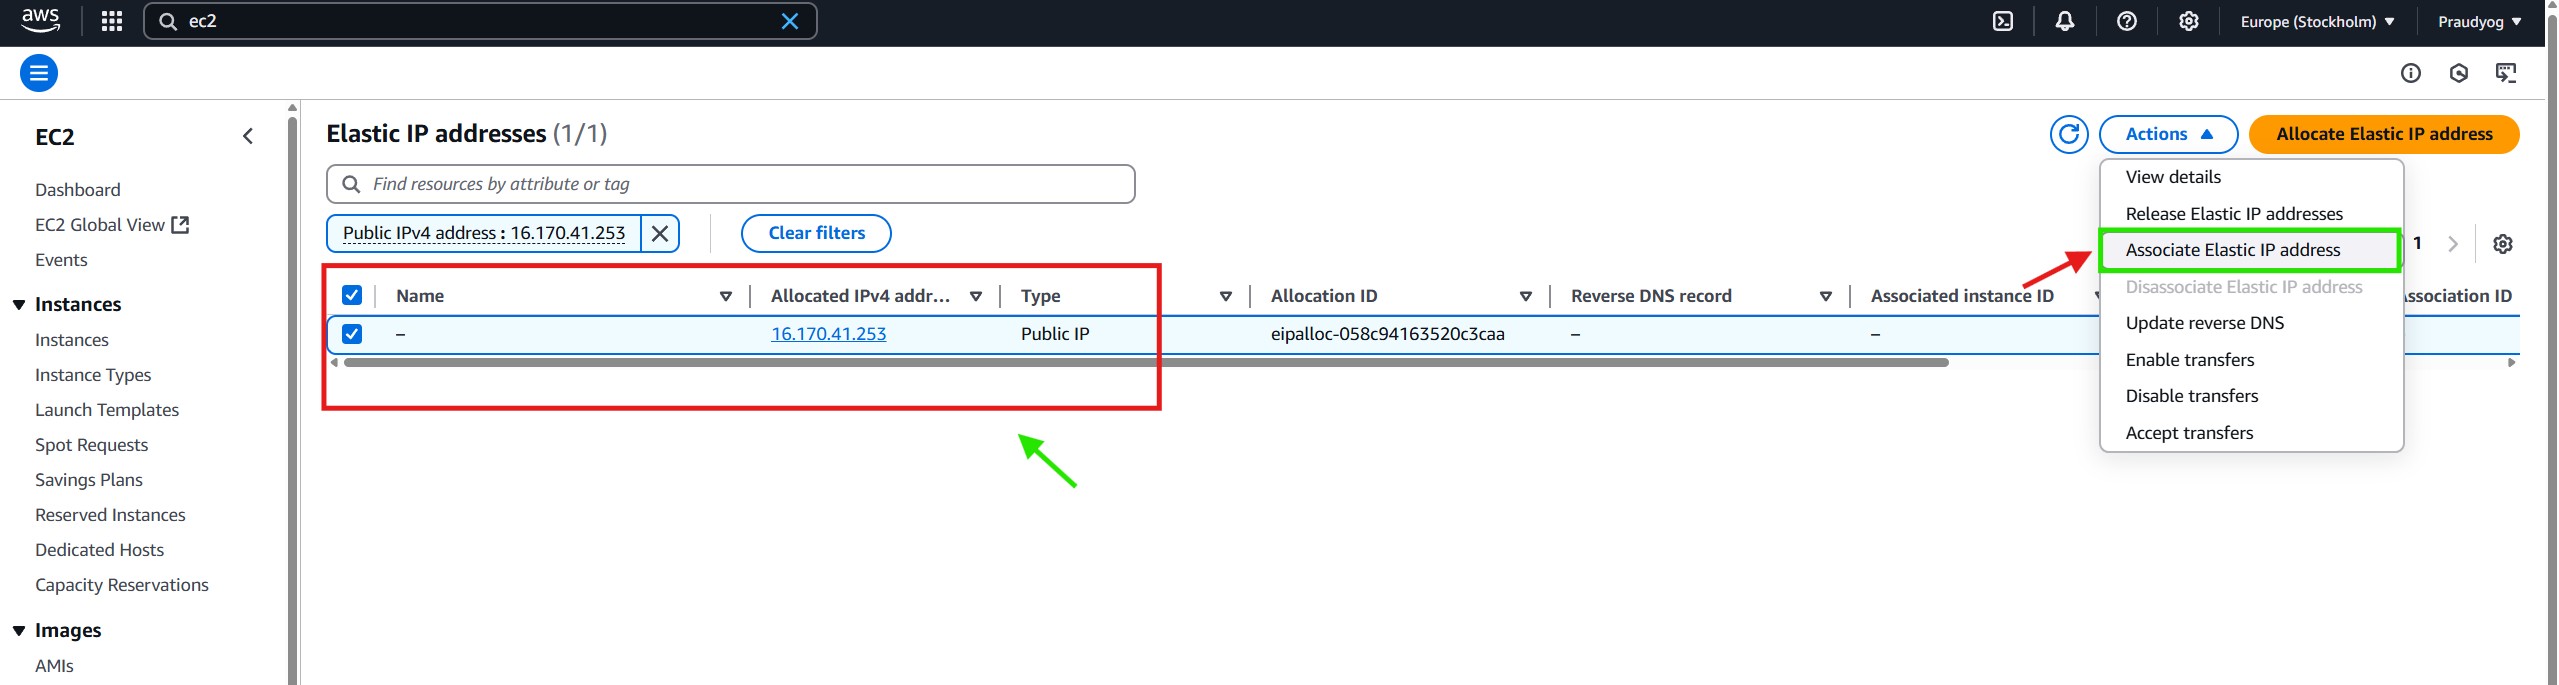
Step-6: Select the newly created Elastic IP and click Associate Elastic IP Address.
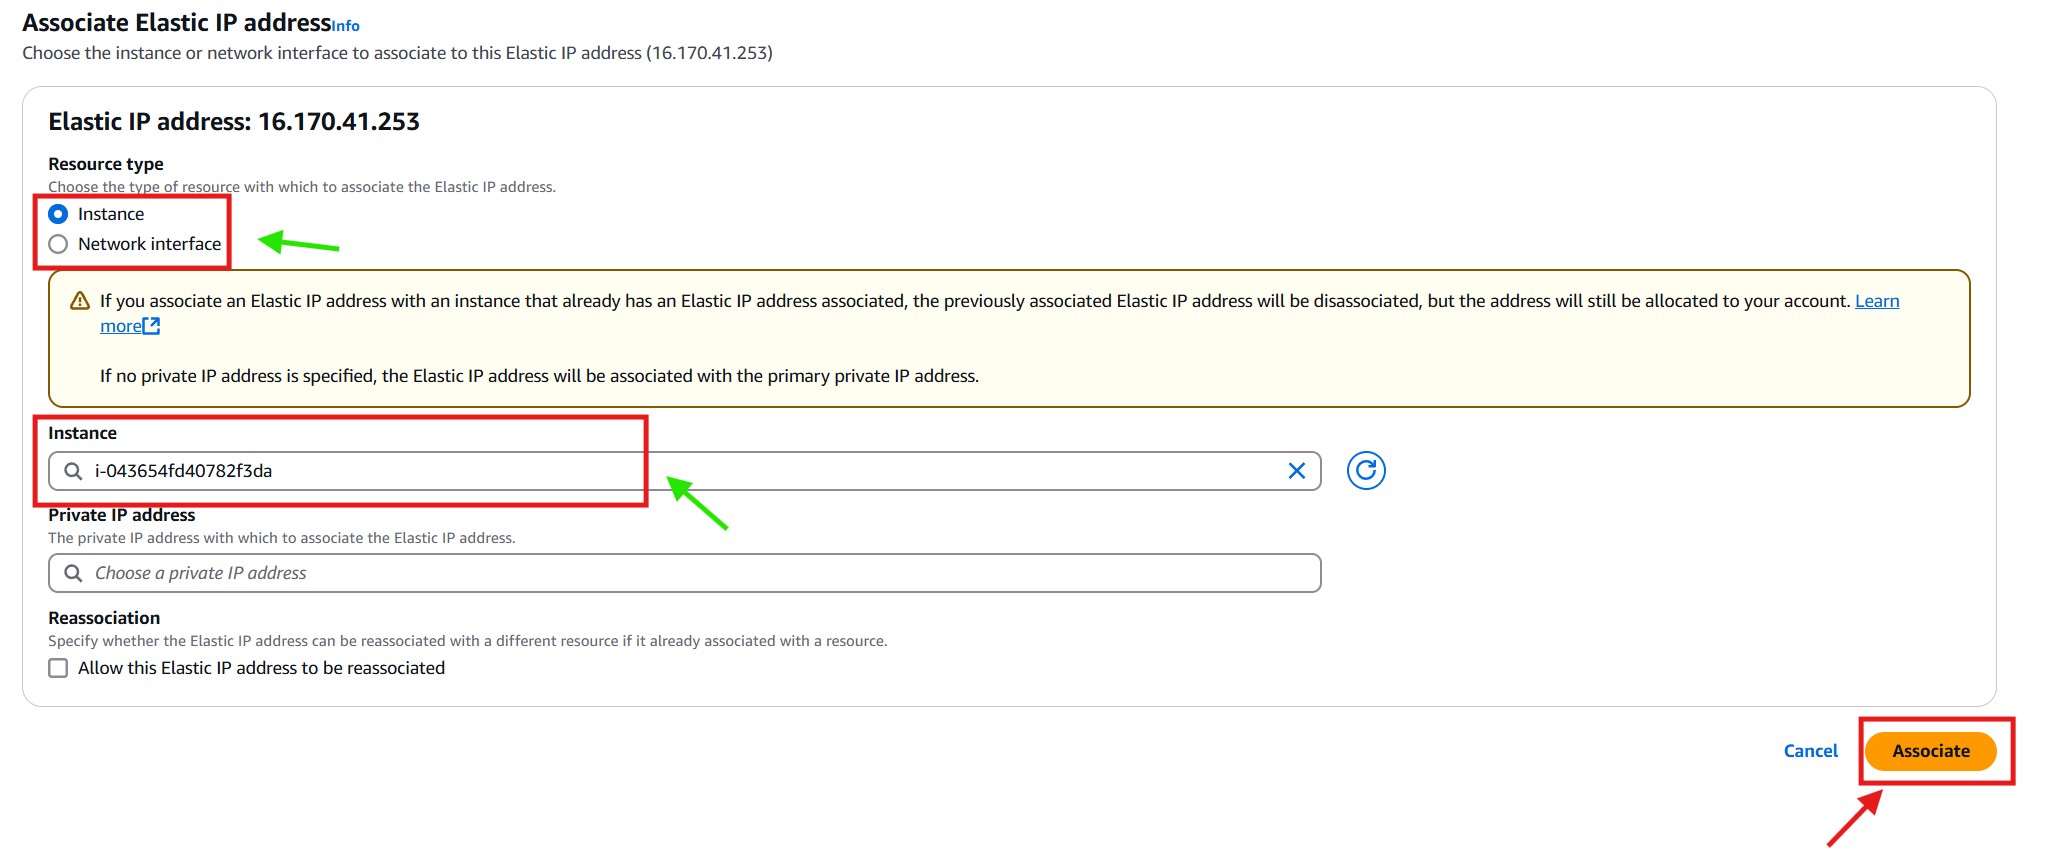
Step-7: Choose your EC2 instance and associate it.
Step-7: Now The Elastic IP Added To Your EC2 Instance
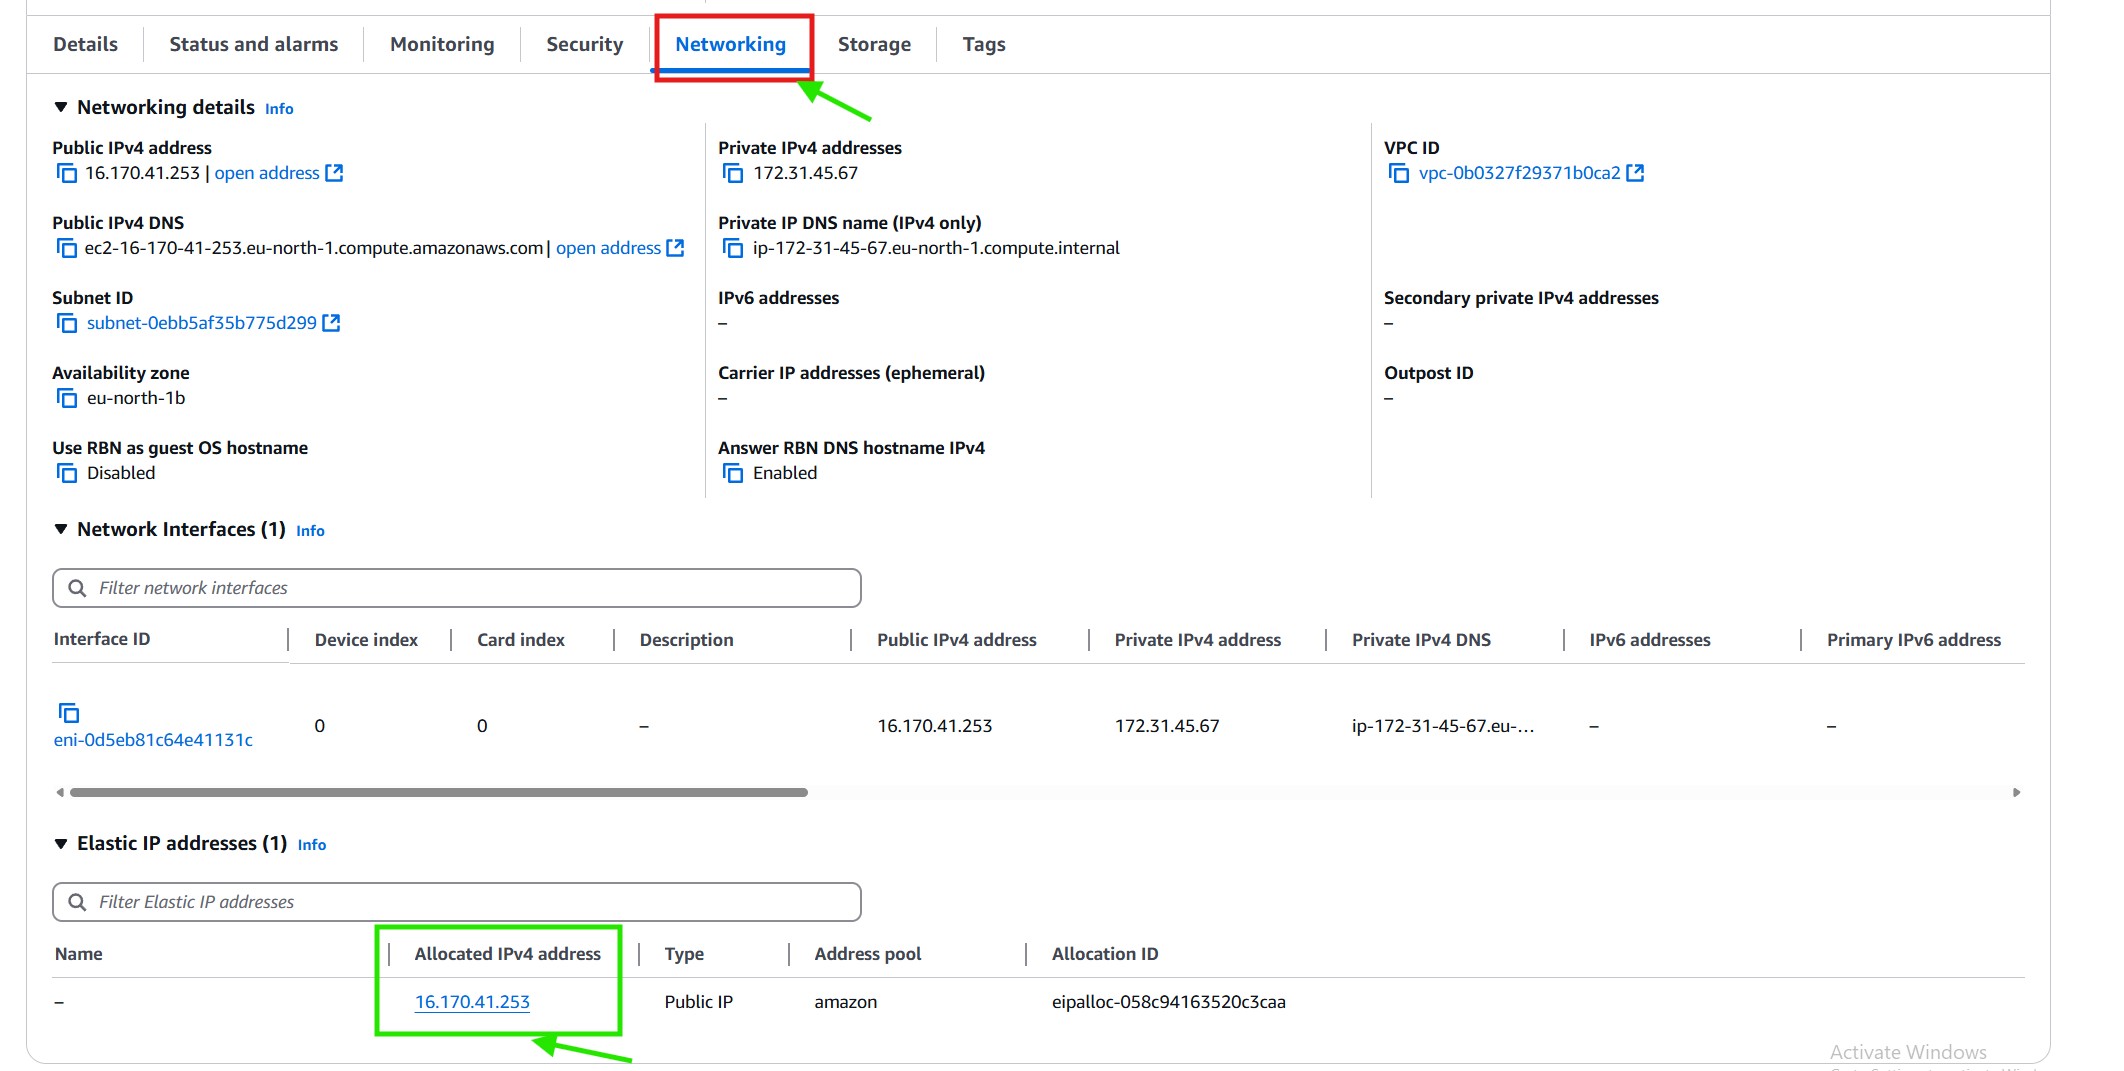
Step-8: Go To EC2 Instance & Check The Network Tab.
(3) How To Check If Python Is Installed Or Not In Newly Created EC2 ?
Step-1: Connect To The EC2 Instance
Step-2: List The Installed Python Version
ls /usr/bin/python*
If python is missing, only python3 versions will be listed.
Step-3: Check The Python Version
python3 – version
If we use only “python” command it will through the error.
python – version
Step-4: Create a Symlink for python
To make "python" work as a command, link "python3" to "python":
sudo ln -s /usr/bin/python3 /usr/bin/python
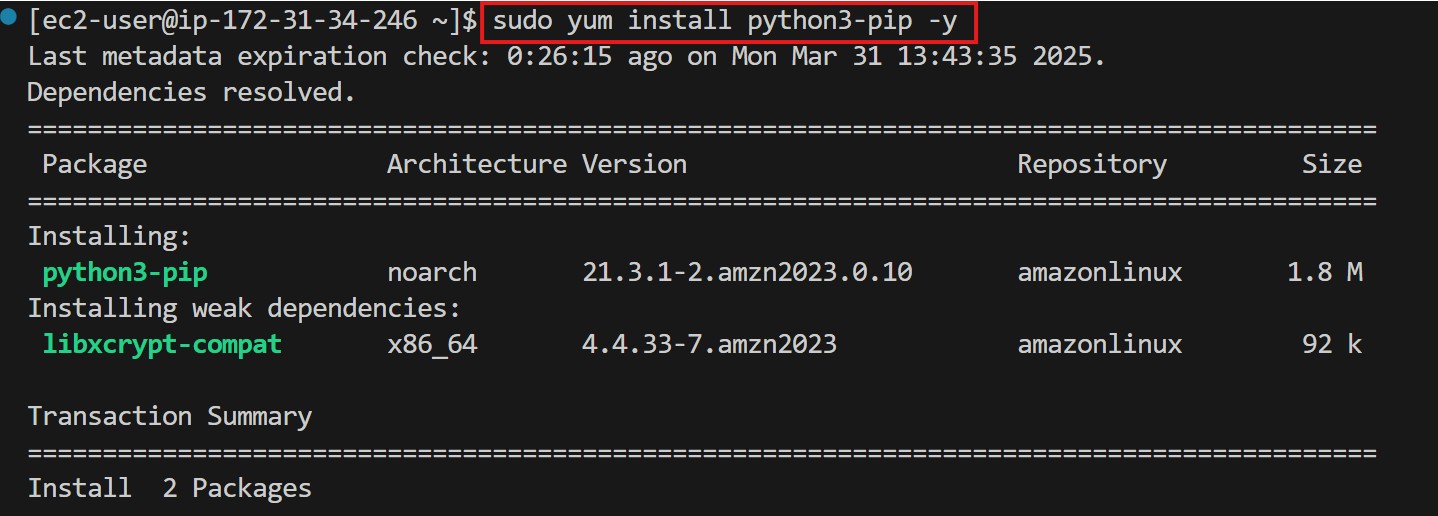
(4) How To Install “PIP” In An EC2 Instance ?
sudo yum install python3-pip -y
pip – version
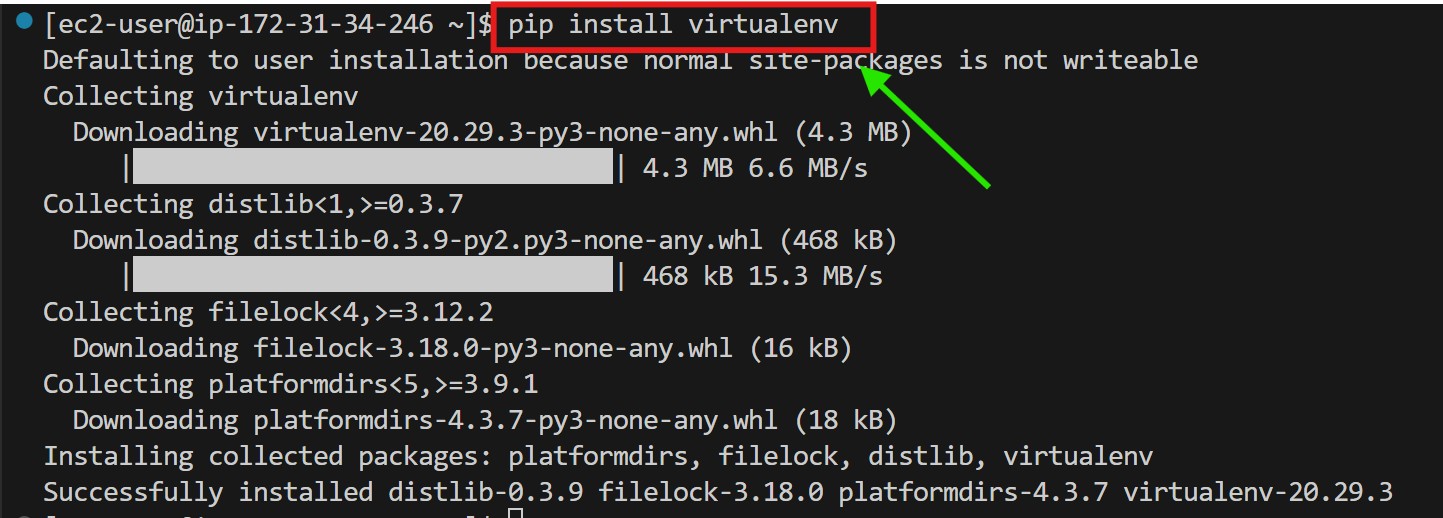
(5) How To Create A Virtual Environment In EC2 Instance ?
Step-1: Install Virtual Environment
pip install virtualenv
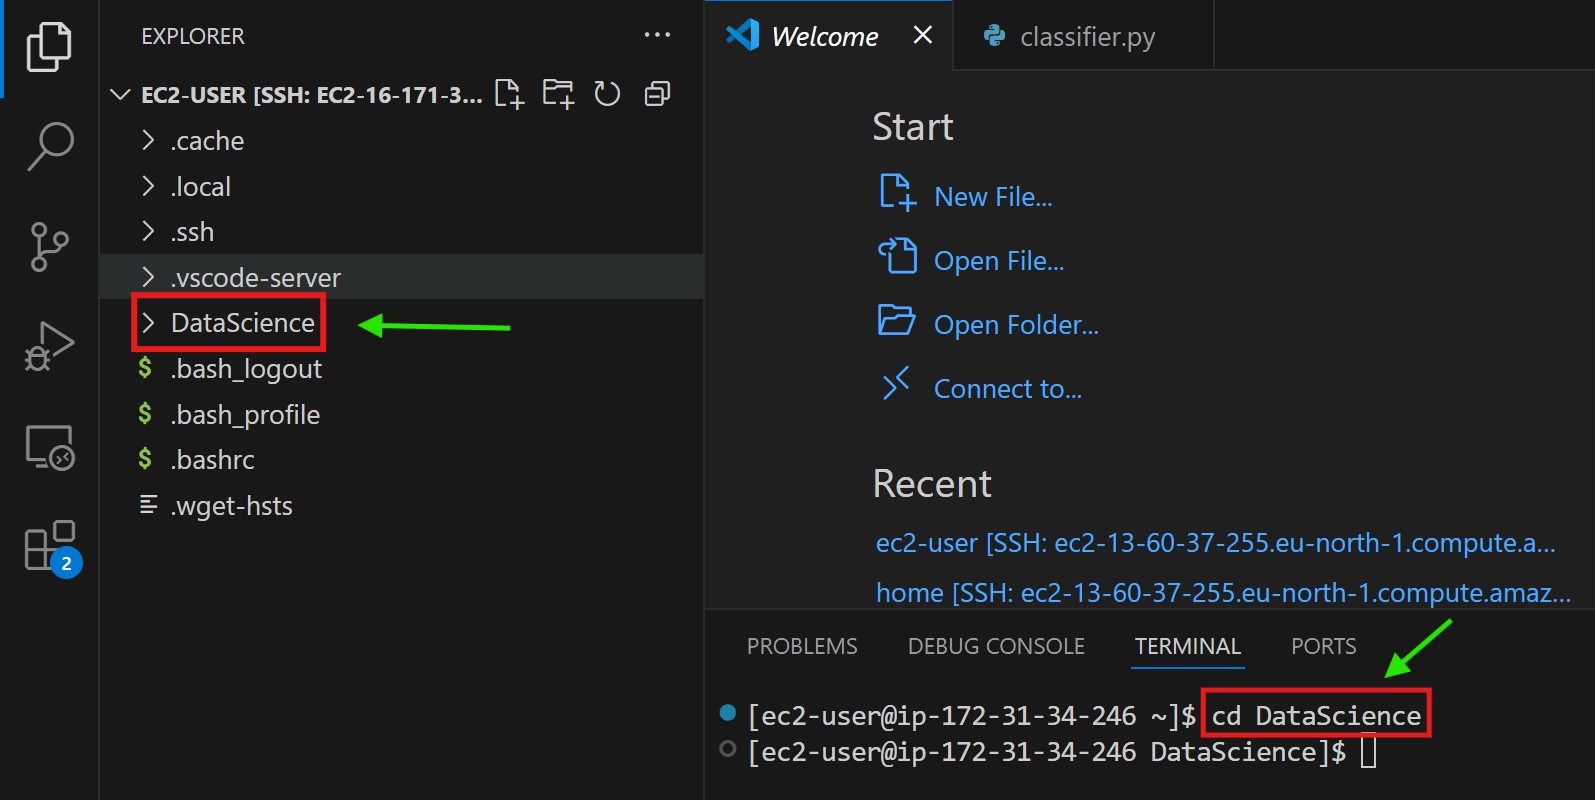
Step-2: Create A Virtual Environment
mkdir DataScience  # Create project folder (if not already created)
cd DataScience     # Move into the project folder