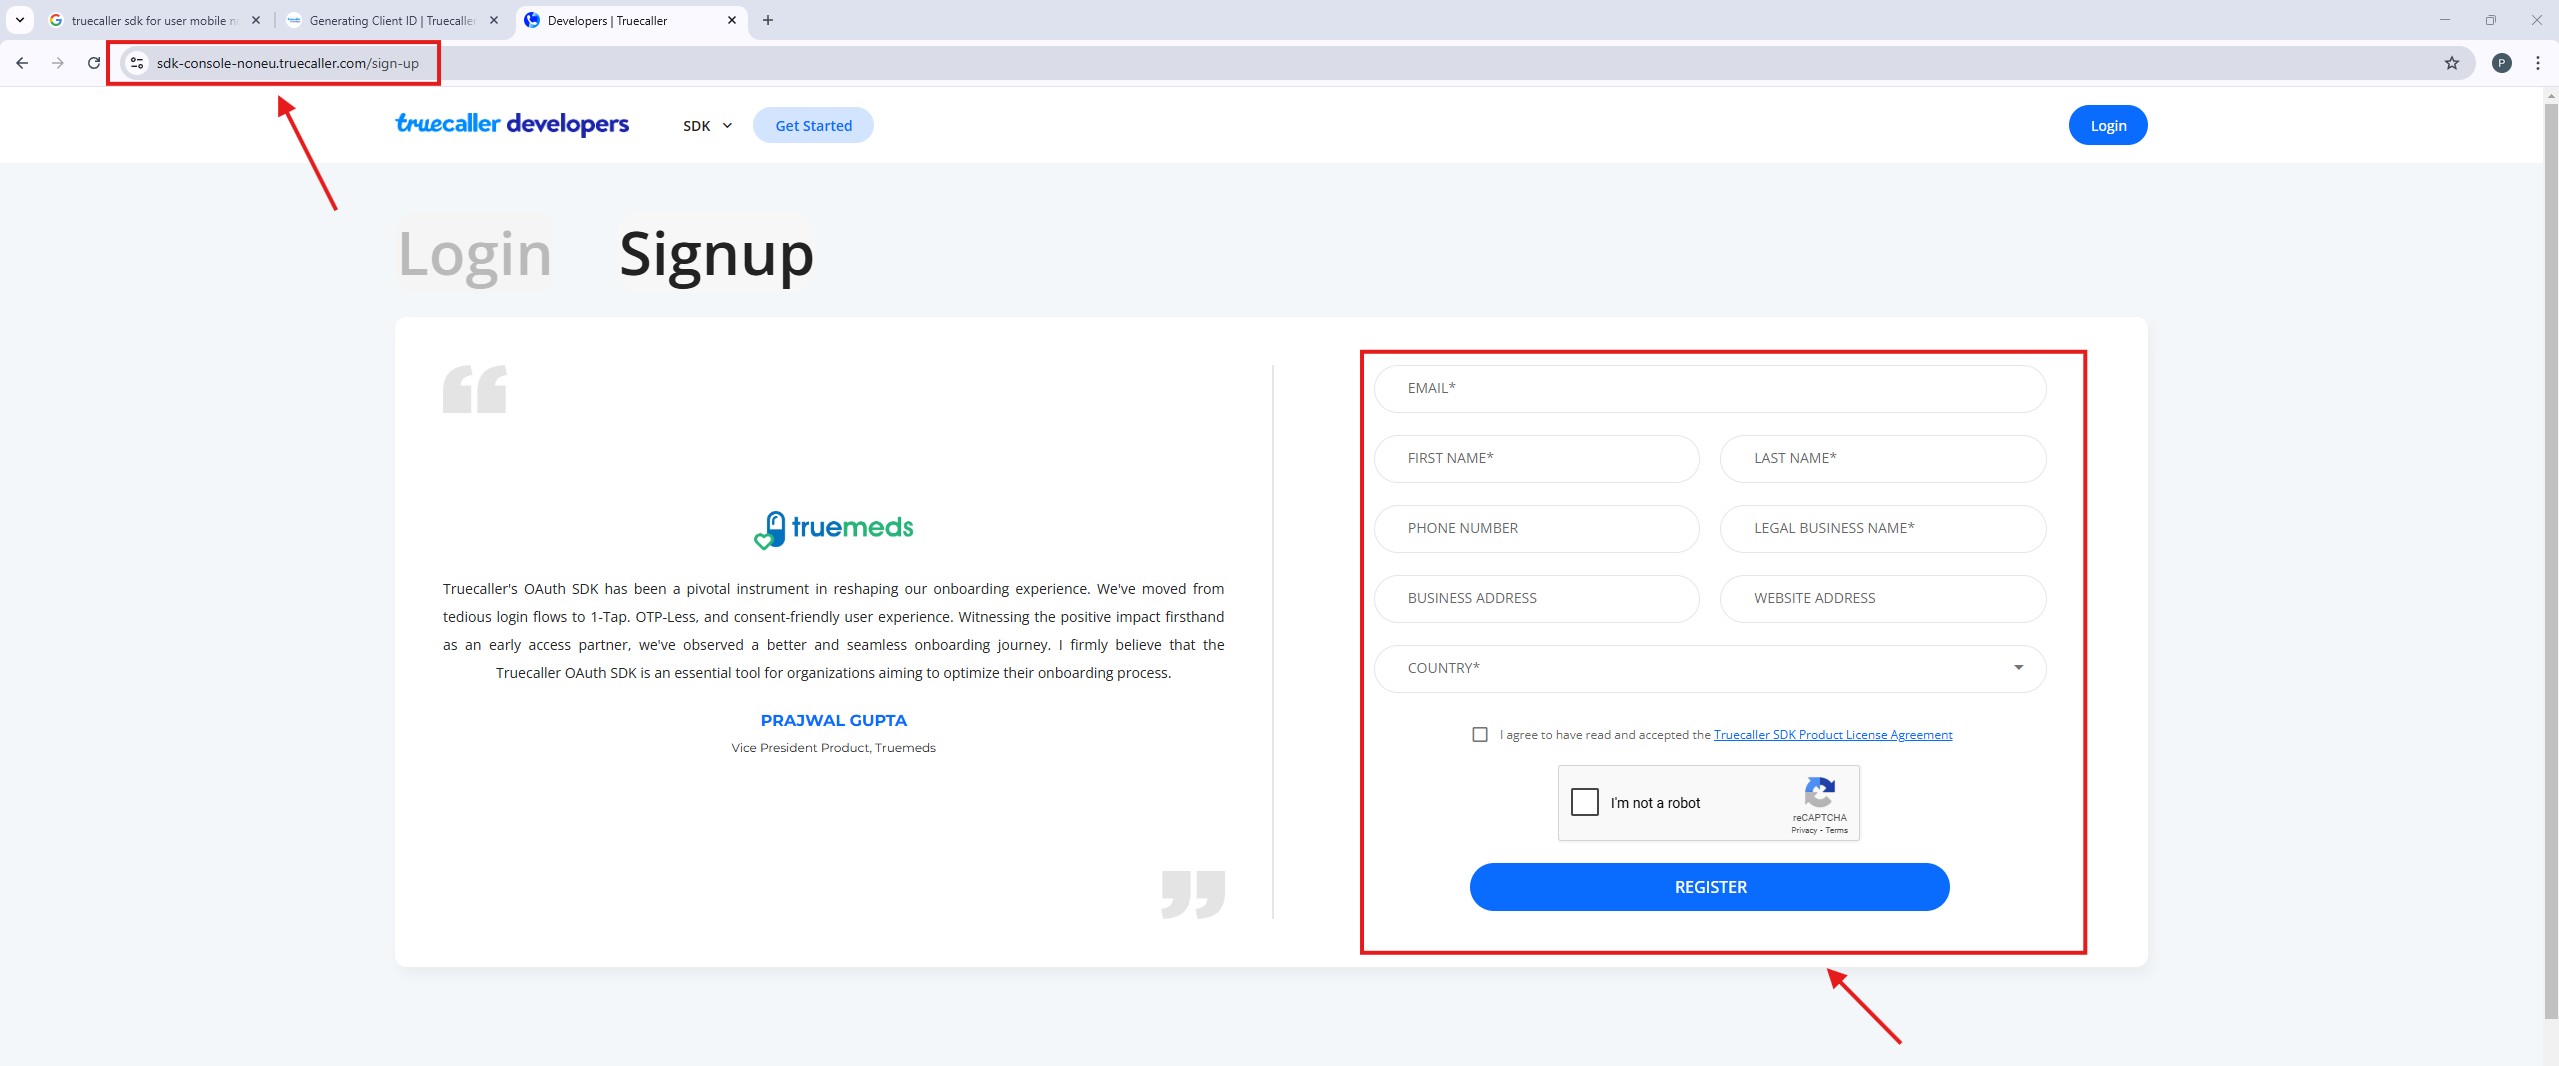
Step-1: Go to https://sdk-console-noneu.truecaller.com/login and register your account.
https://sdk-console-noneu.truecaller.com/login
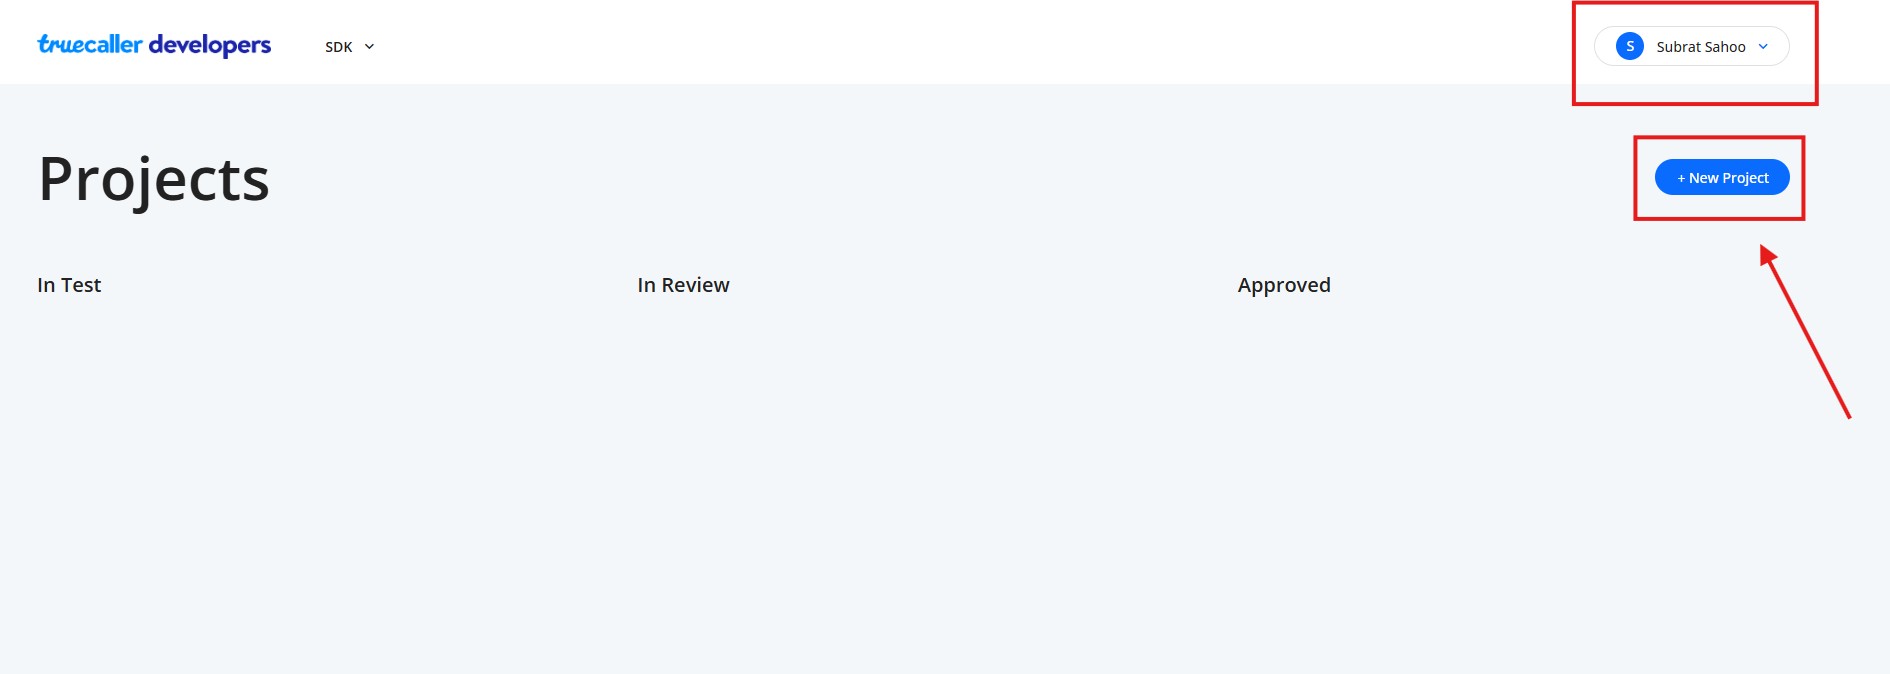
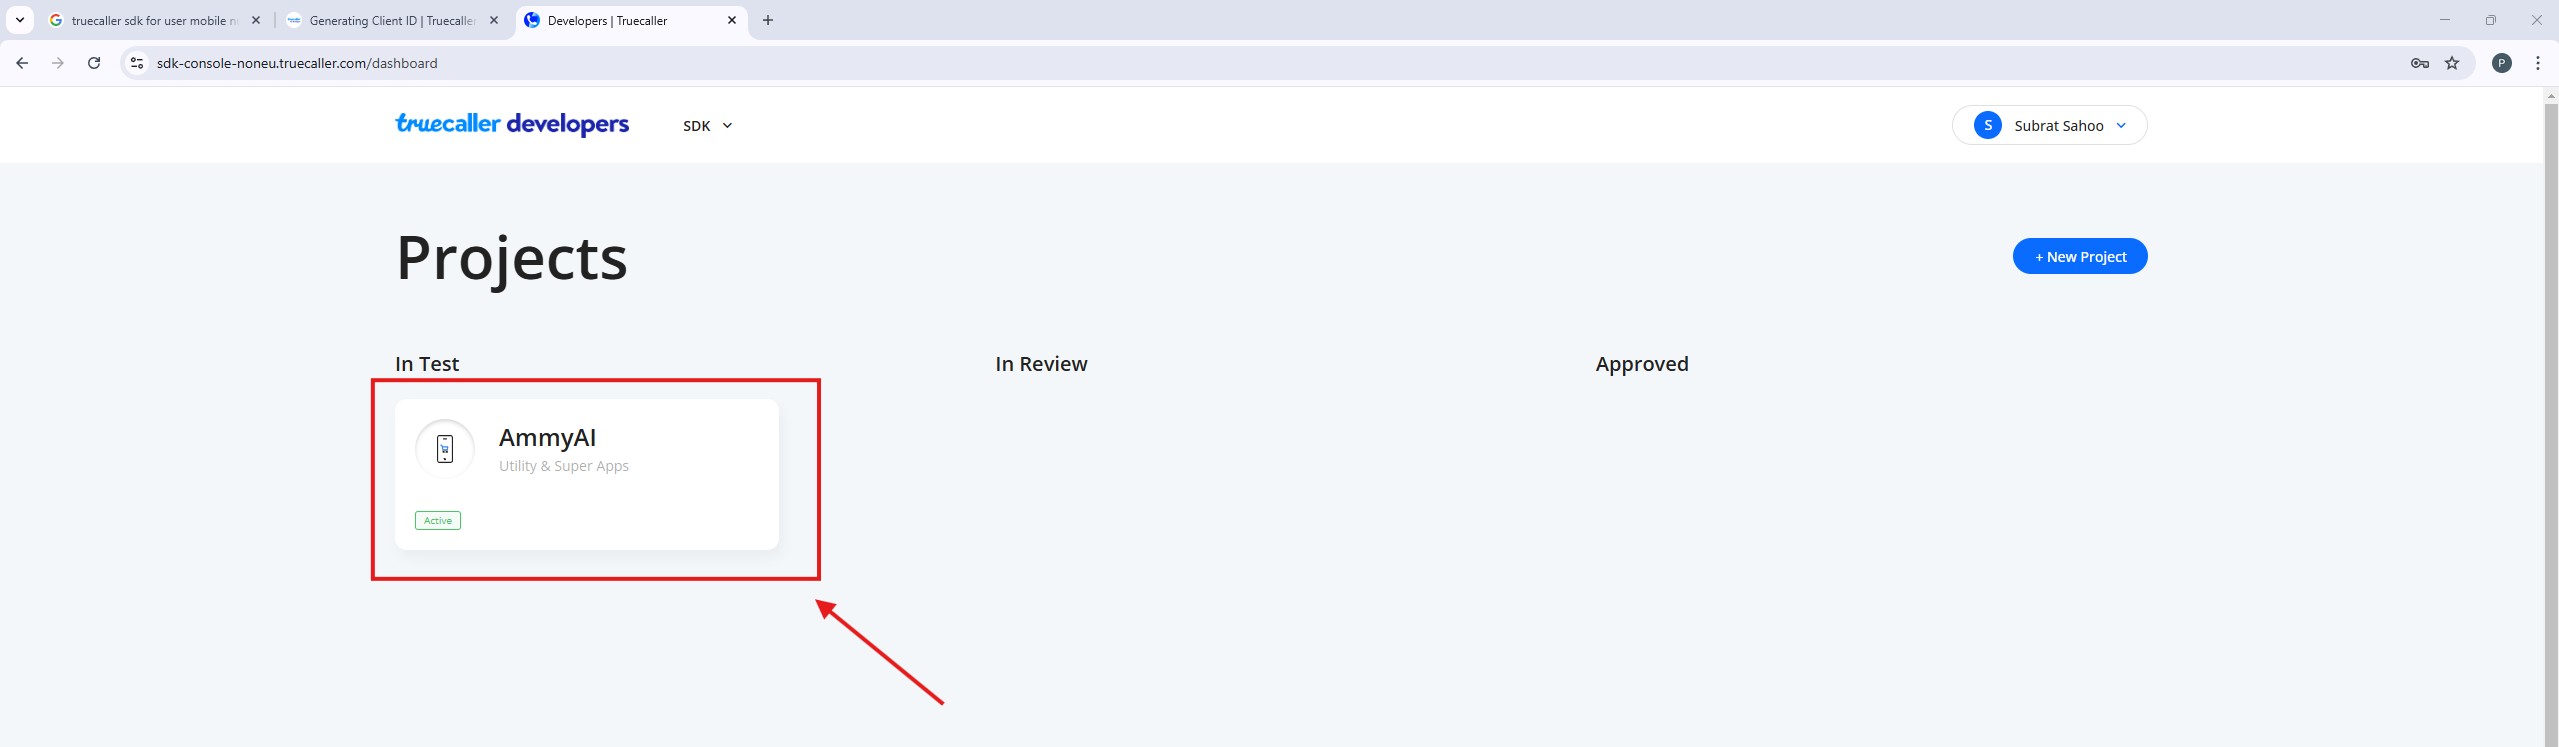
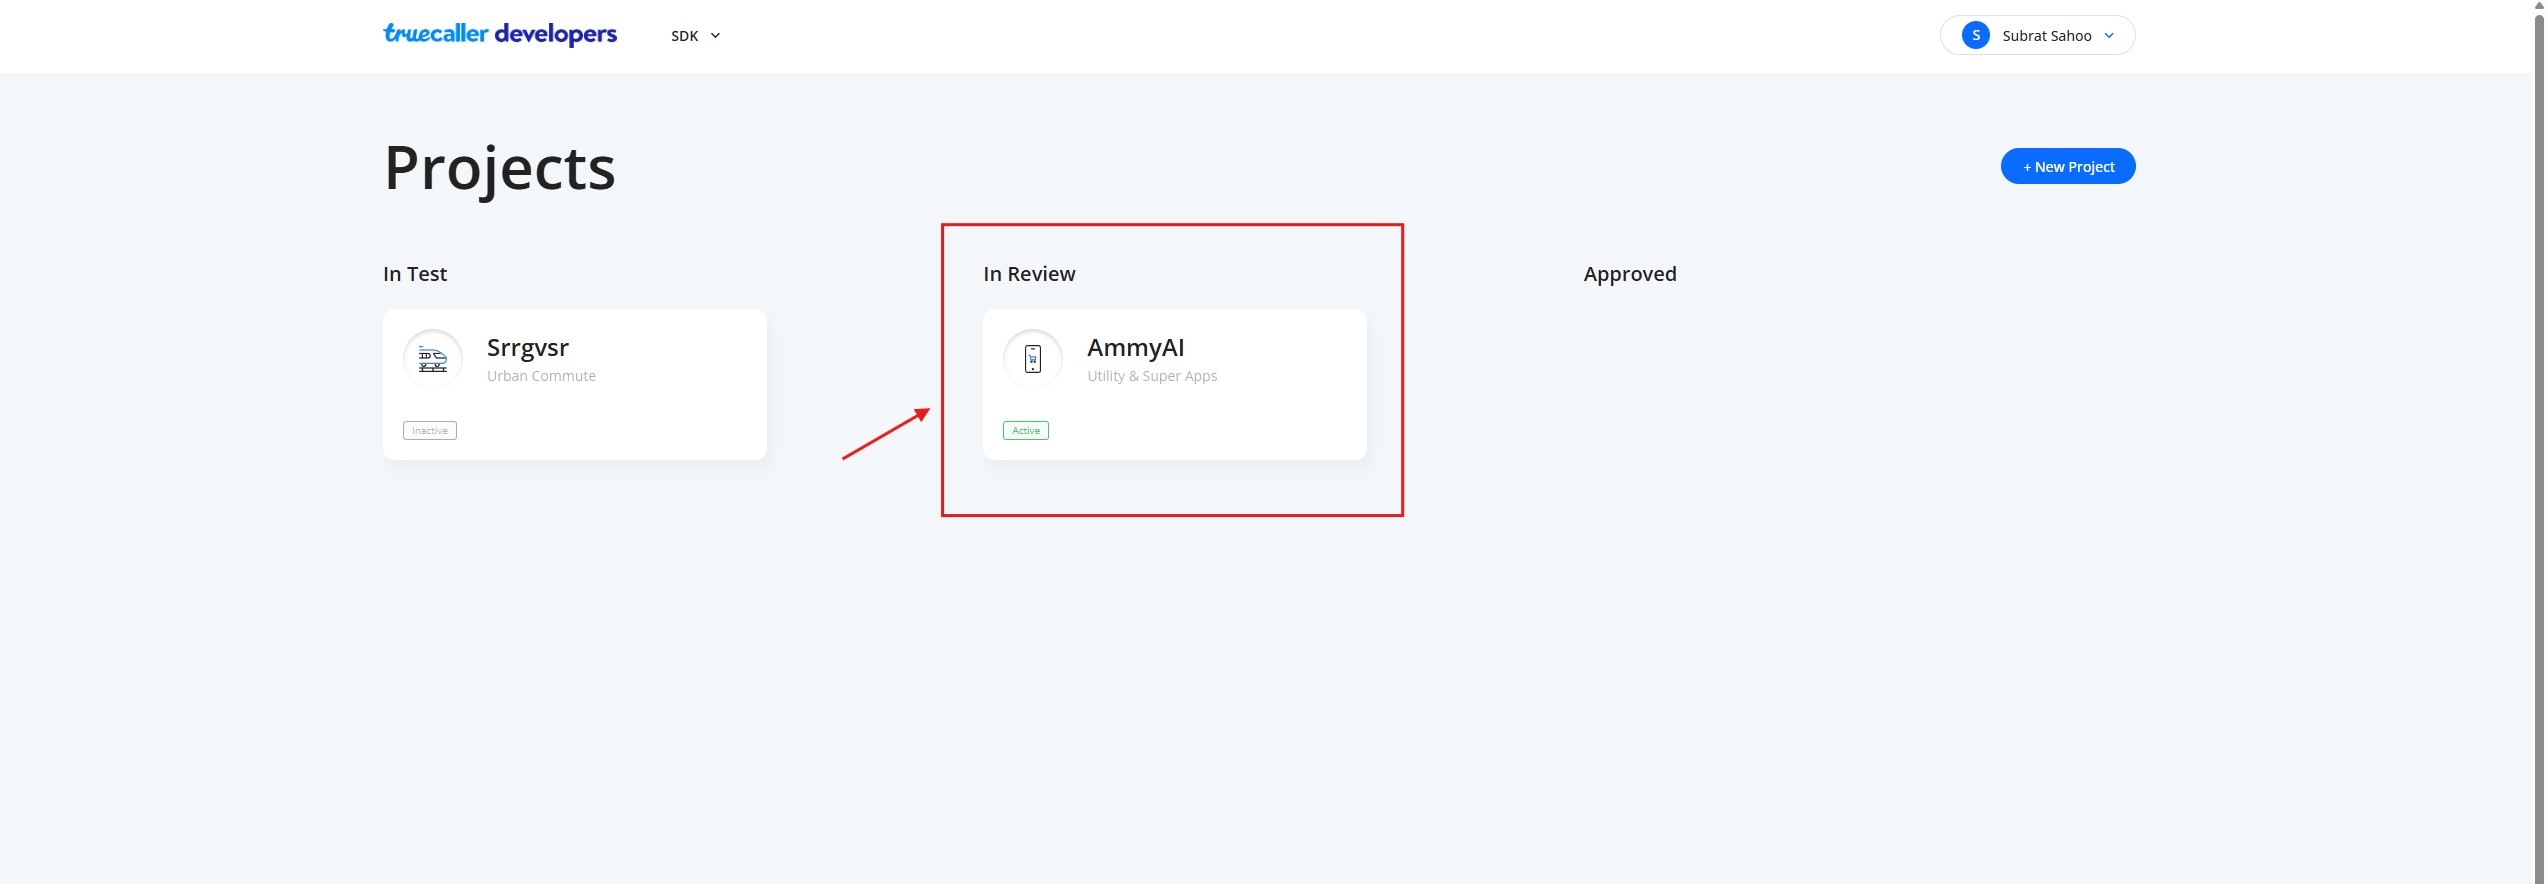
Step-2: Once registered, log in to your account and click on the “create project” button.
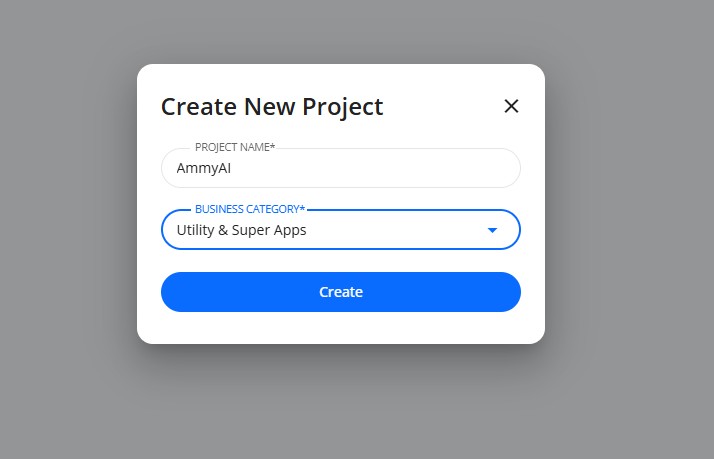
Step-3: Enter the project name and select the business category from the dropdown menu. This will create a new project.
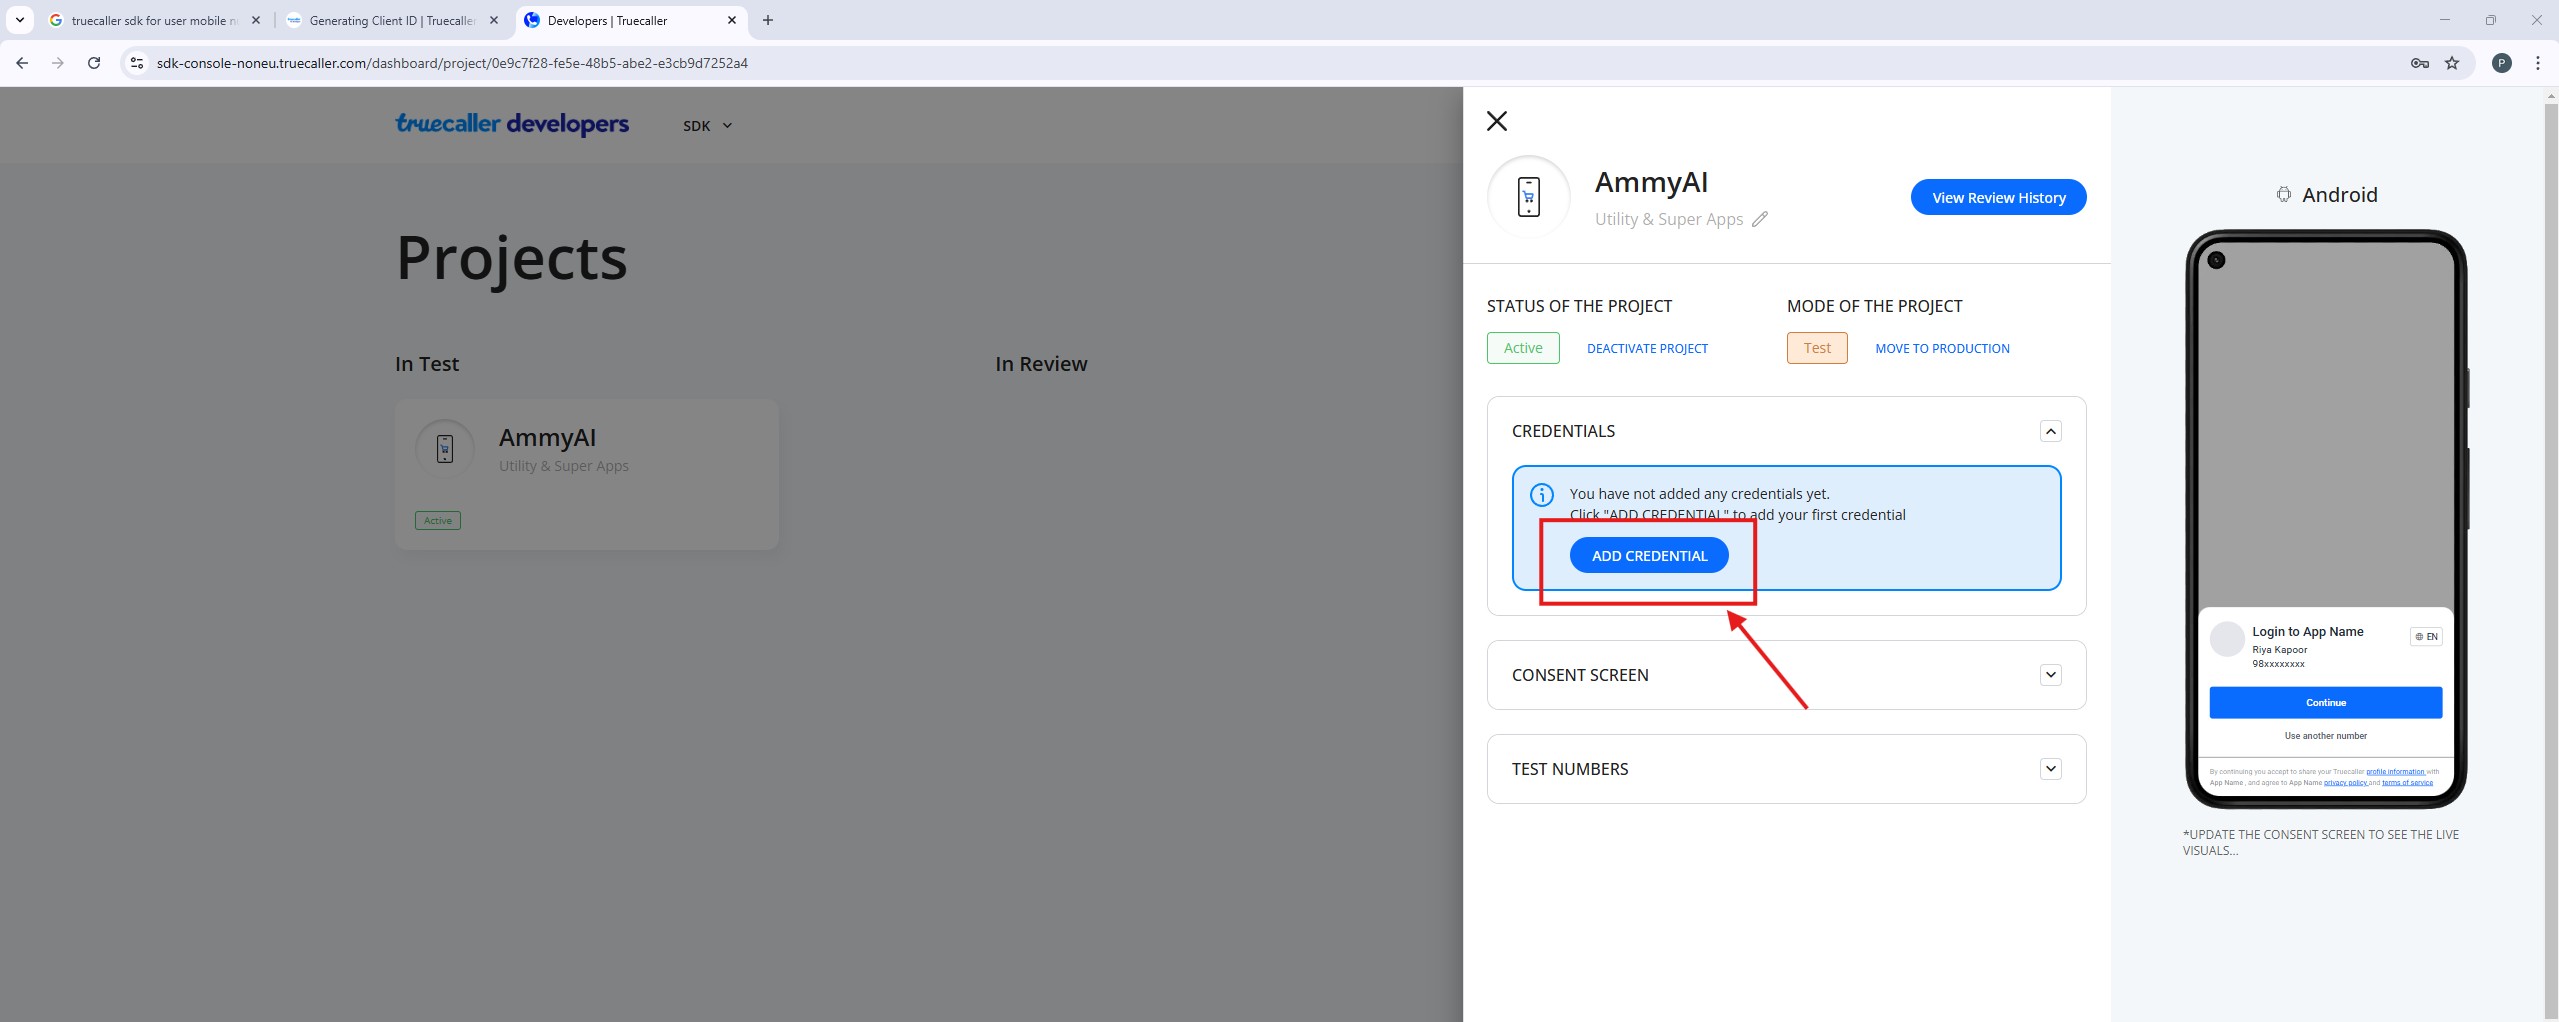
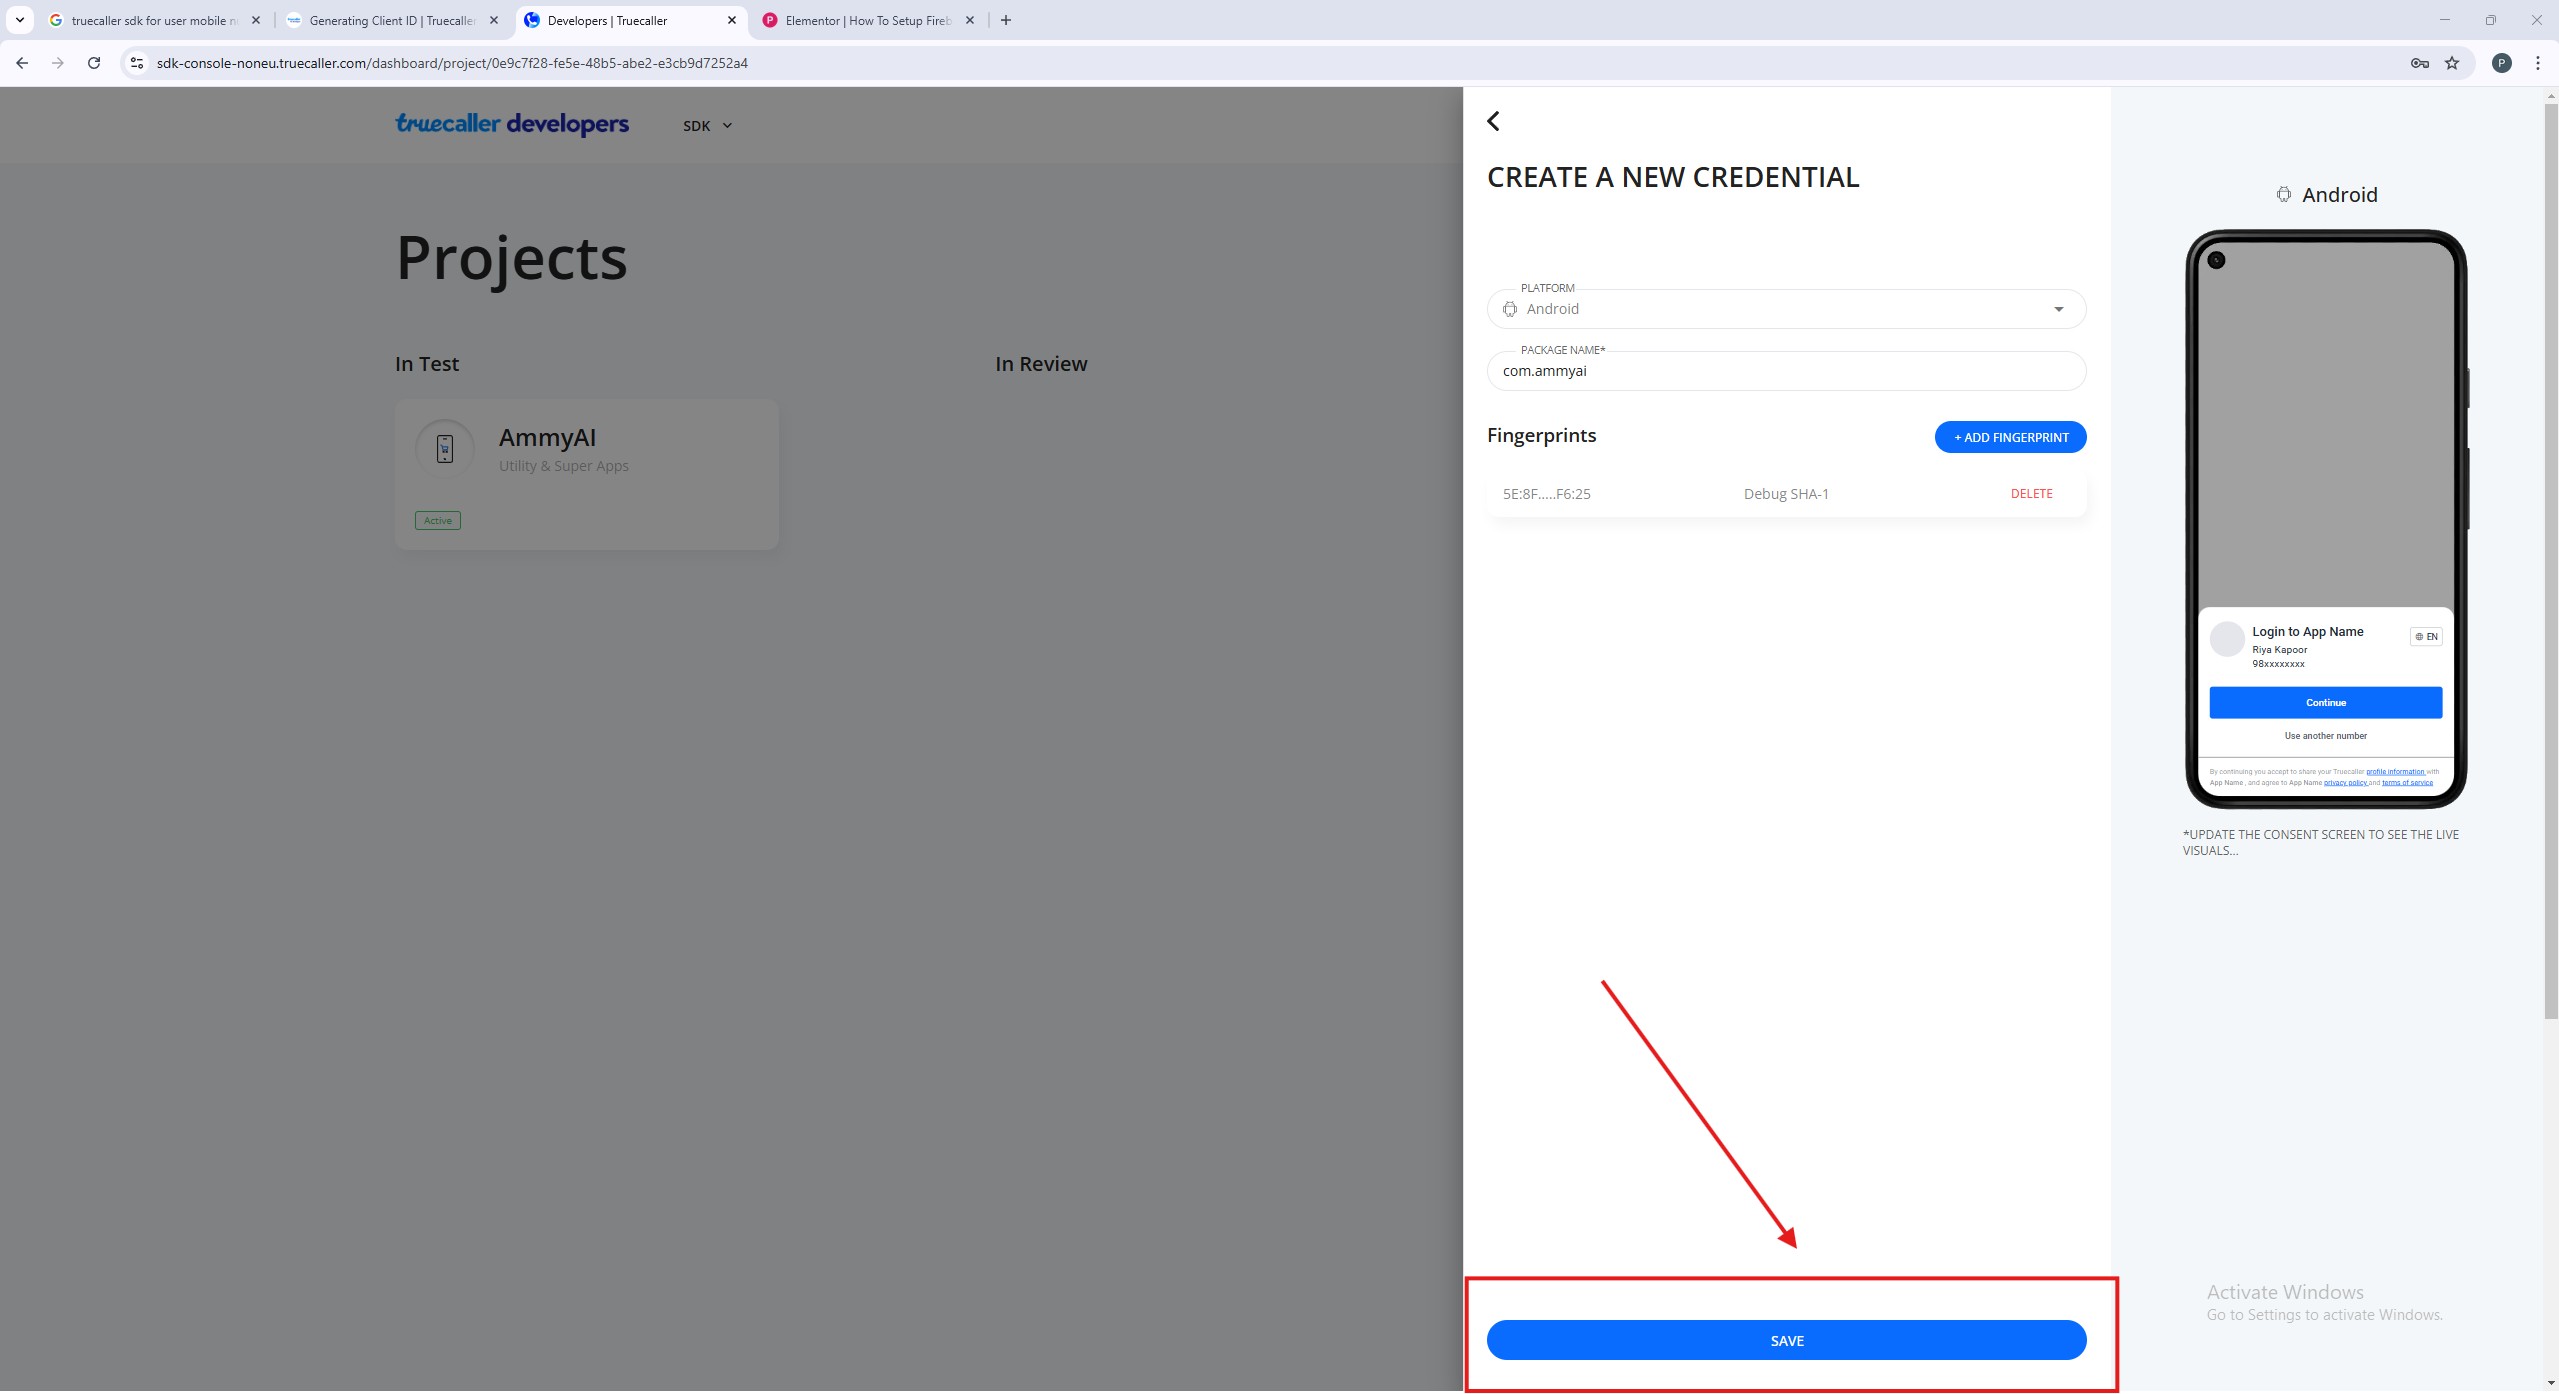
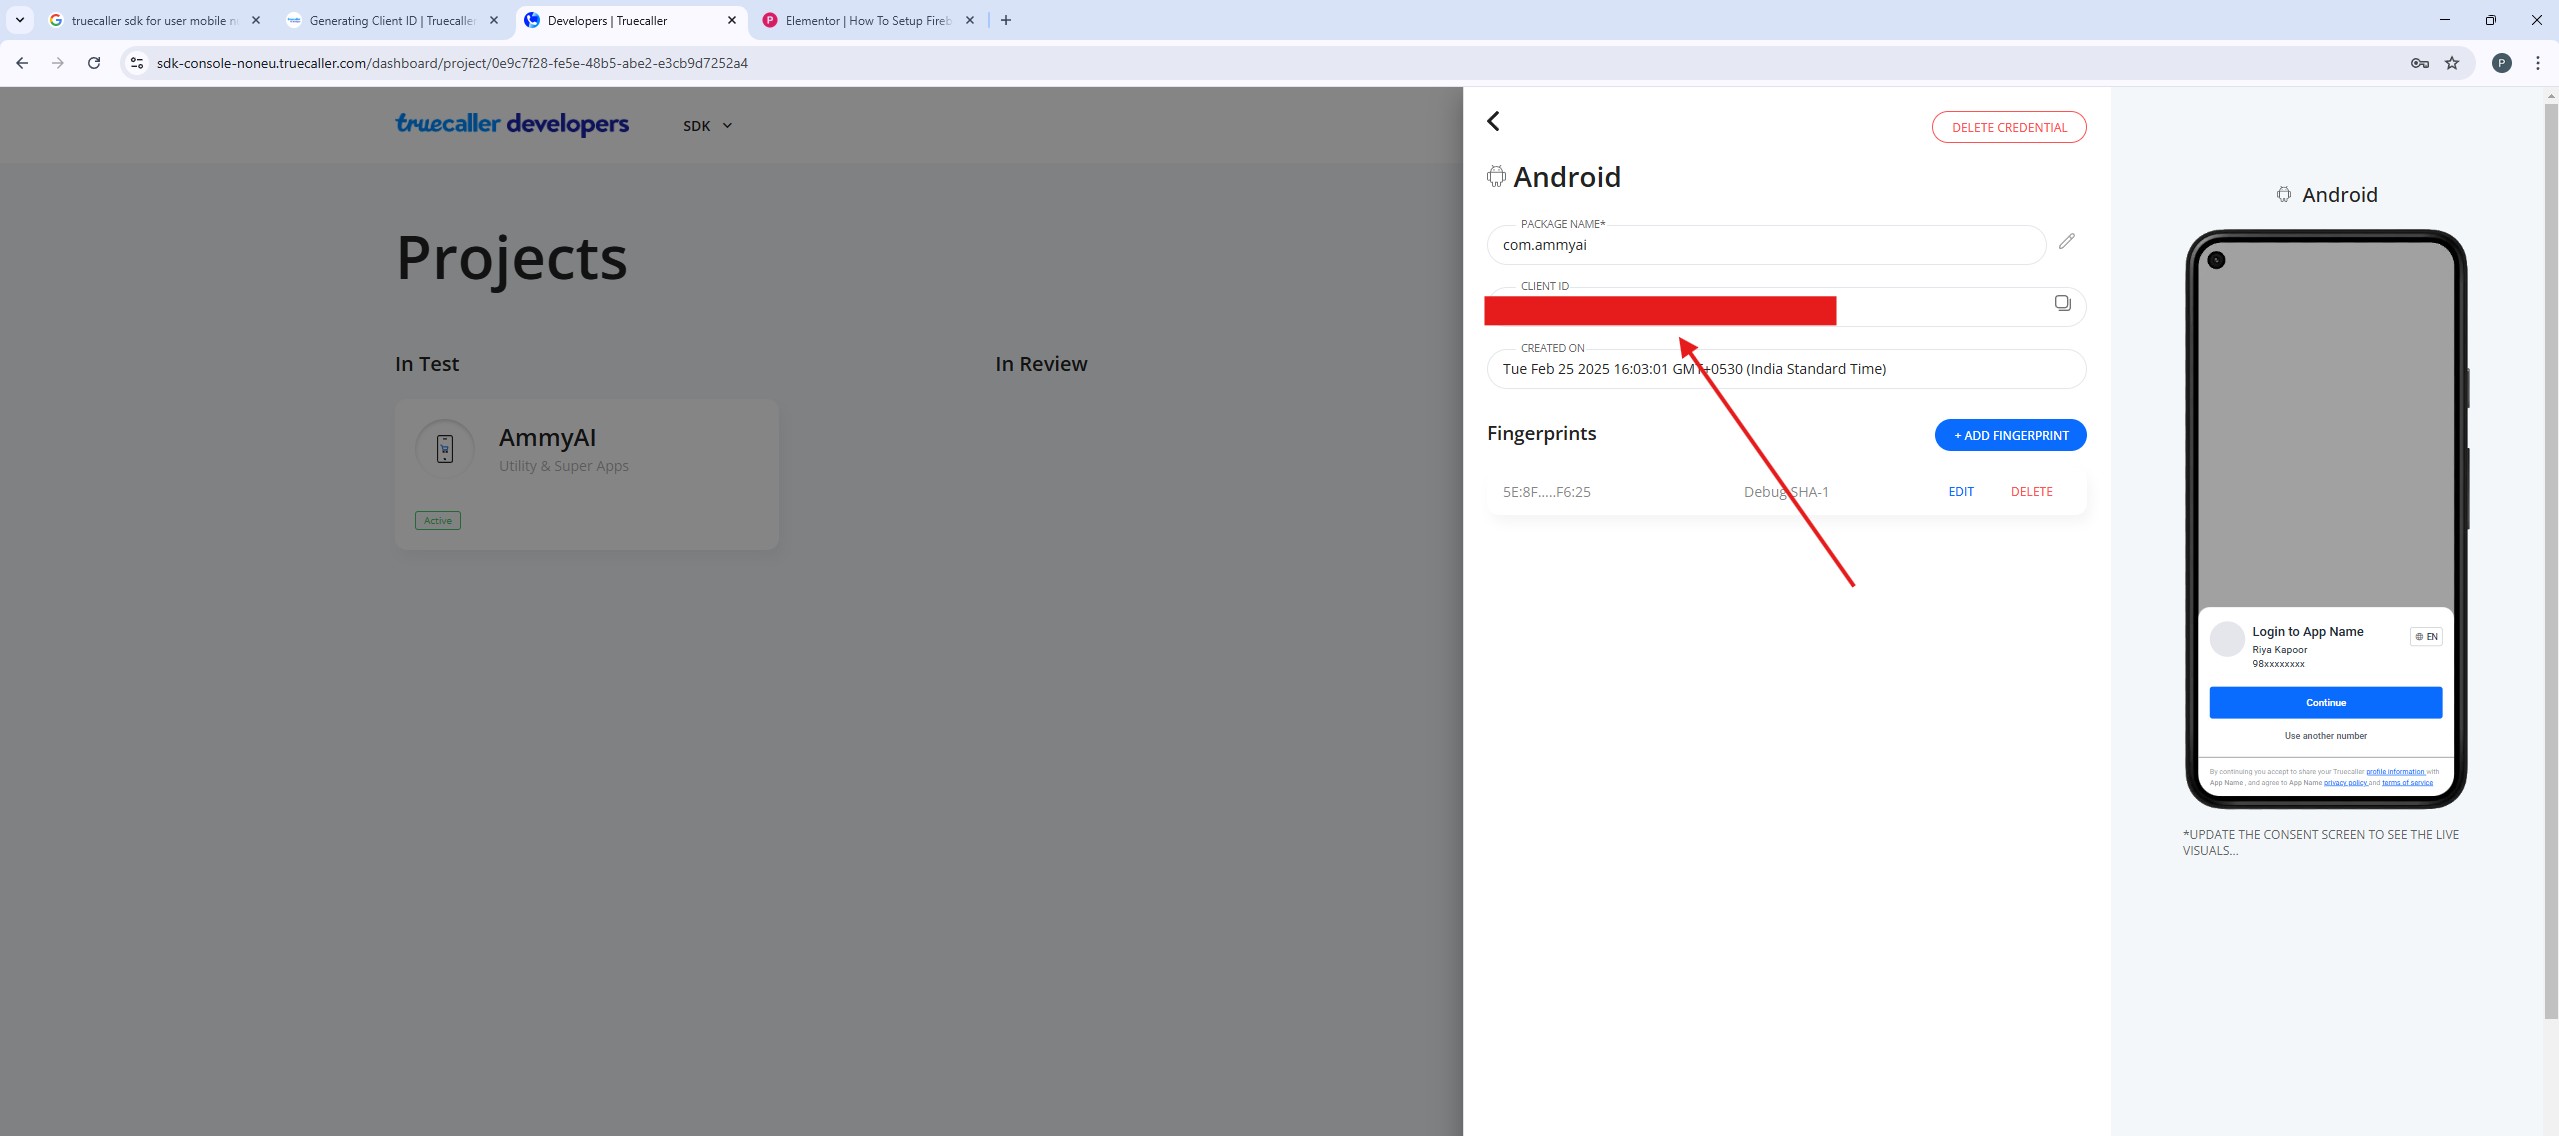
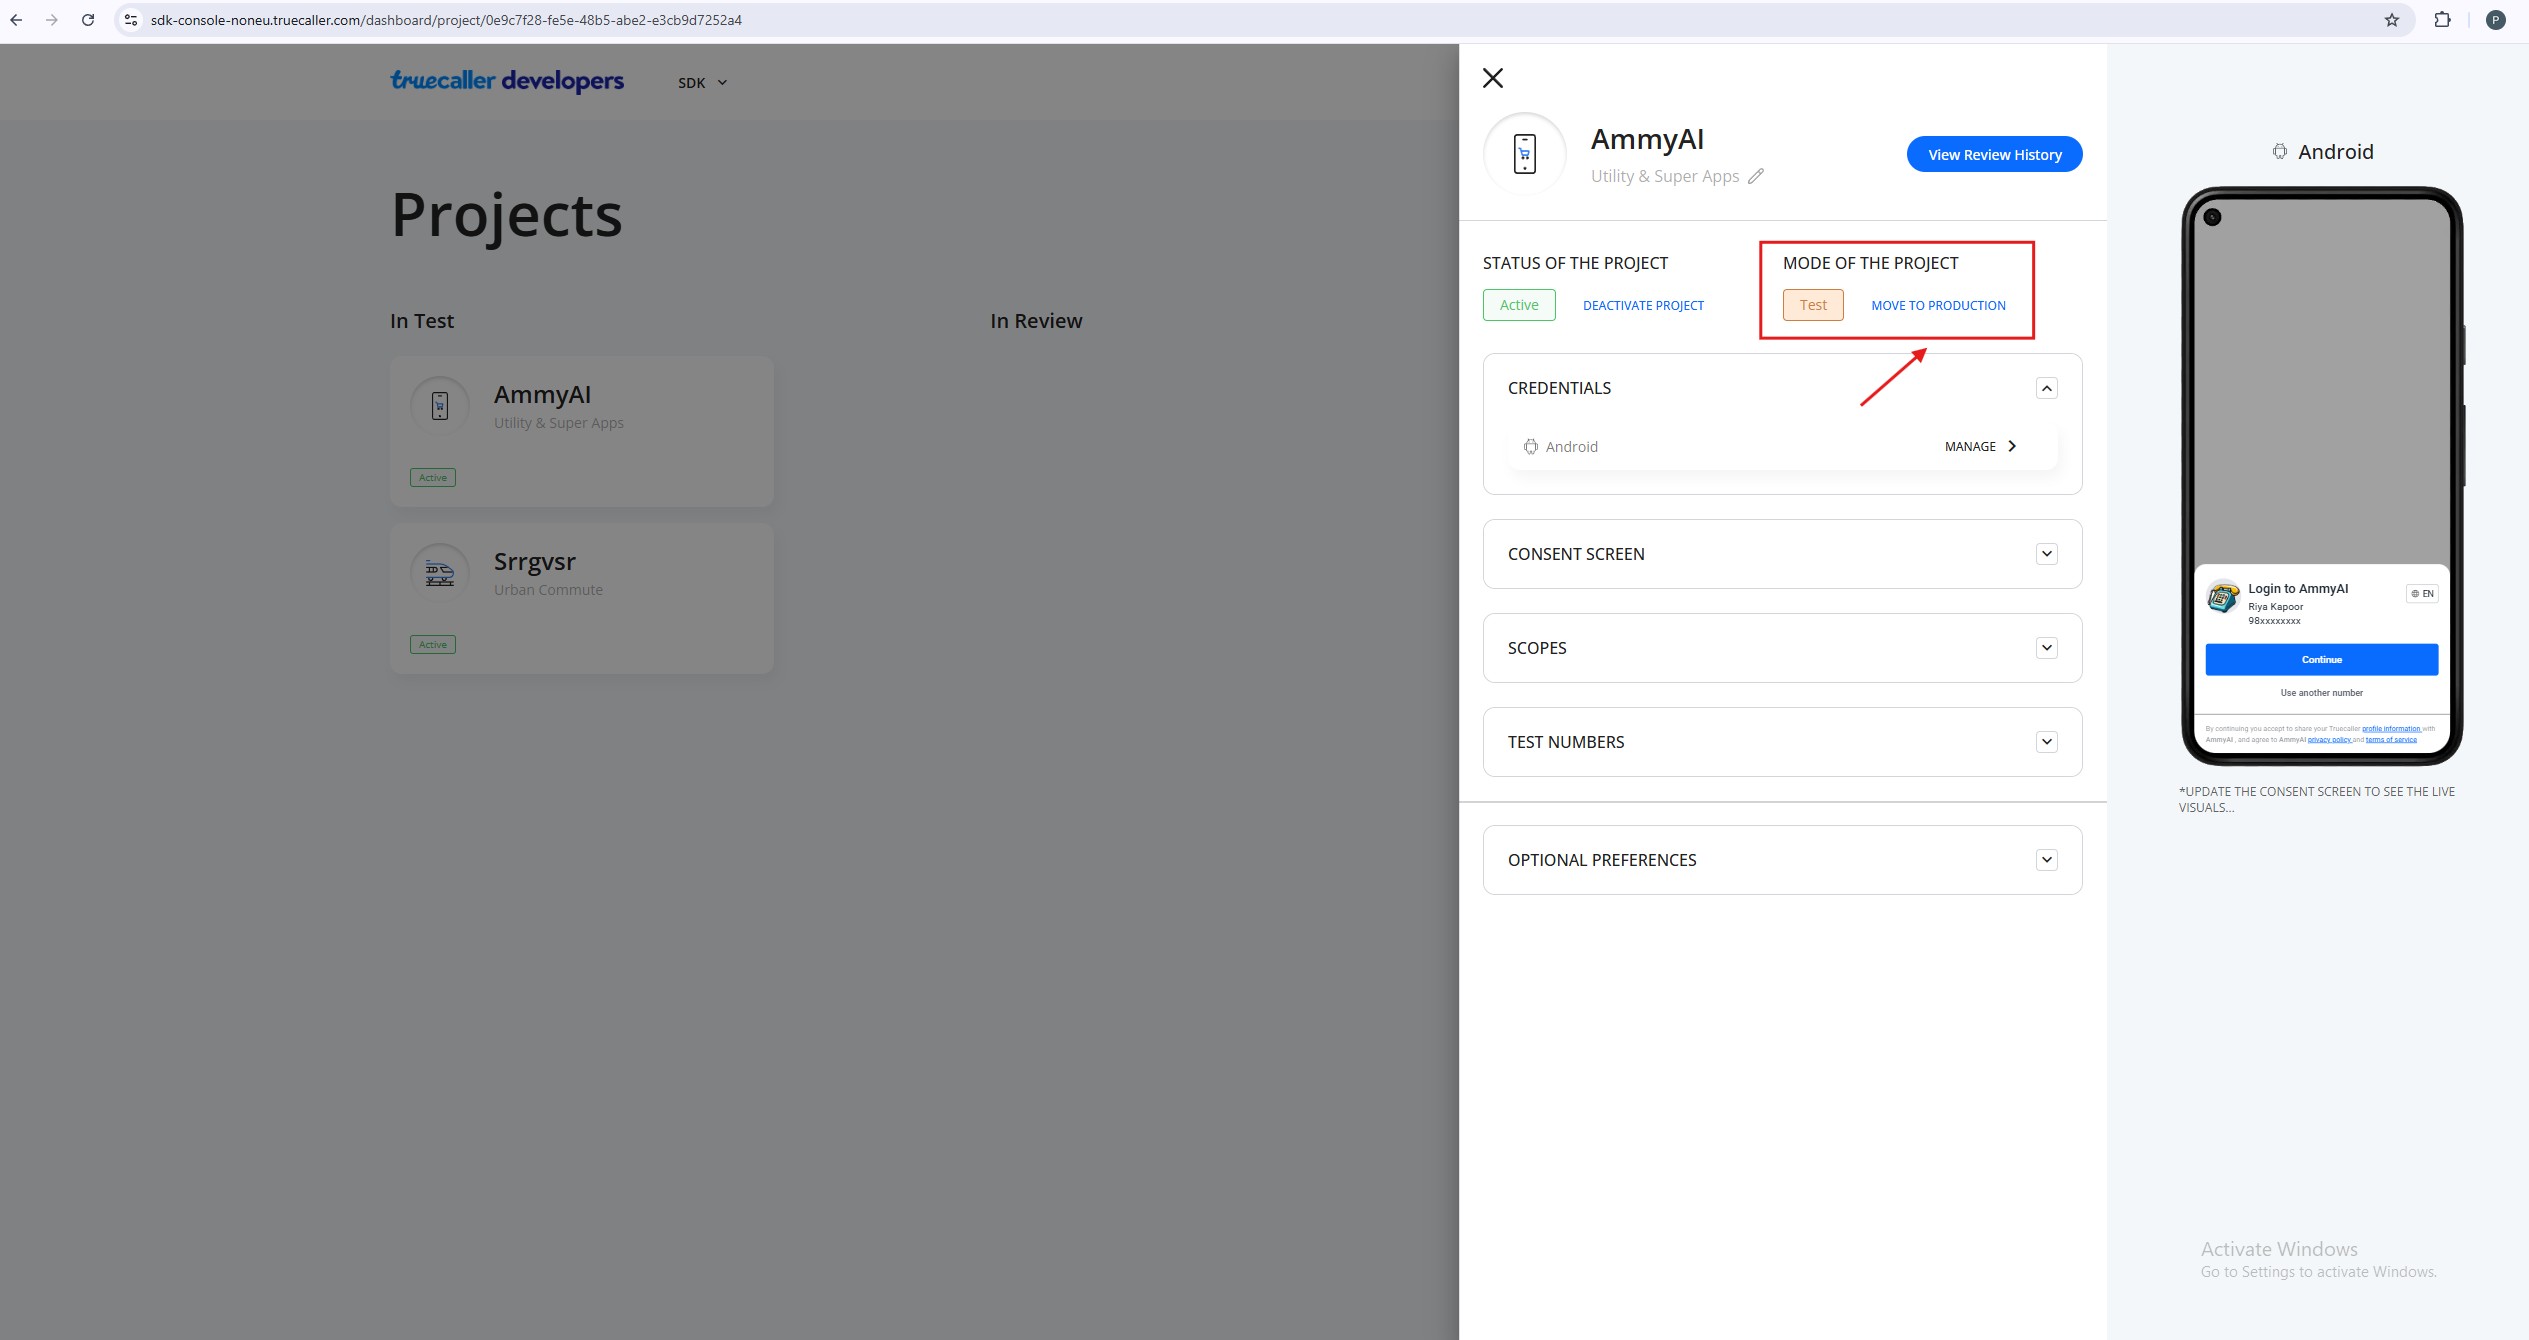
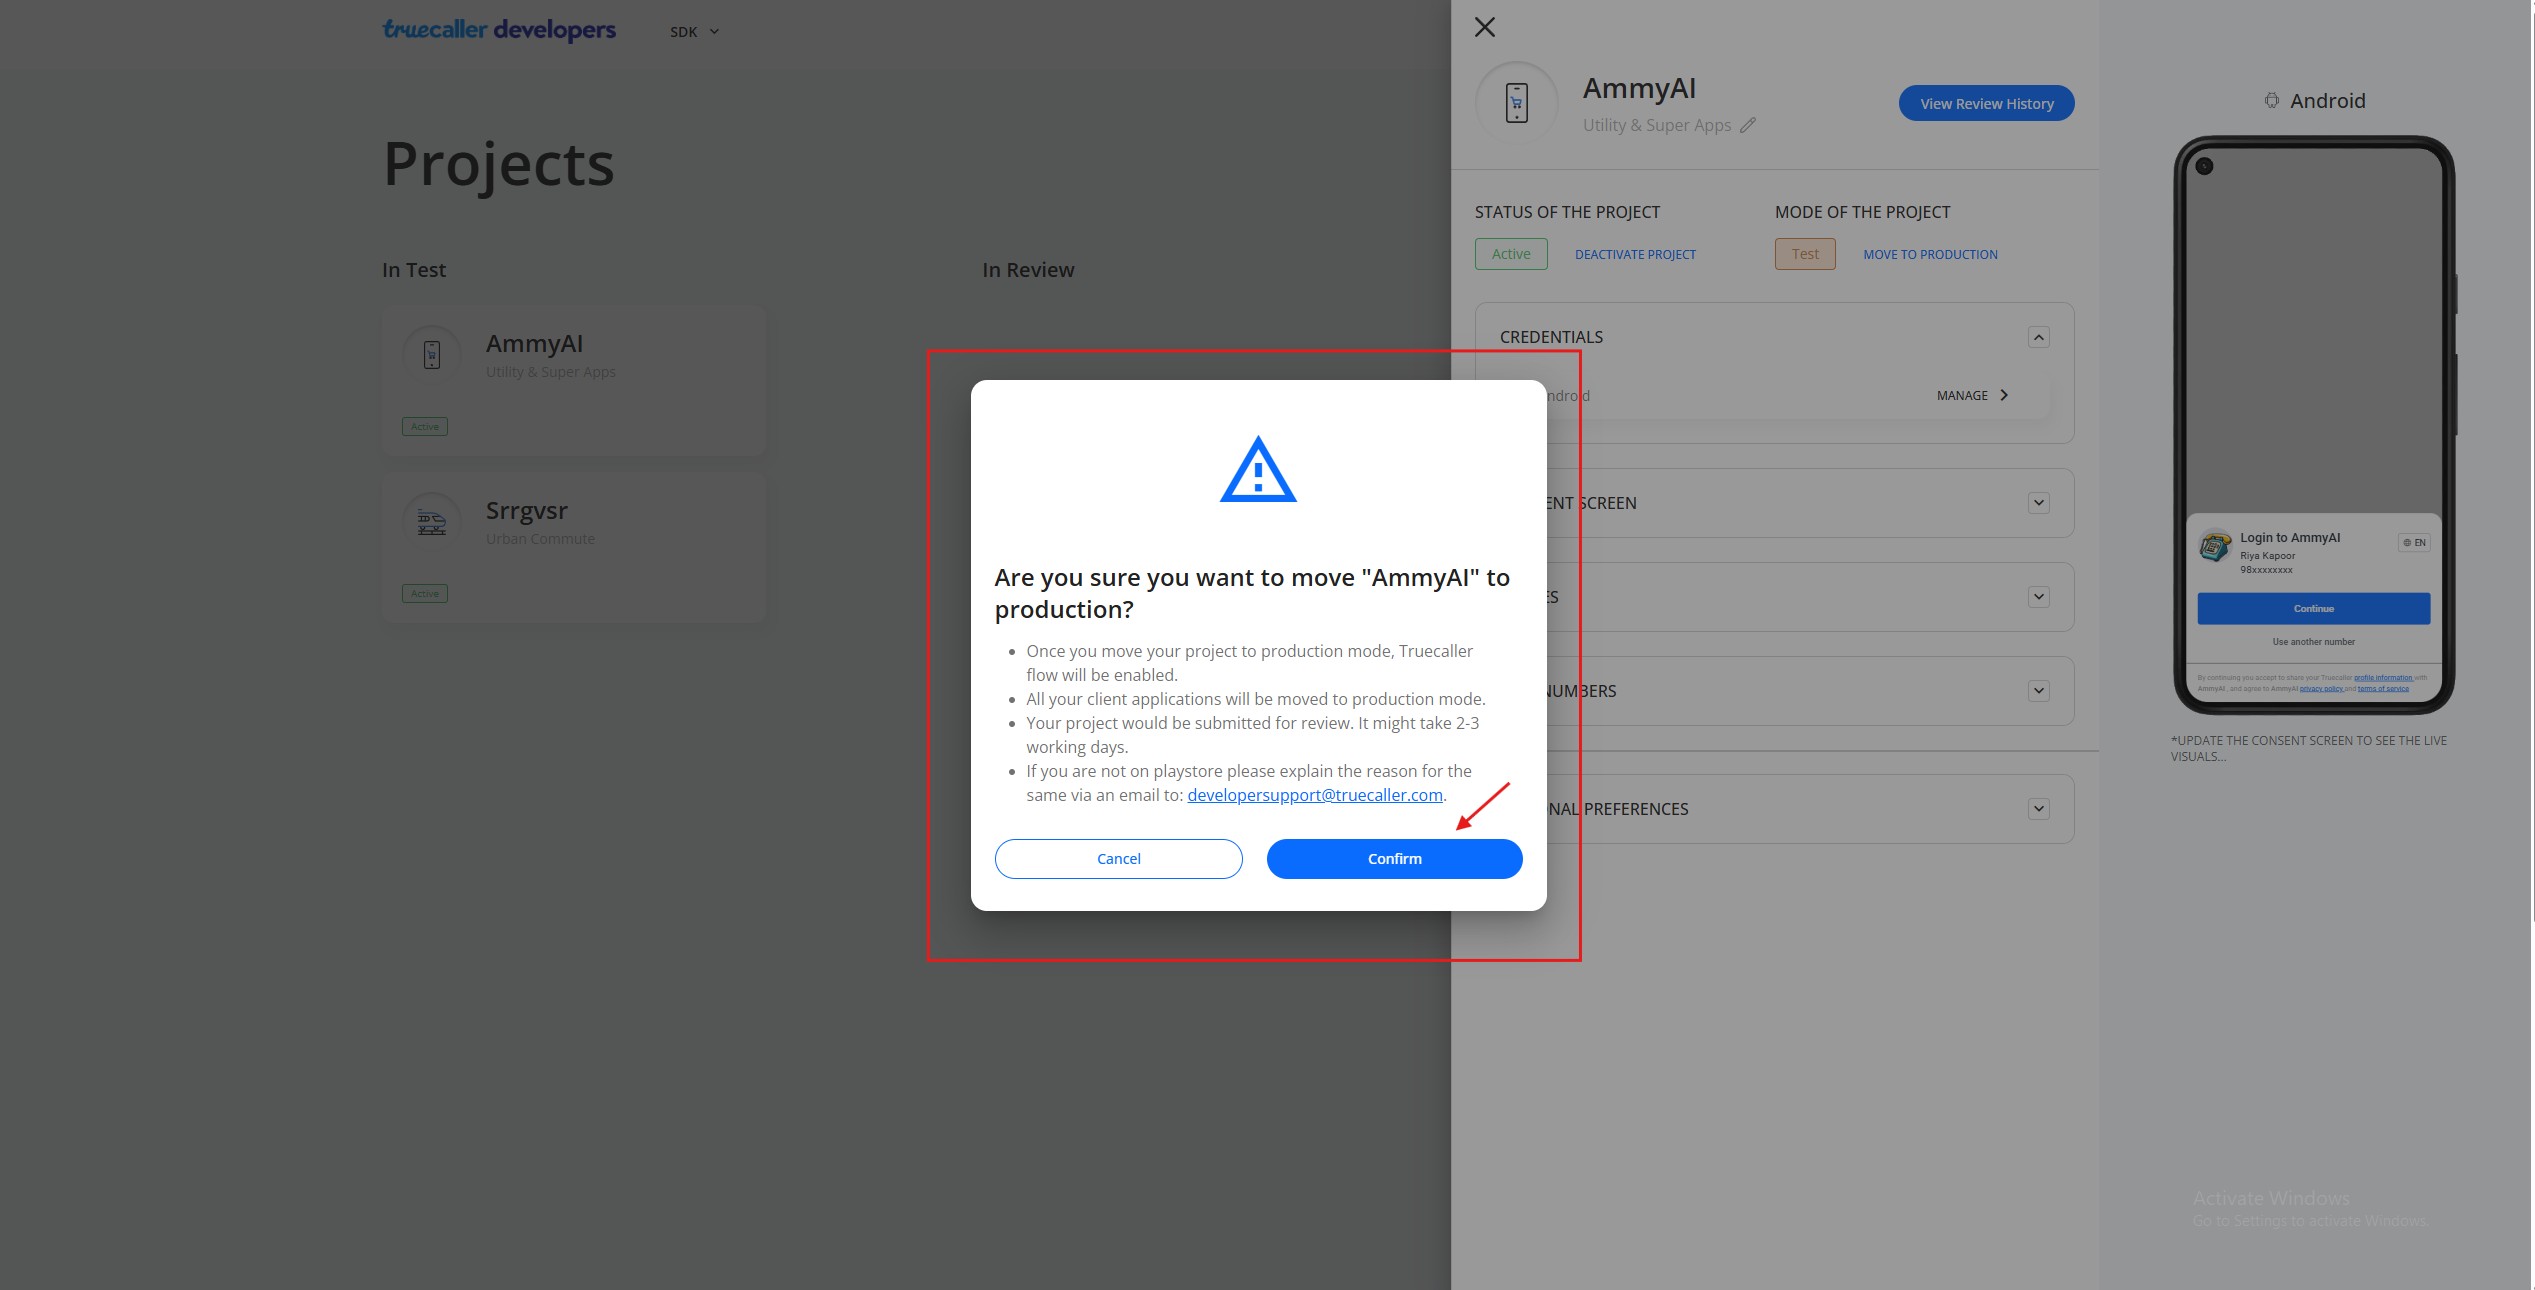
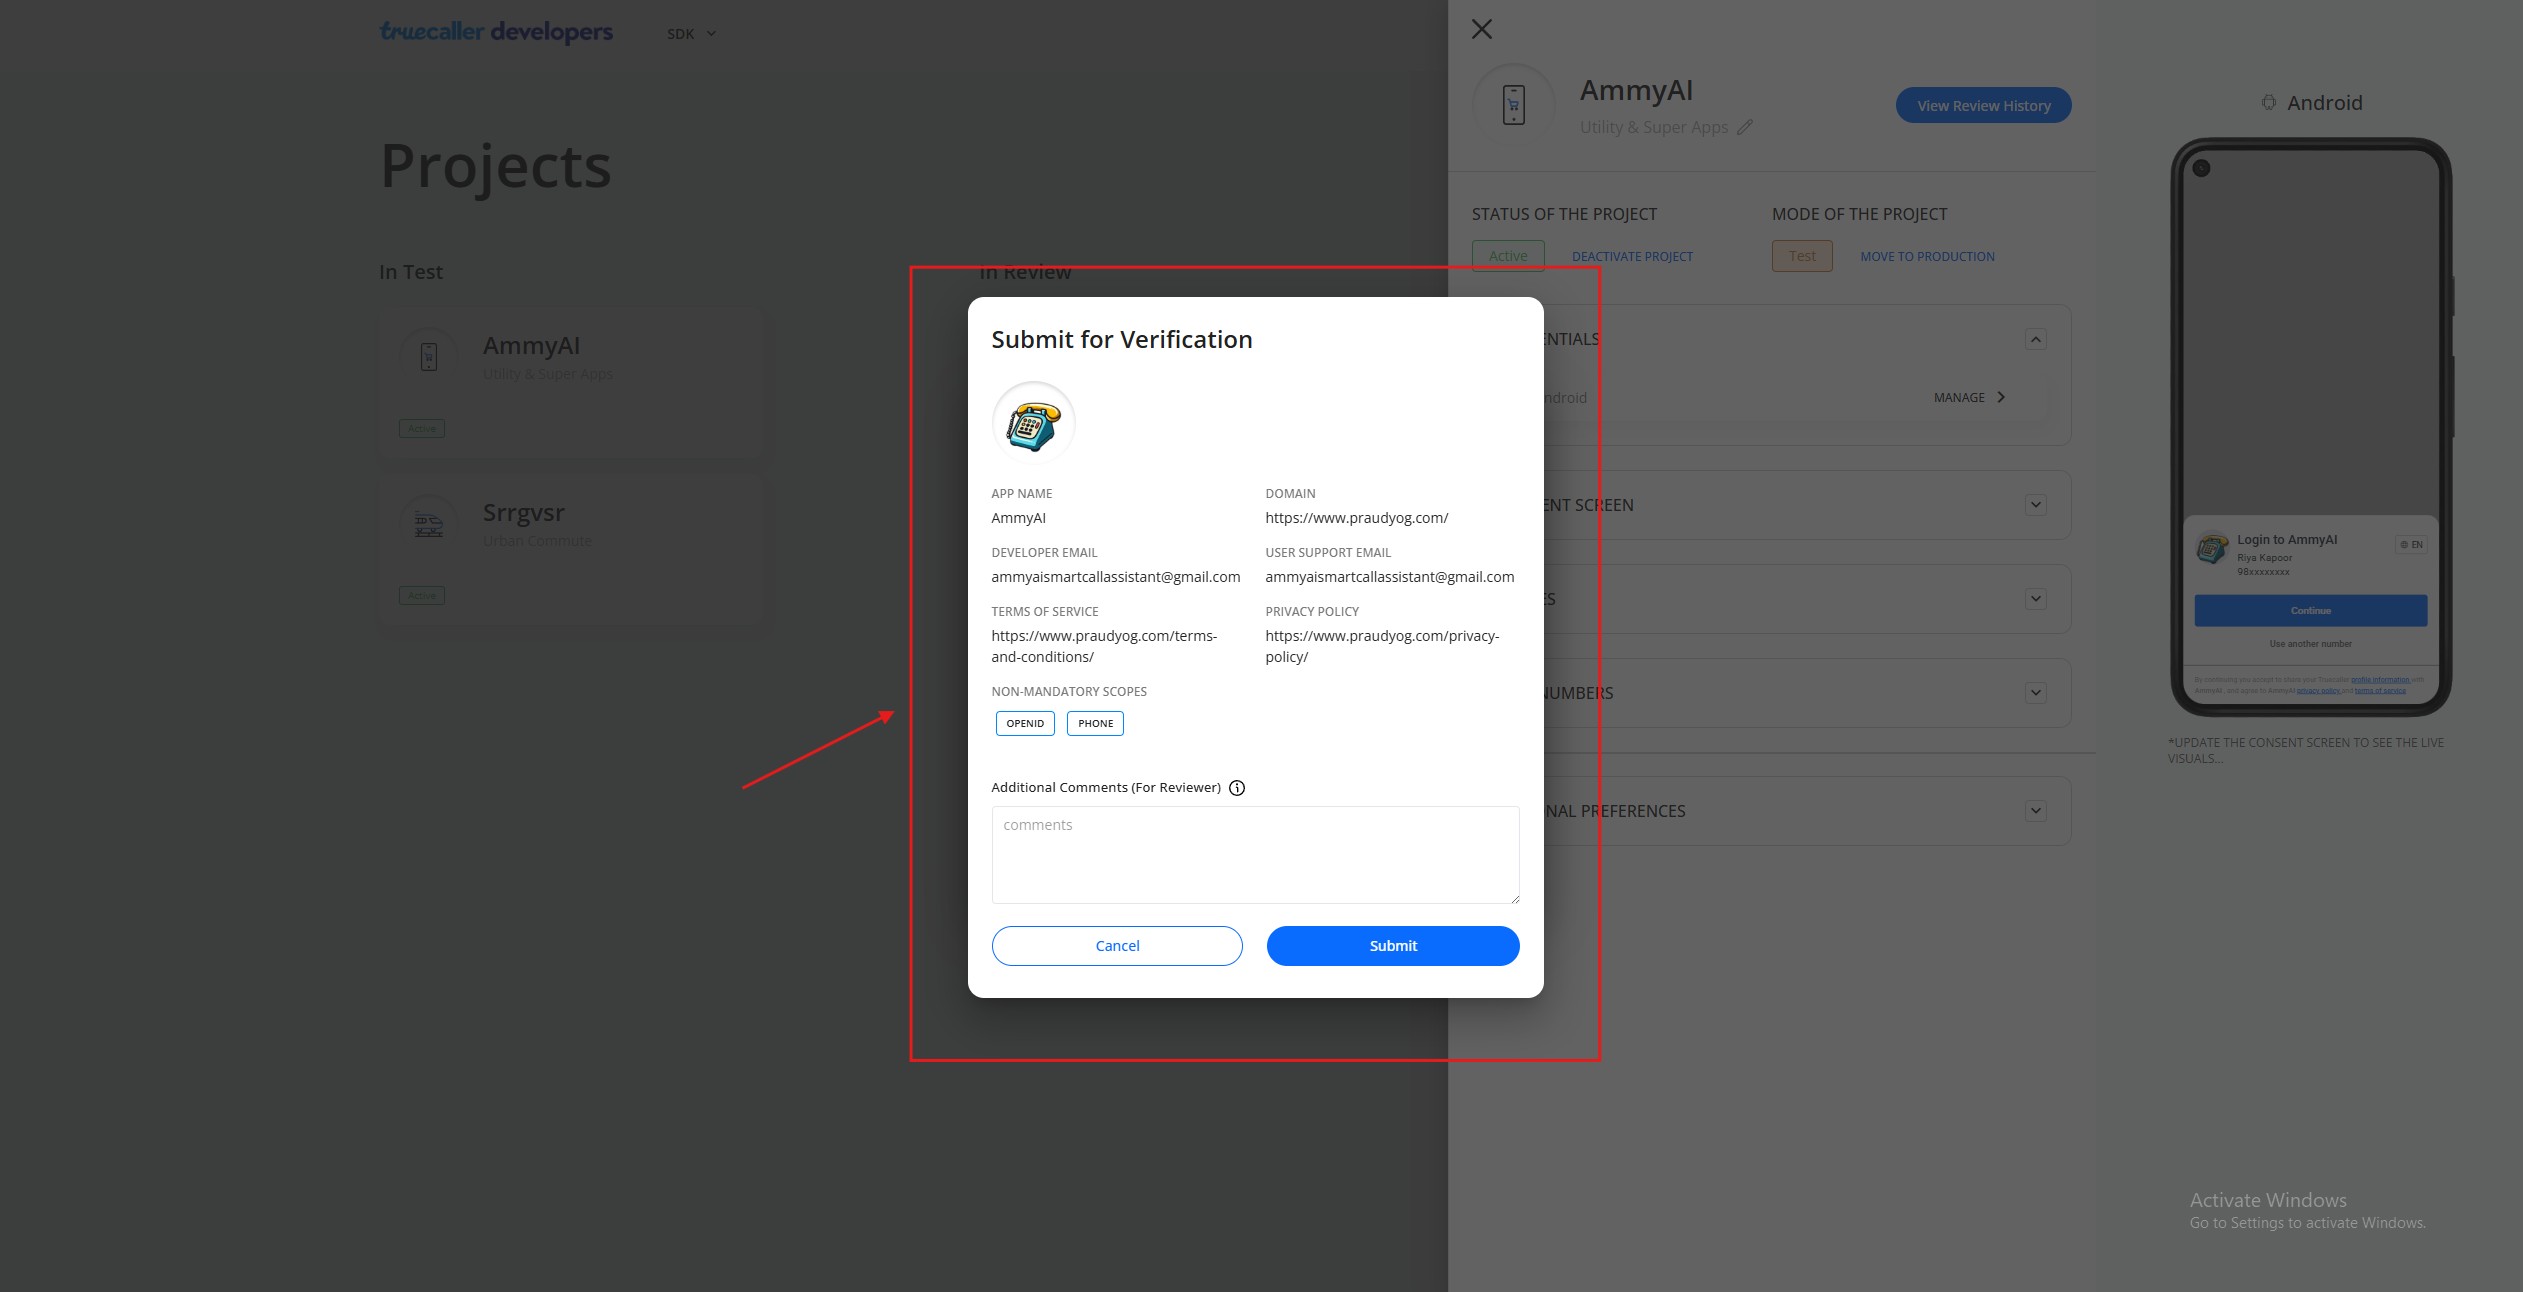
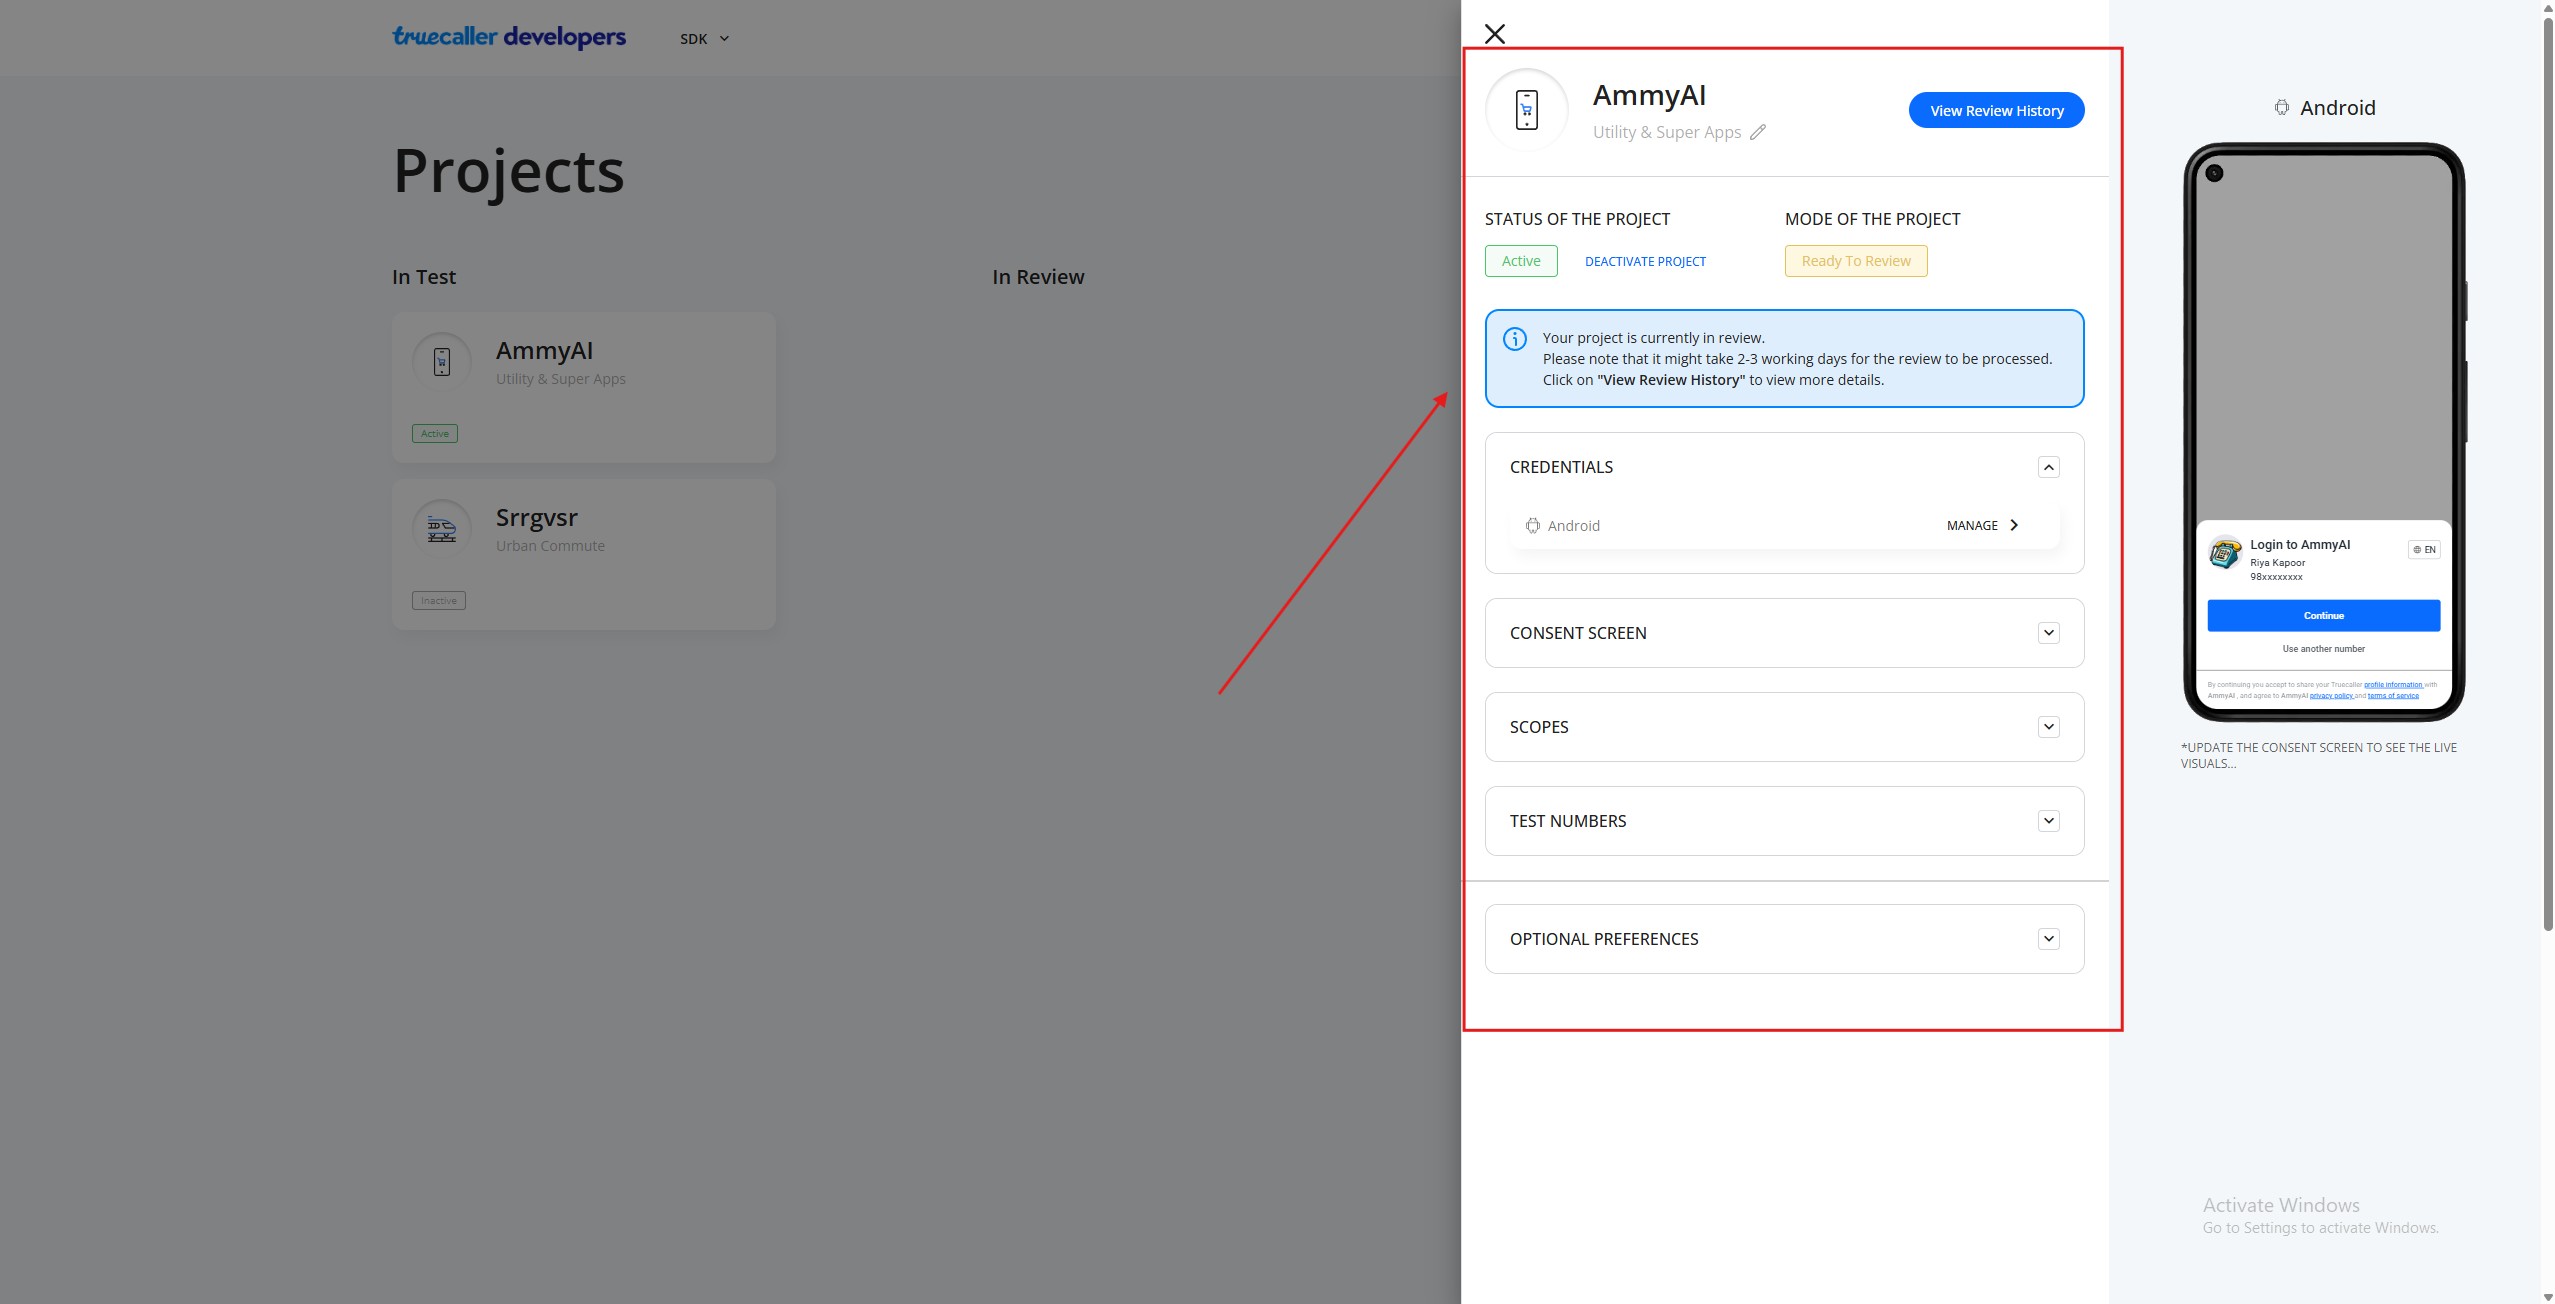
Step-5: On the project screen, click the “add credential” button and select the platform as Android from the dropdown menu.
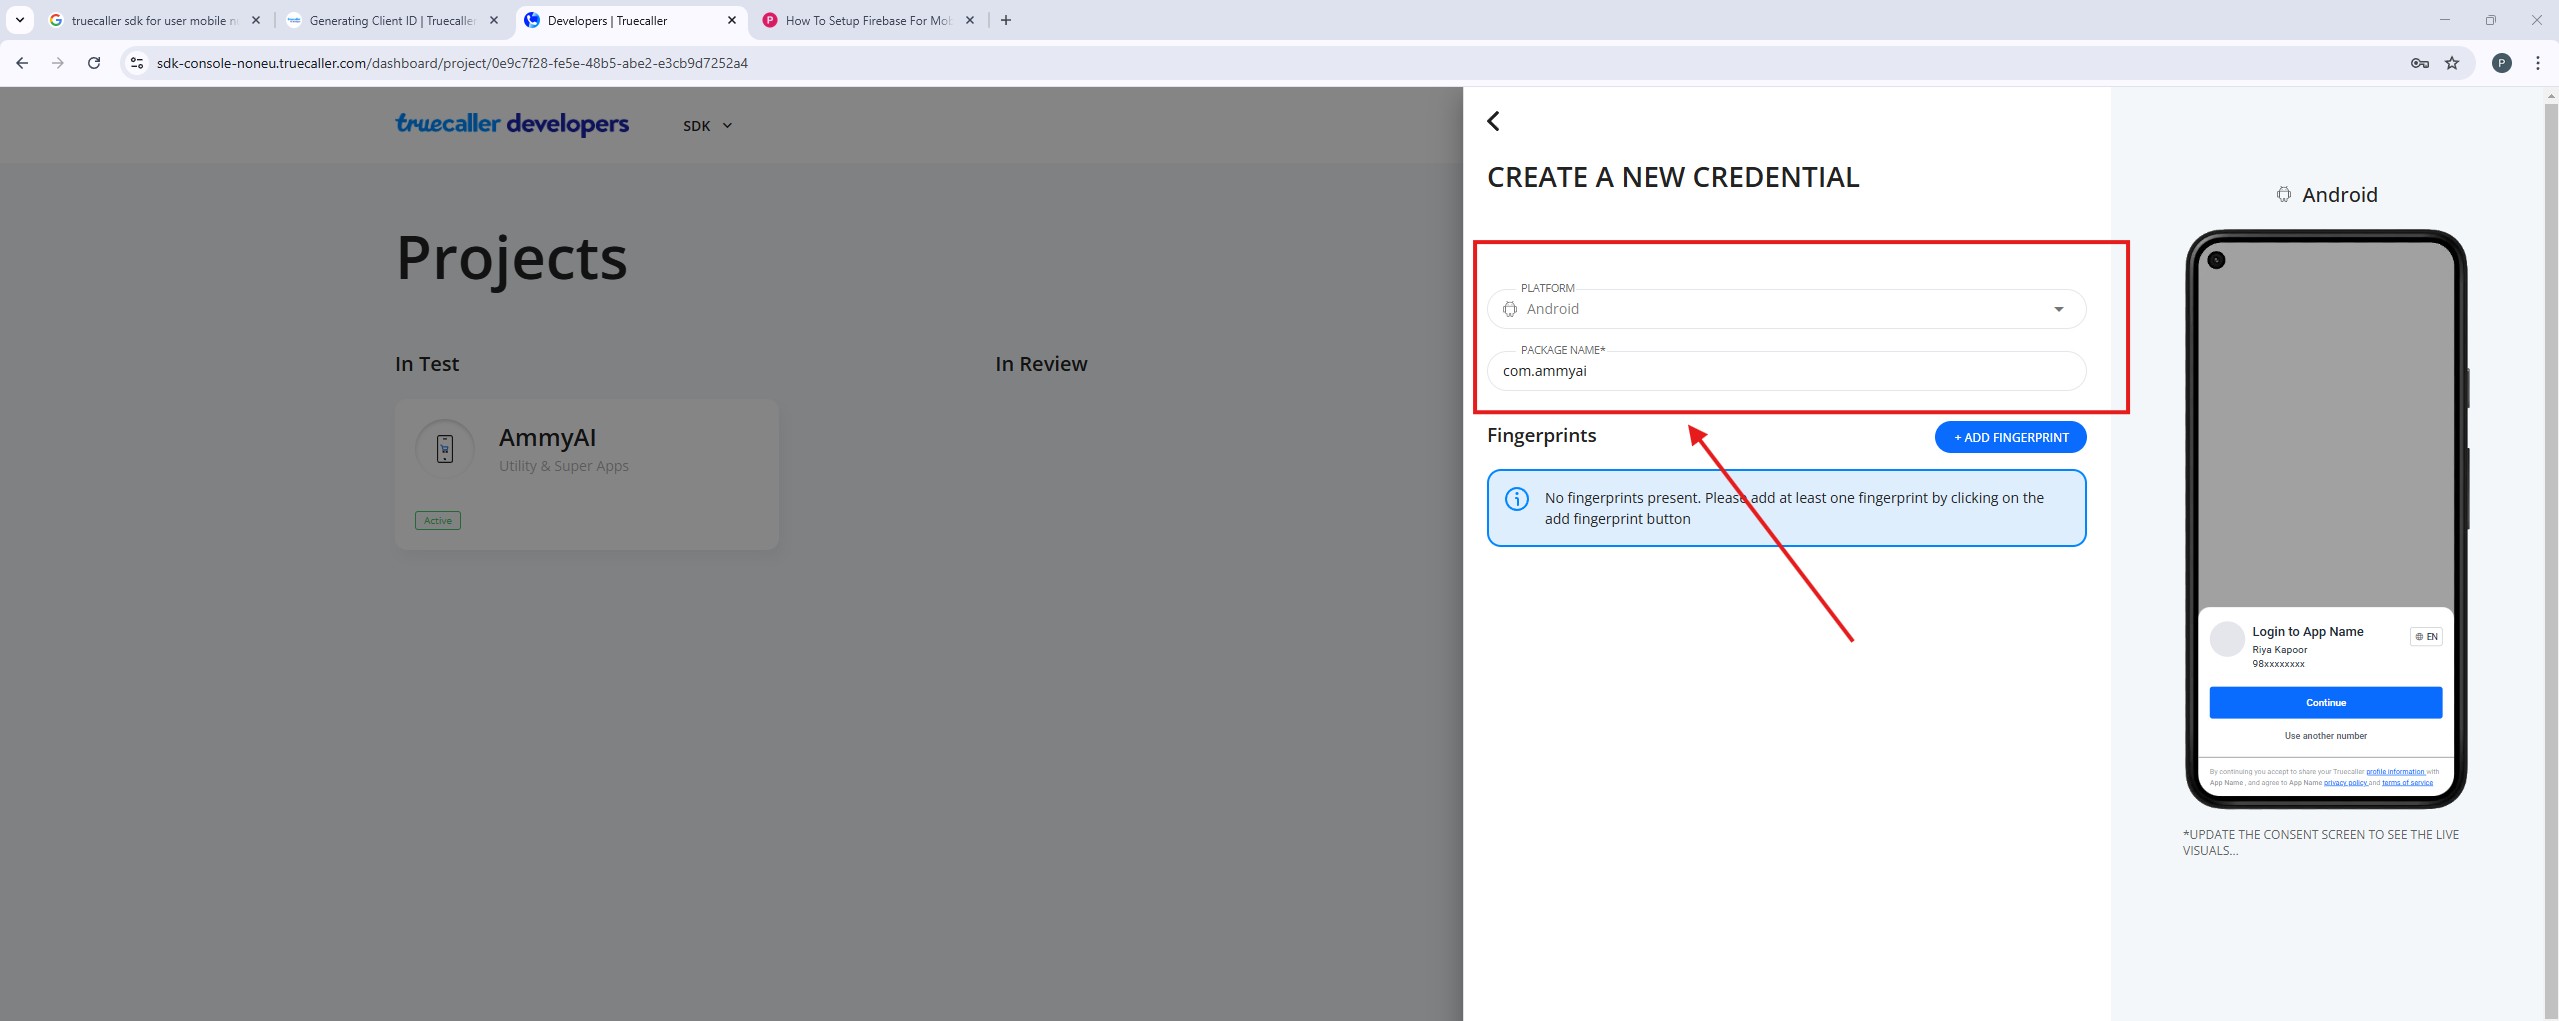
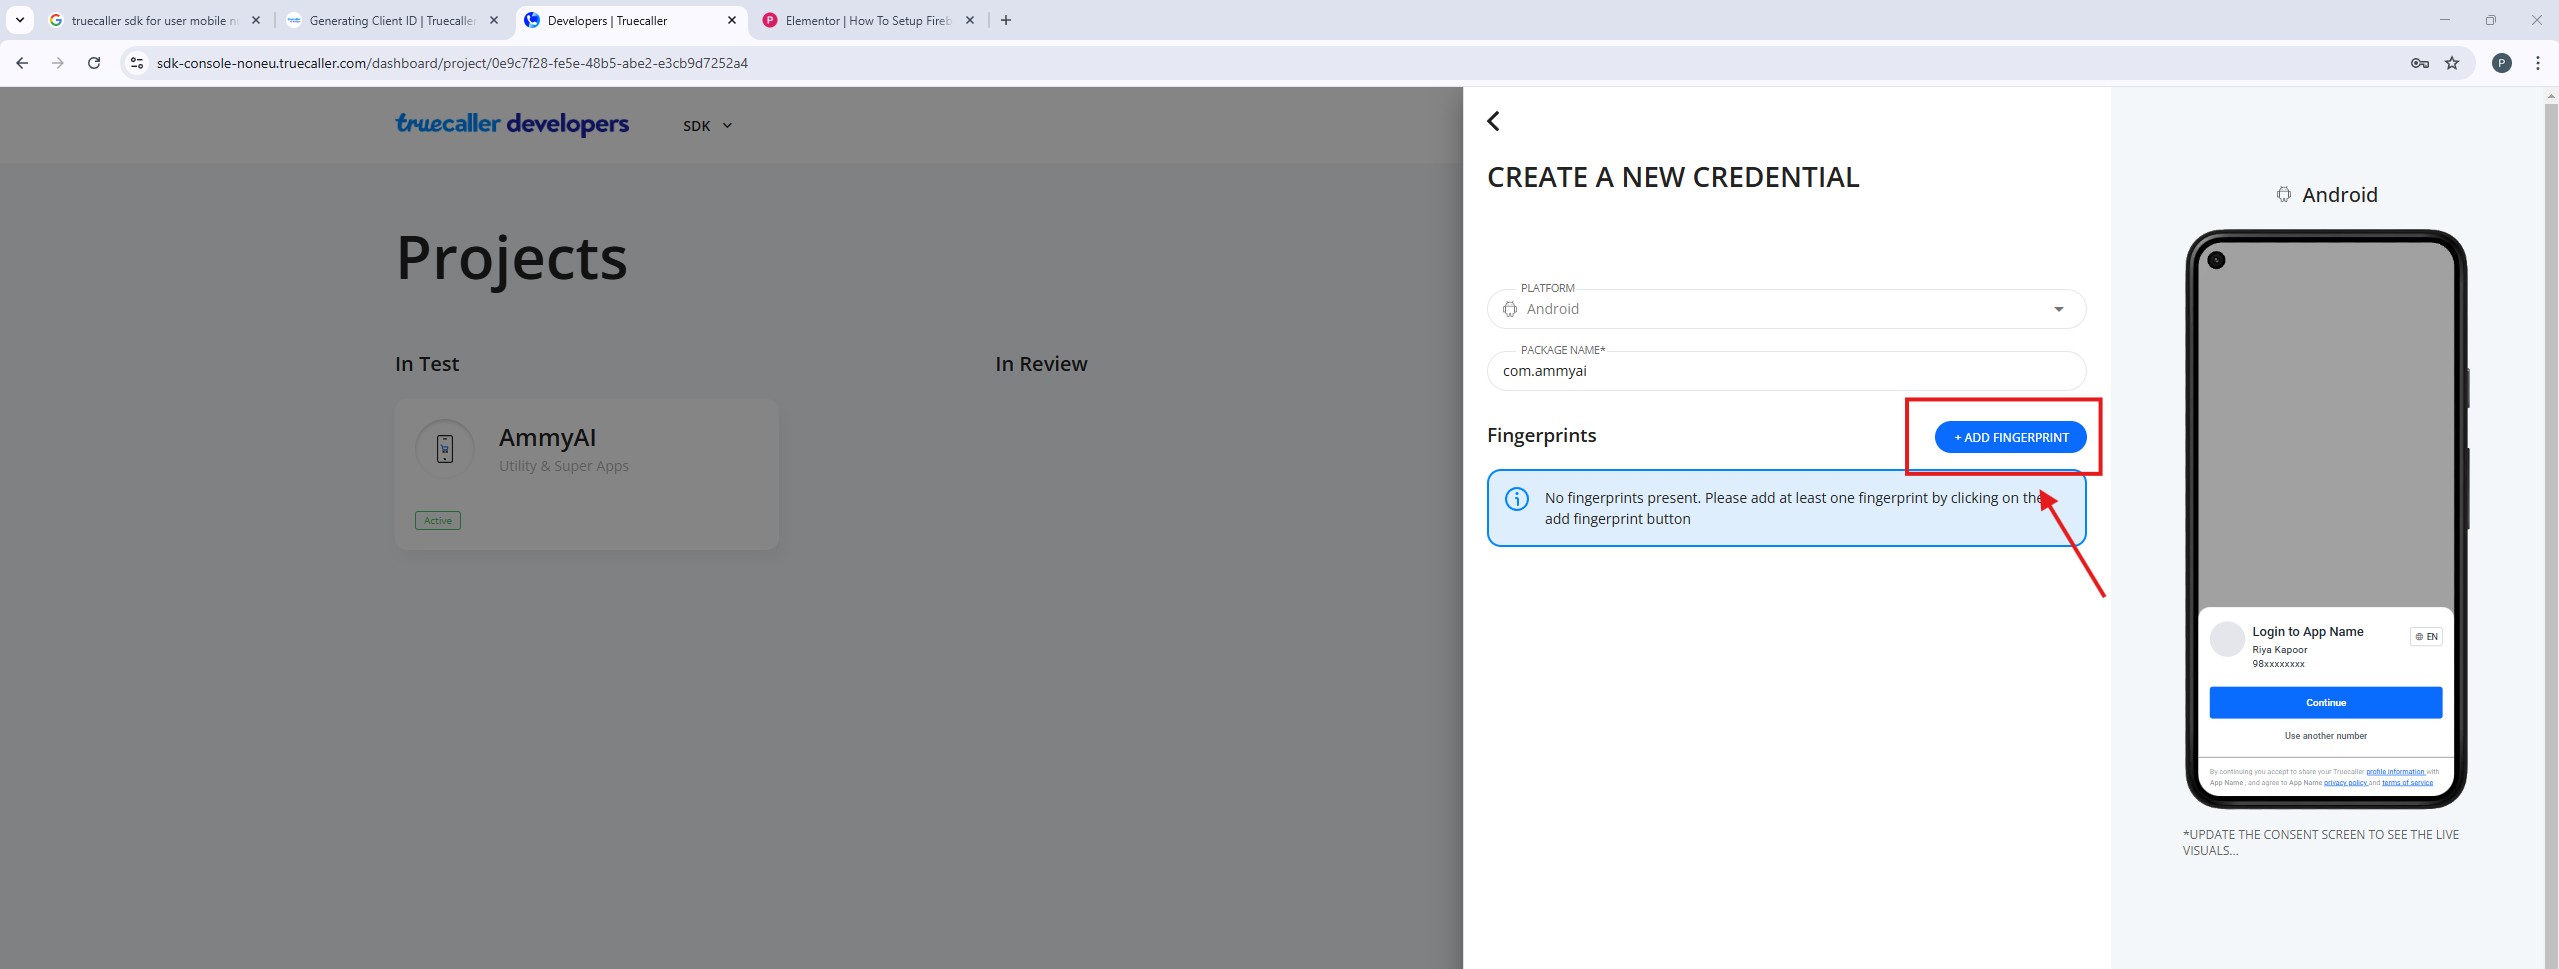
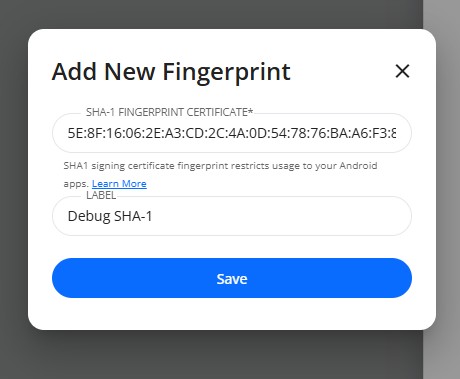
Step-6: On the credential section, enter the package name and the SHA1.
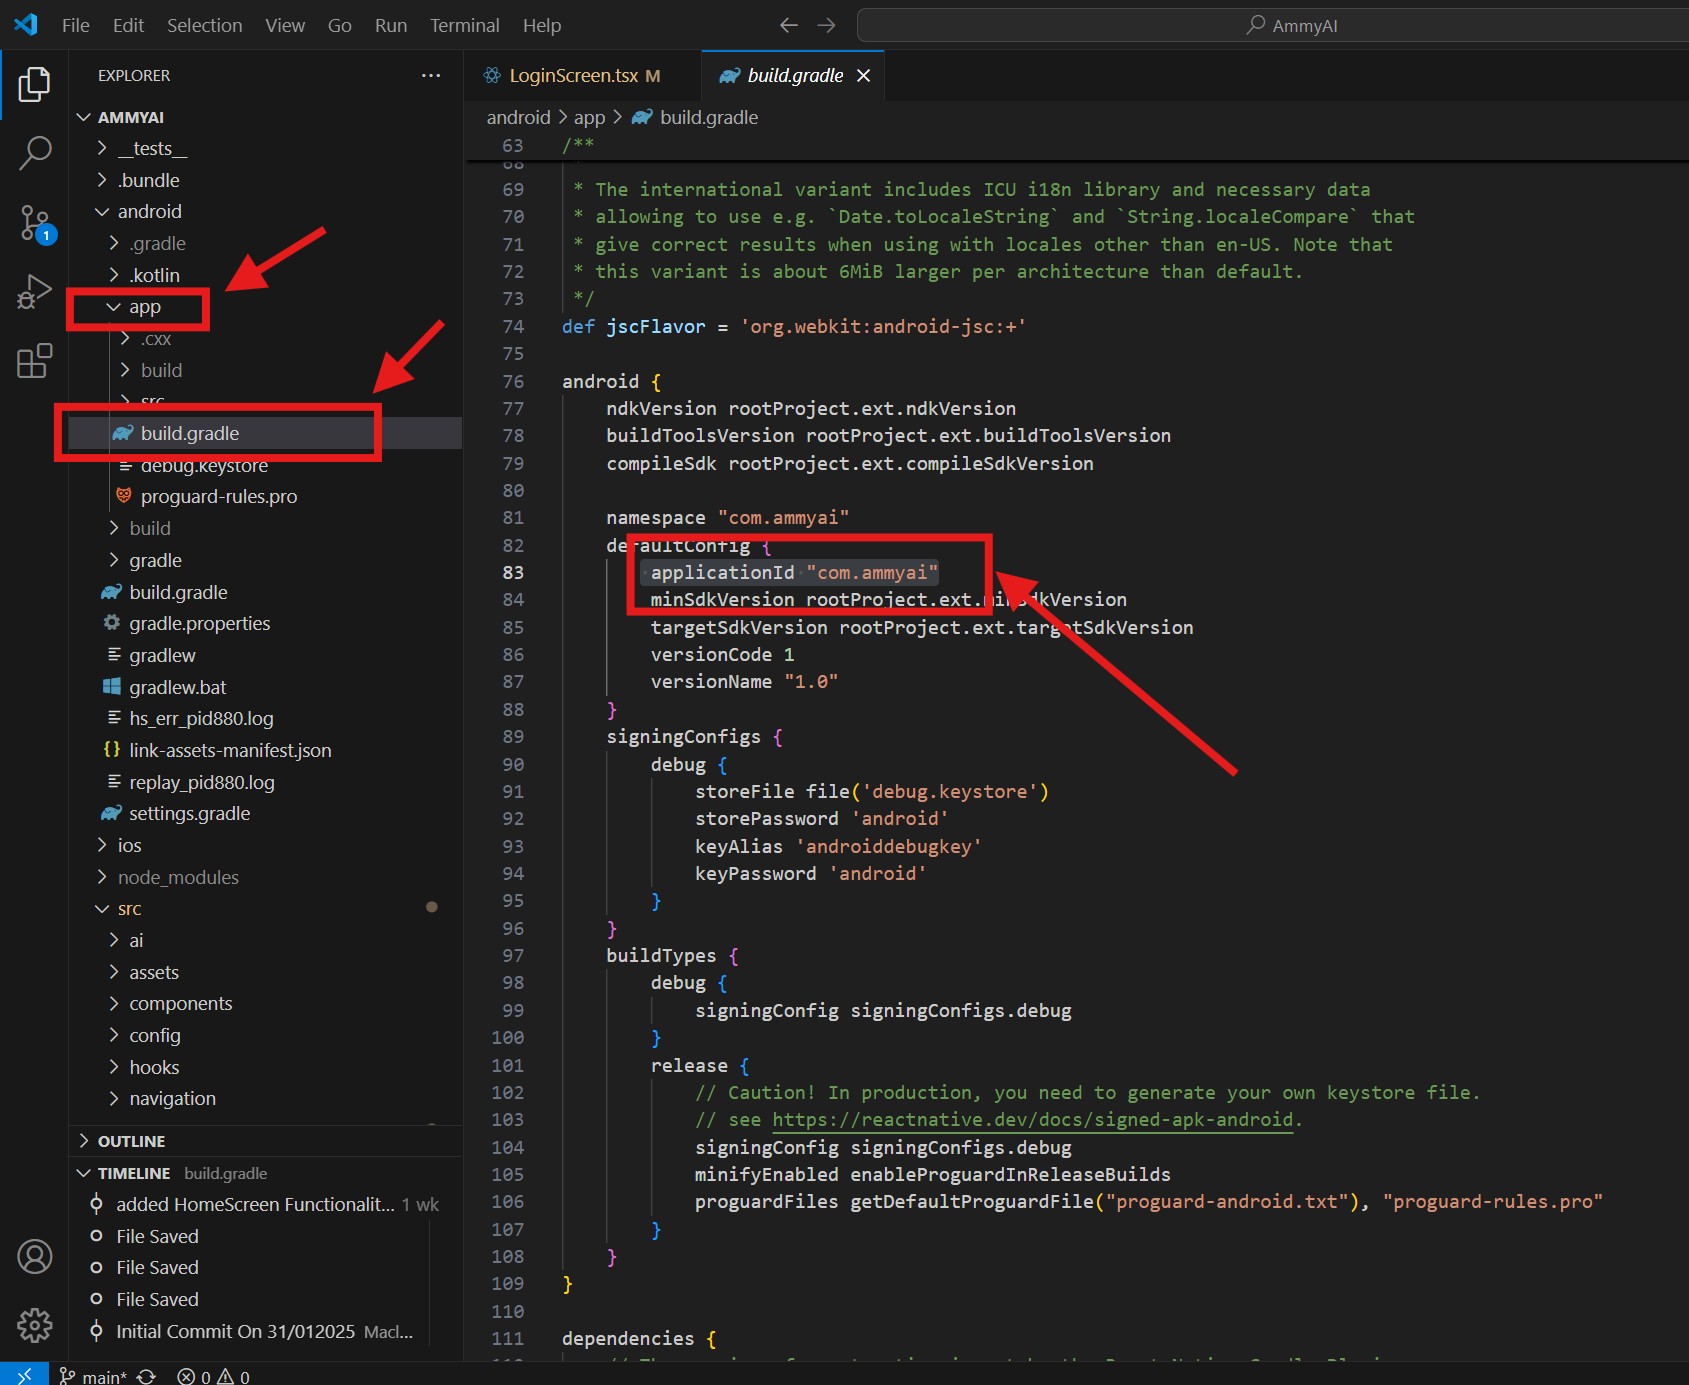
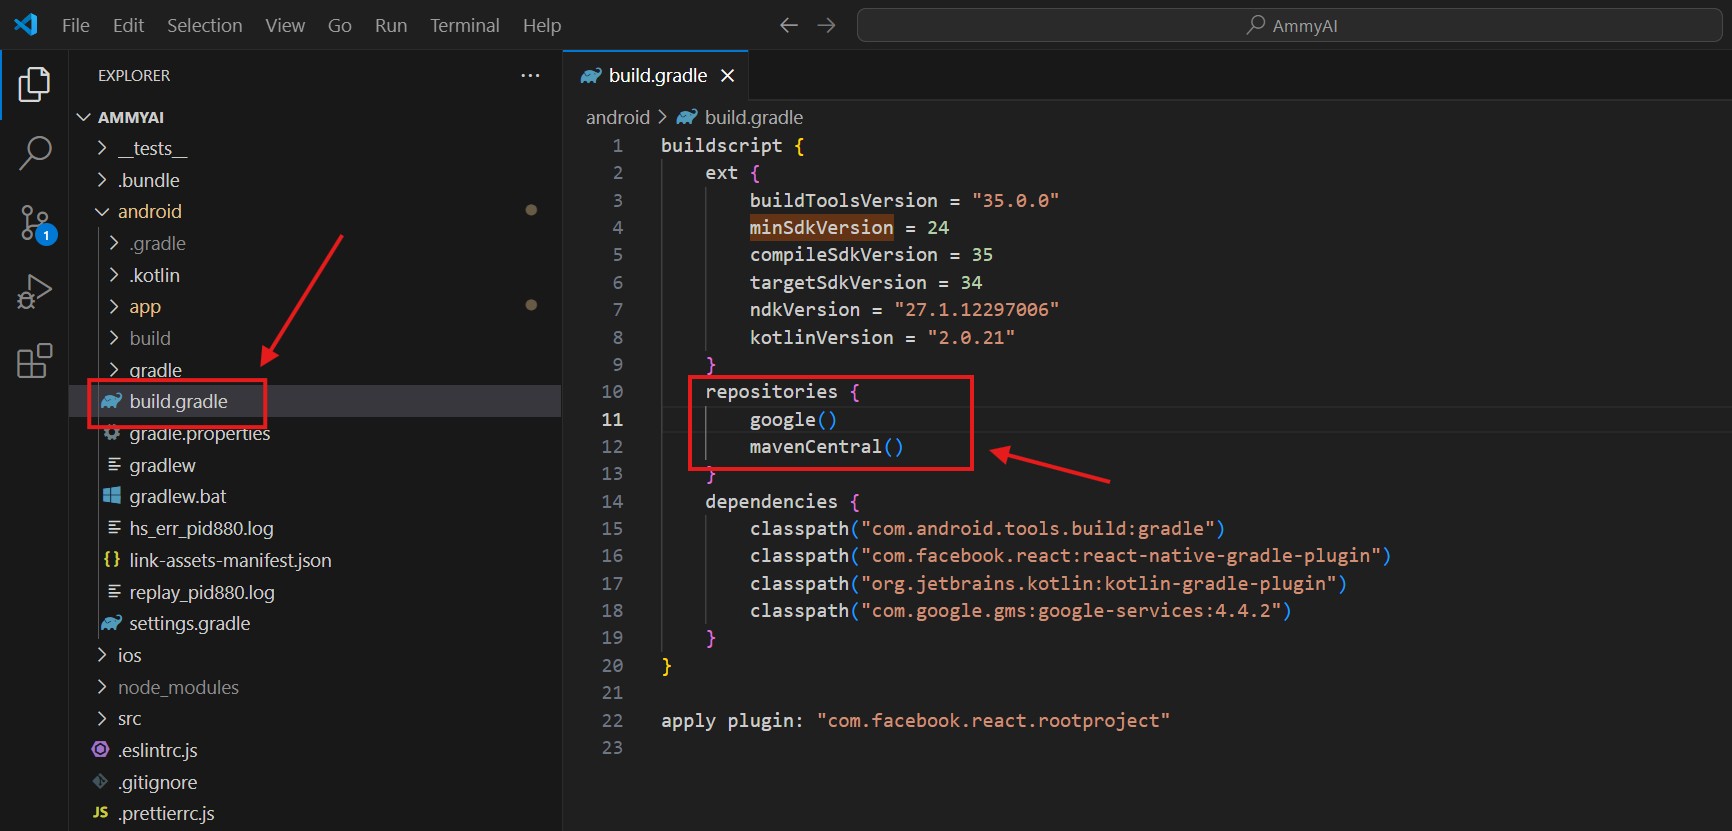
Package Name You Can Find On app/build.gradle File
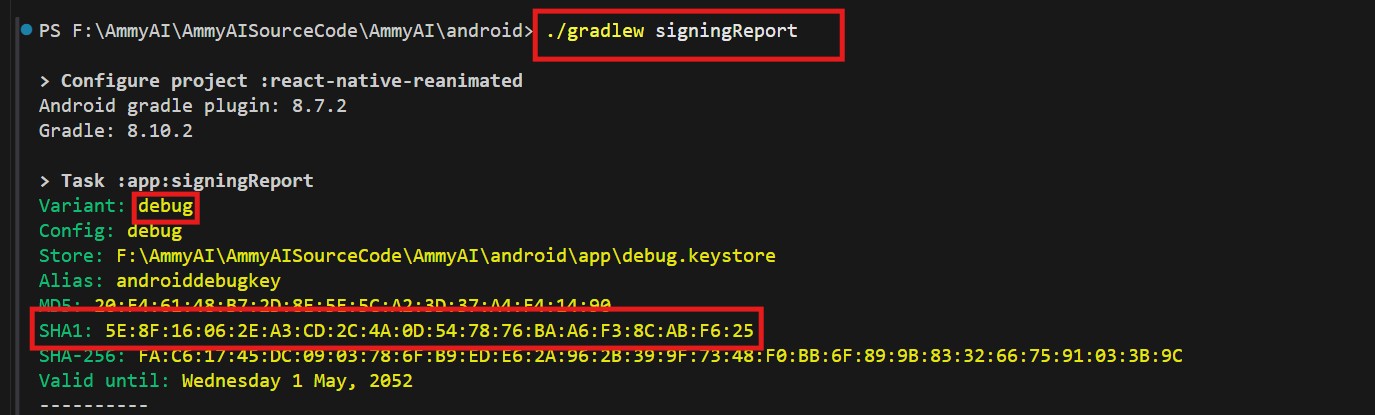
Run The Below Command To Get The SHA1 Fingerprint
./gradlew signingReport
Now Your ClientID Is Being Generated.
(2) Setup
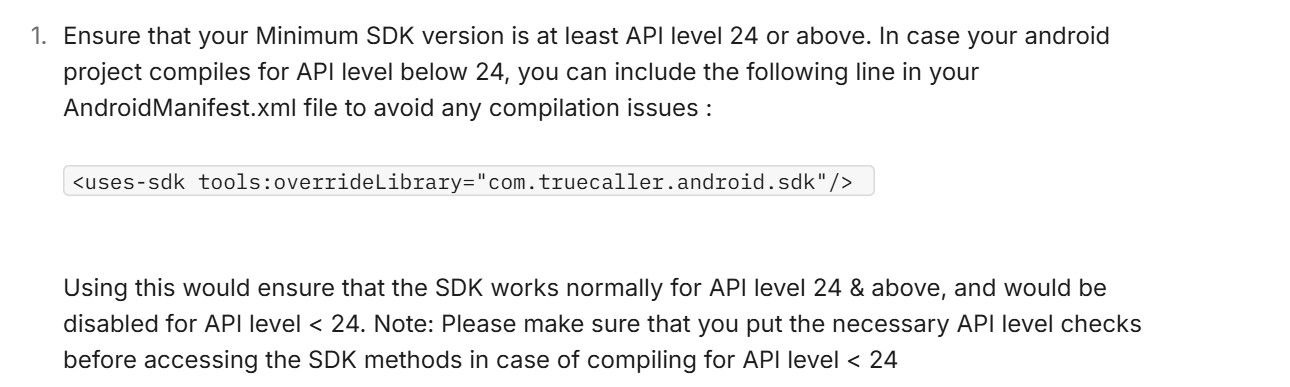
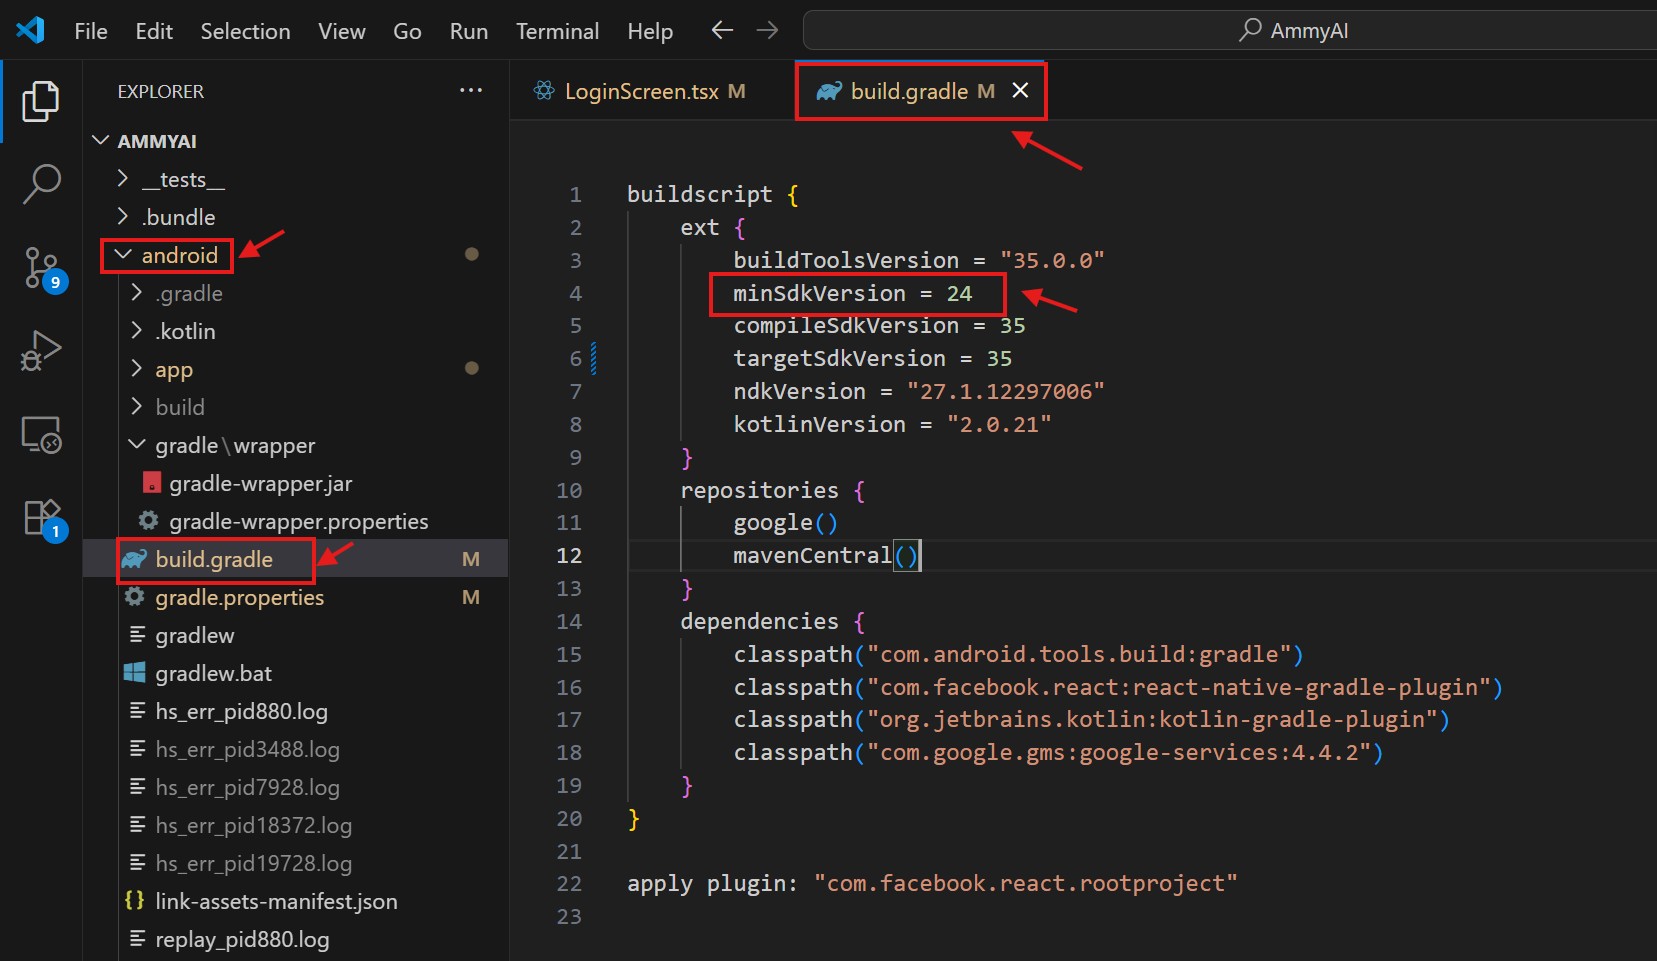
Step-1
For My Project It Is Not Necessary To Add This Override Line.
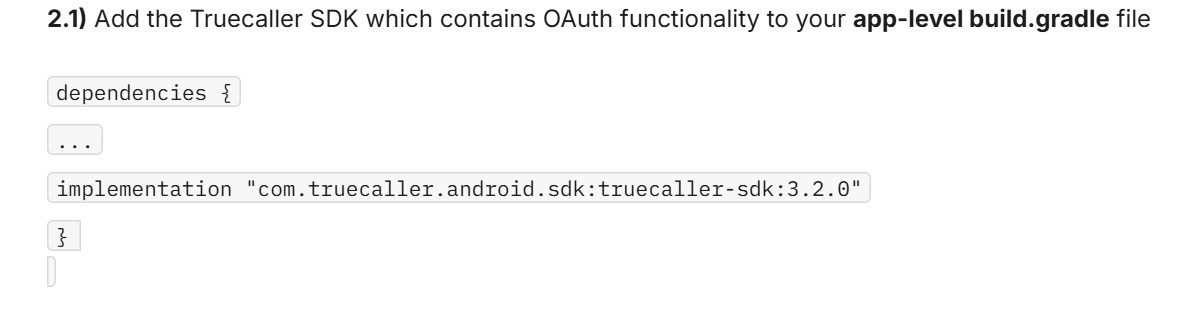
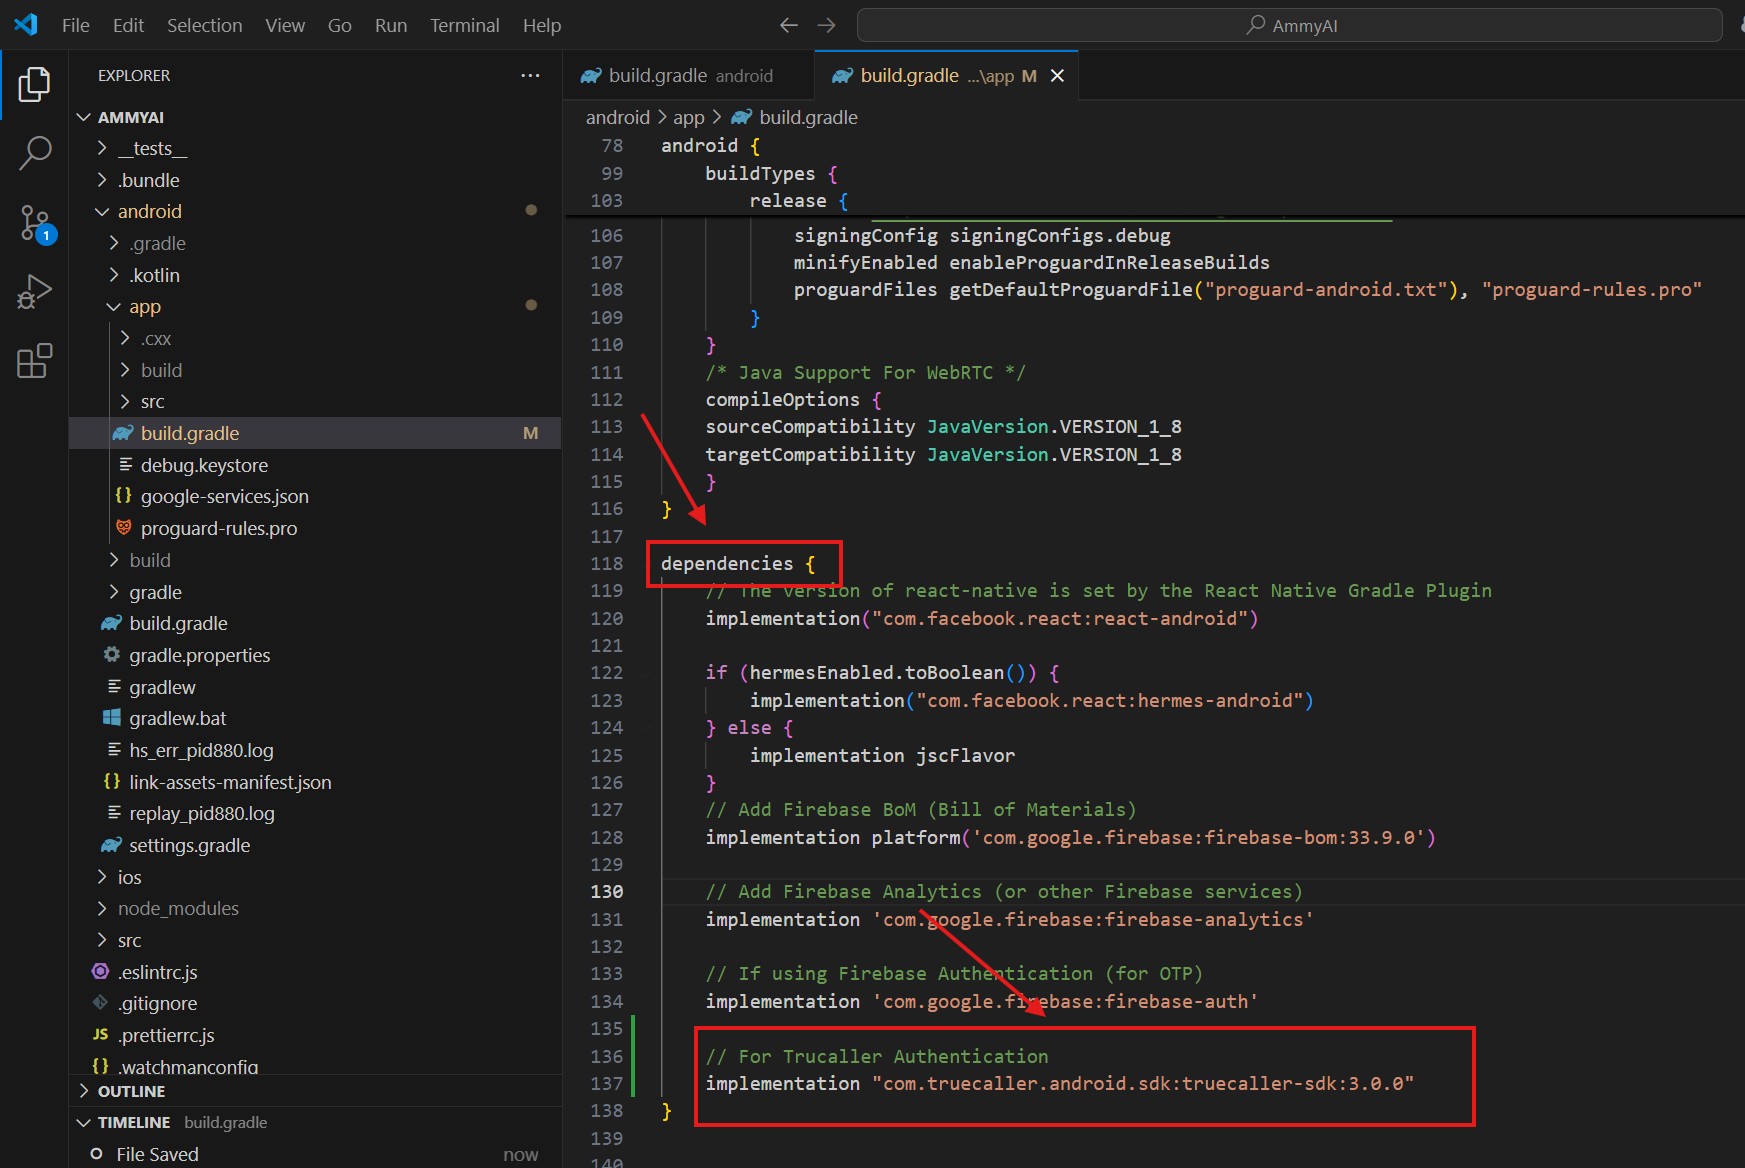
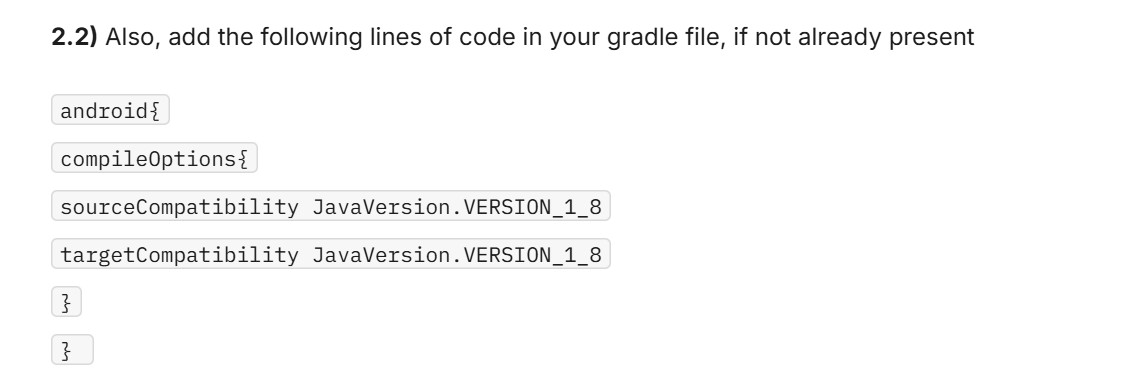
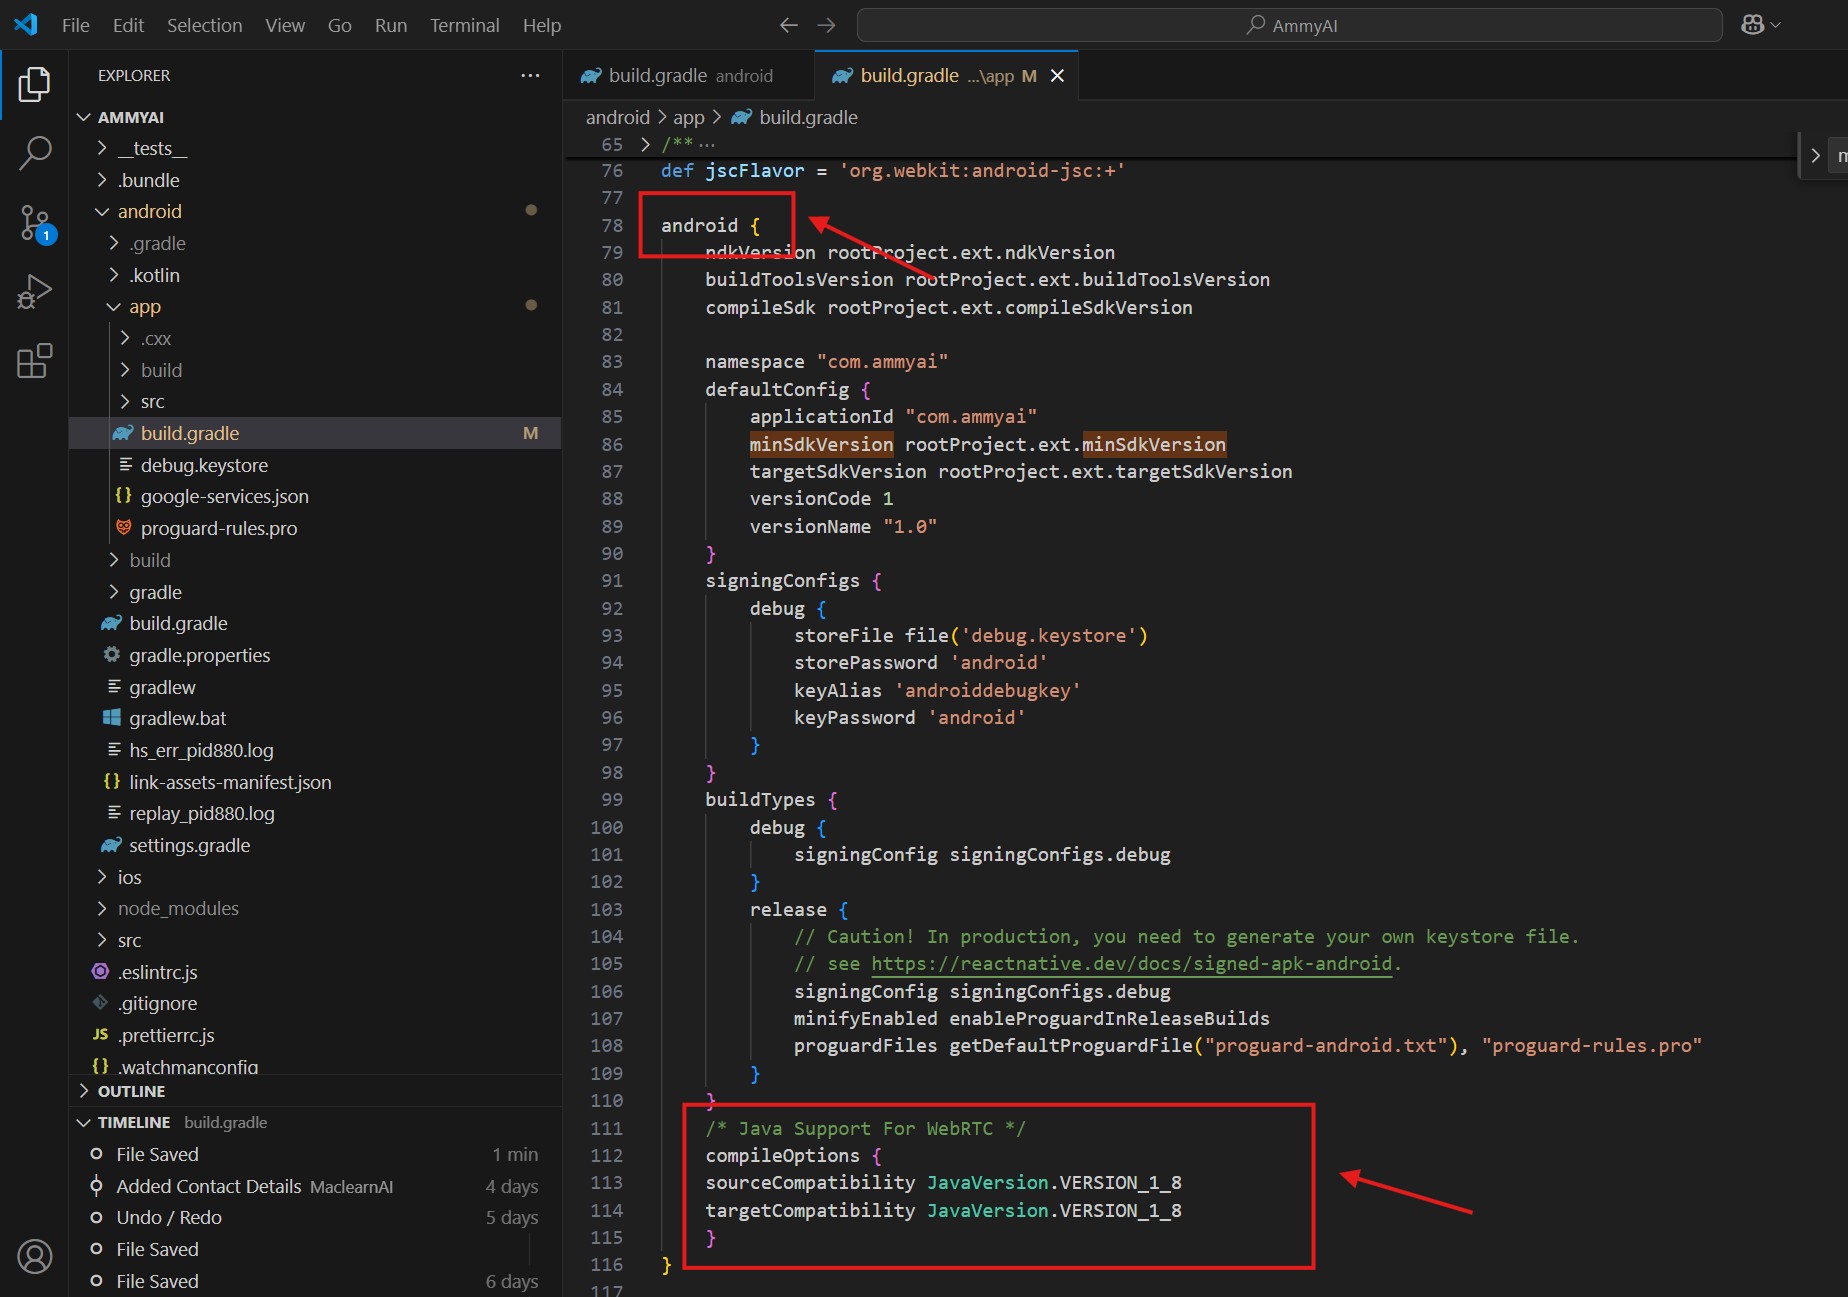
Step-2.1:
Step-2.2:
Step-3:
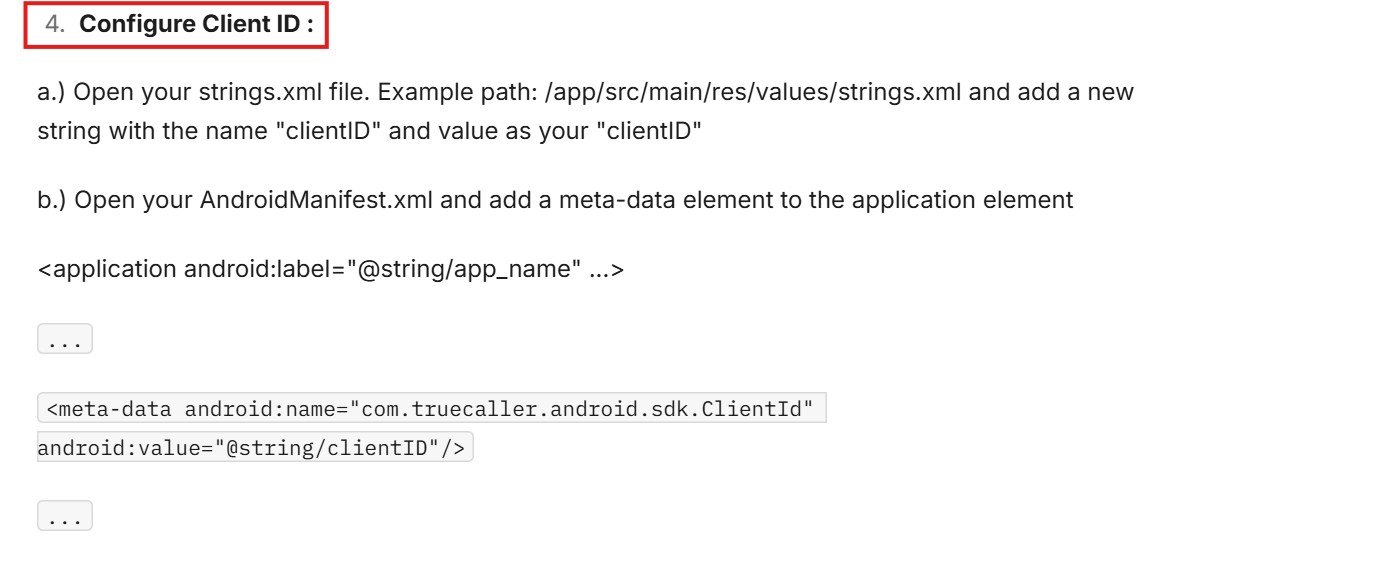
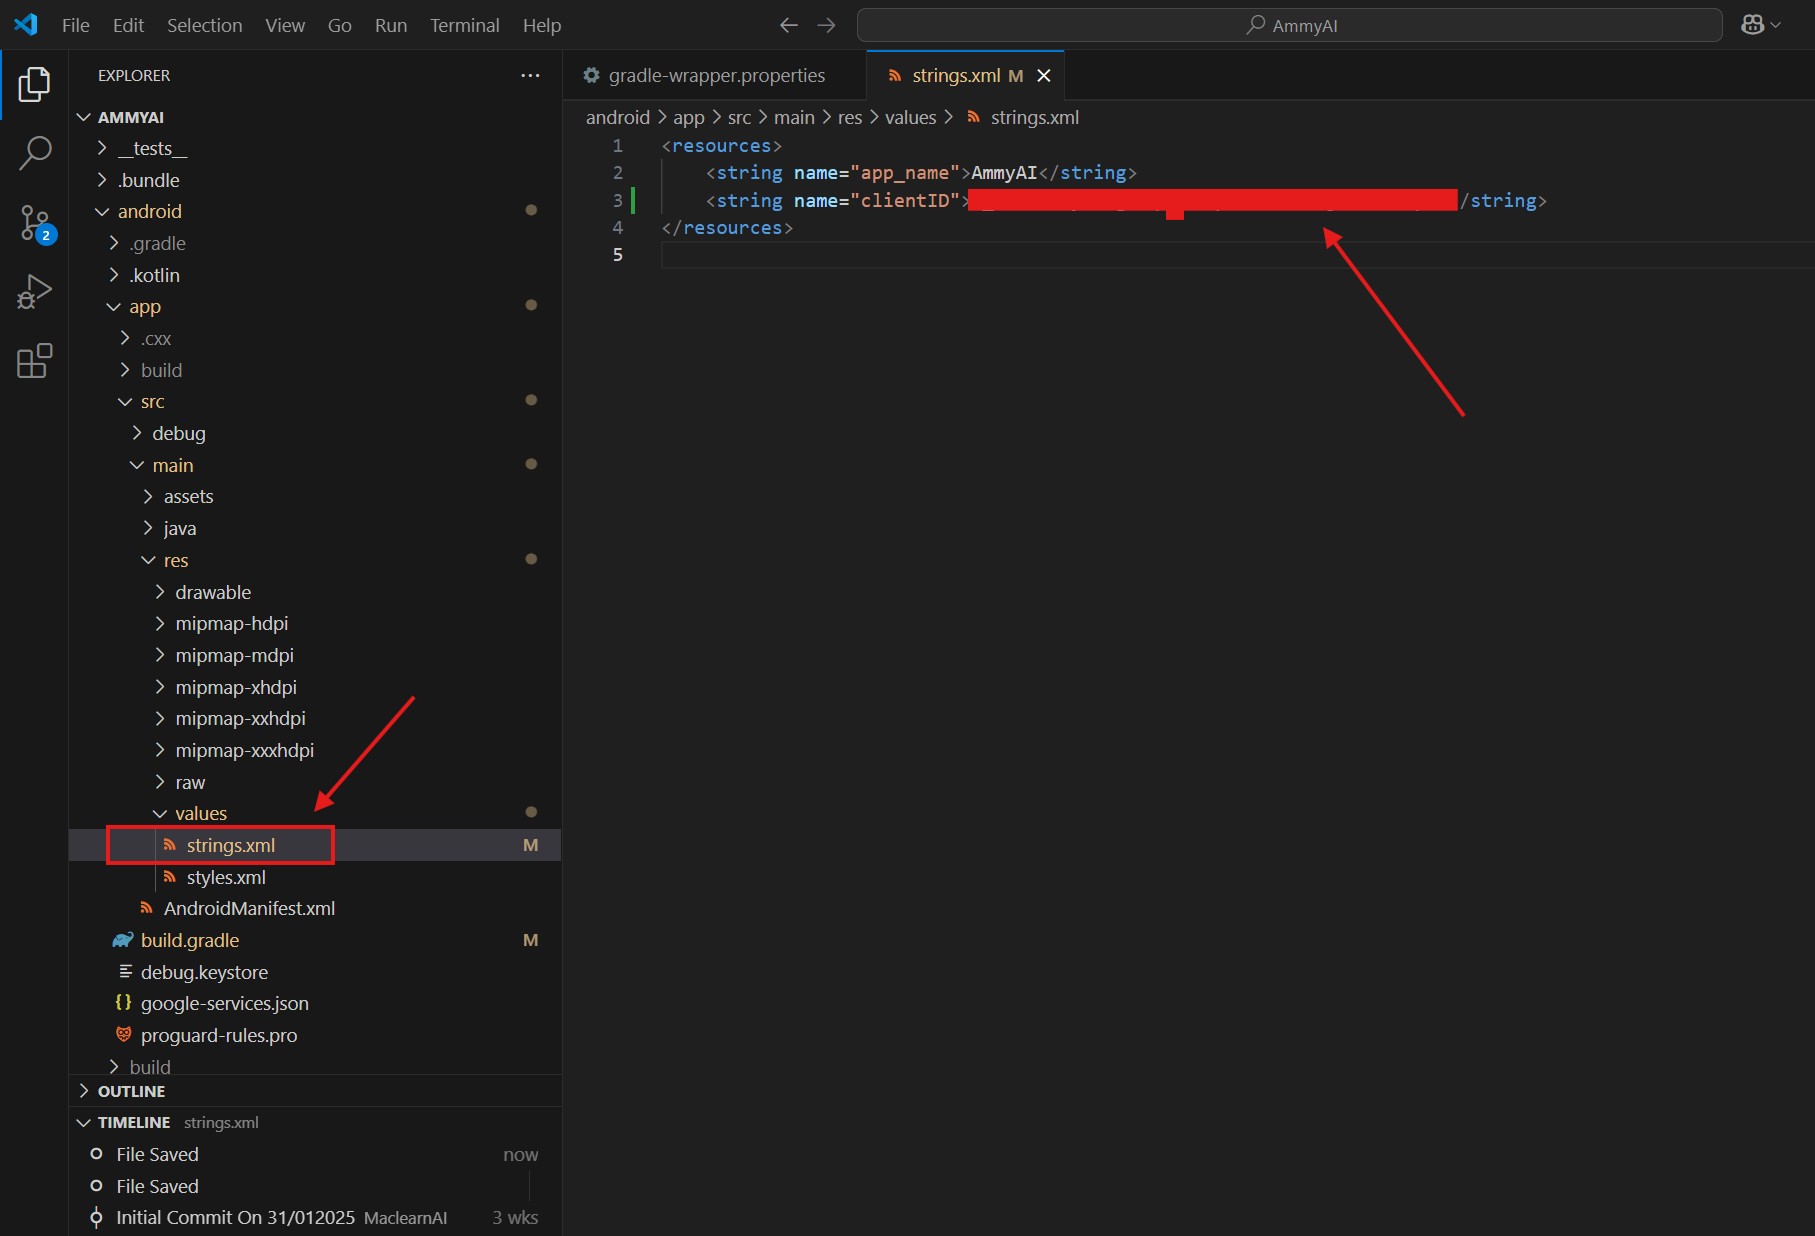
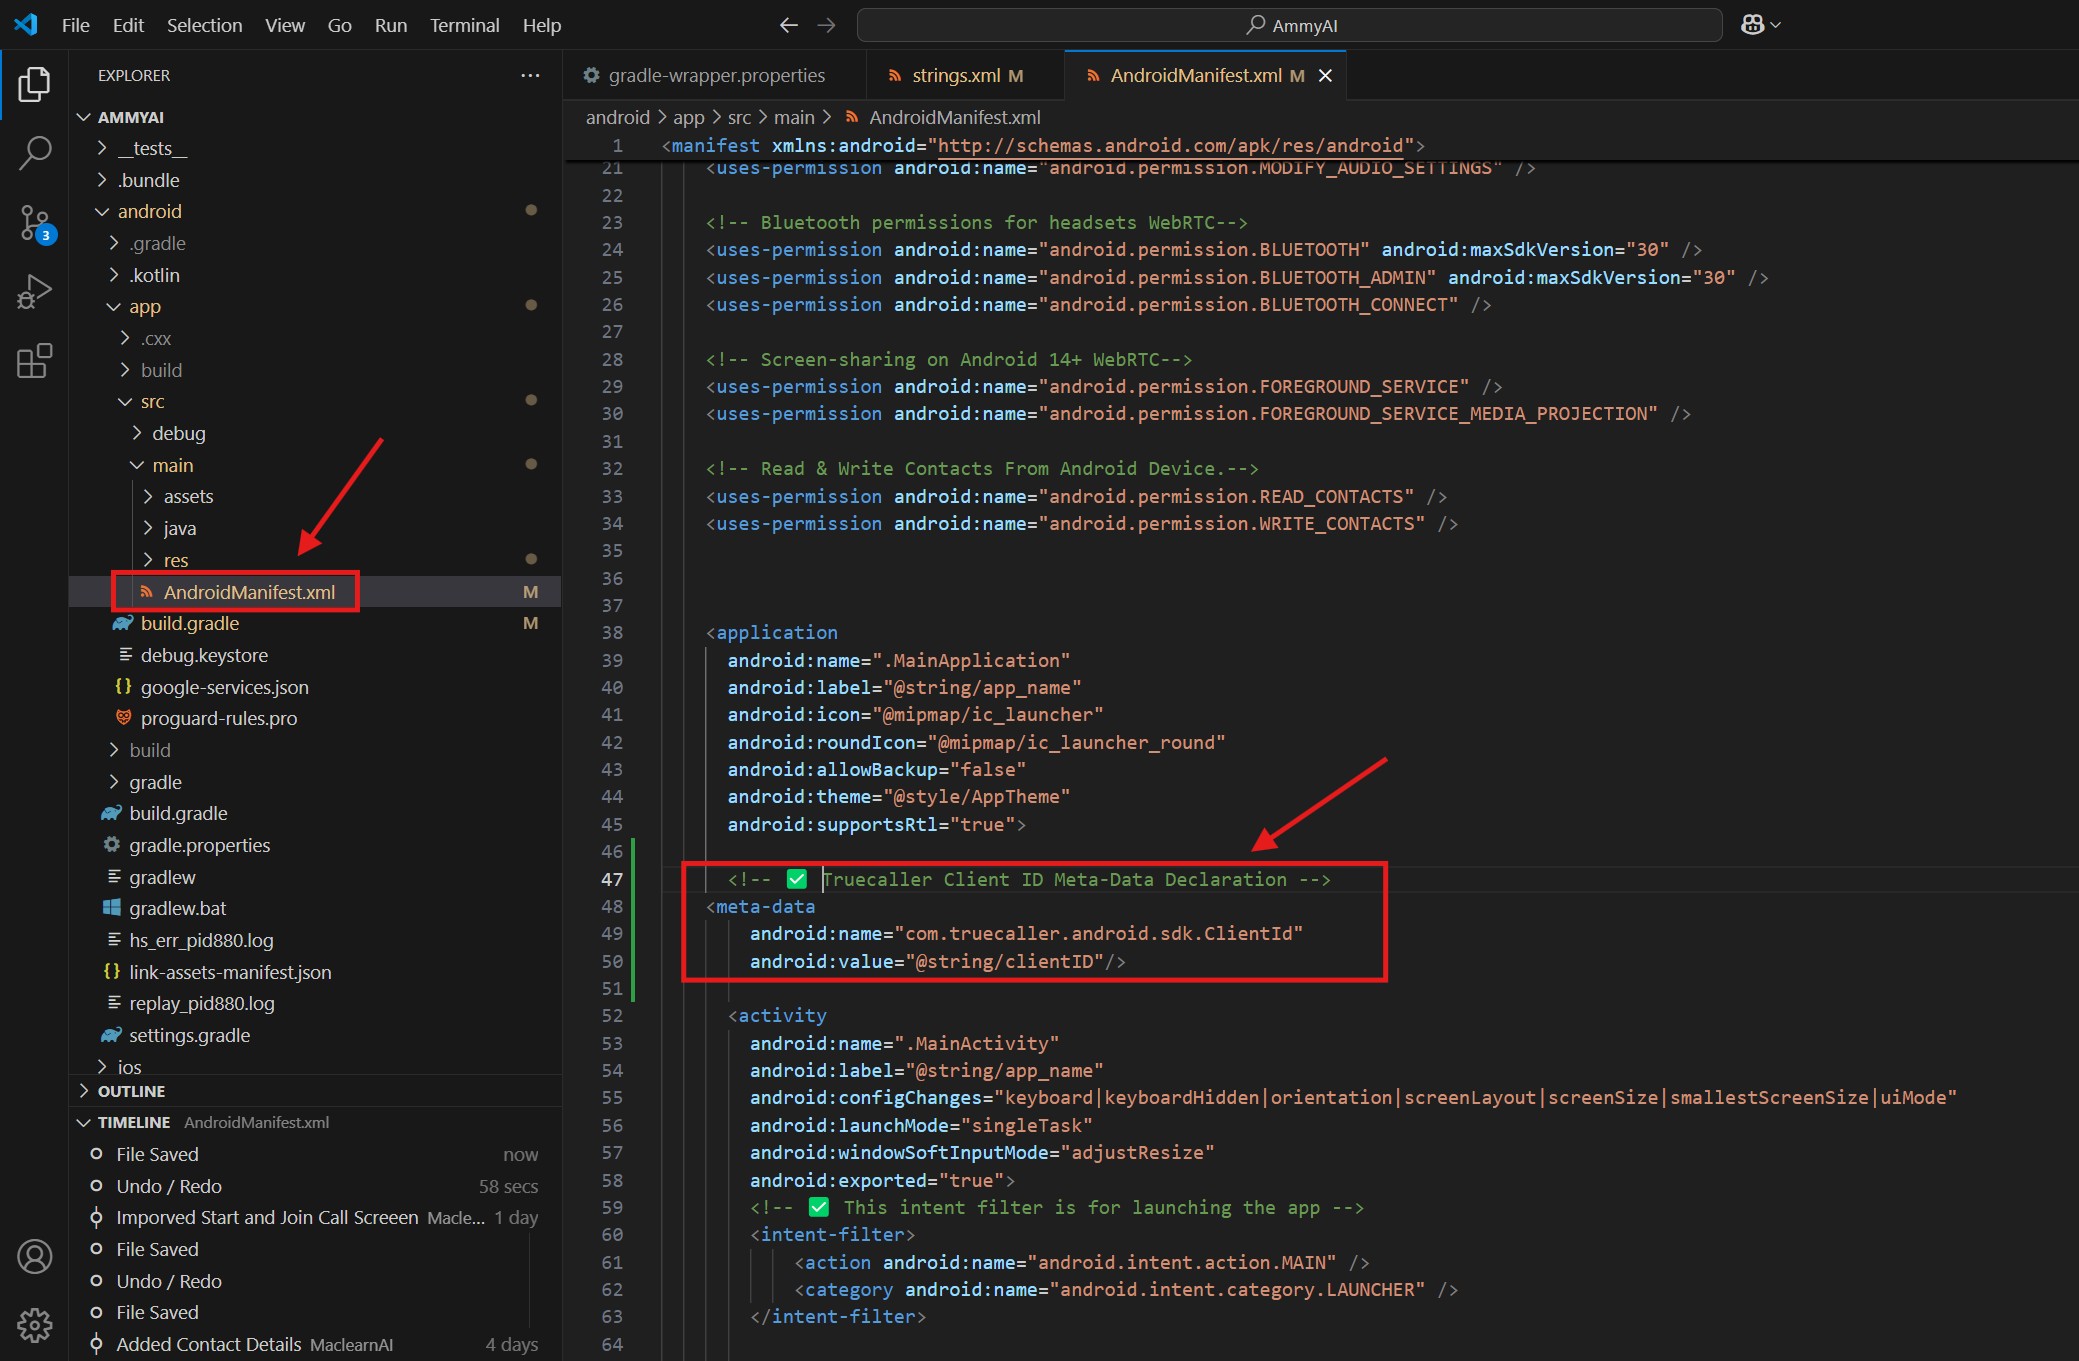
Step-4: Configure Client ID
(3) Implementing Callbacks
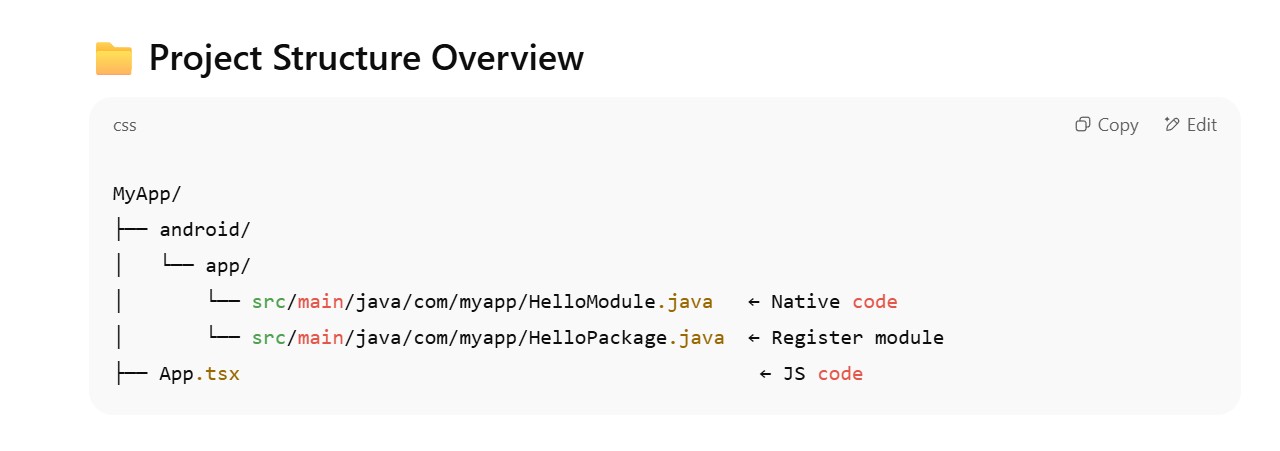
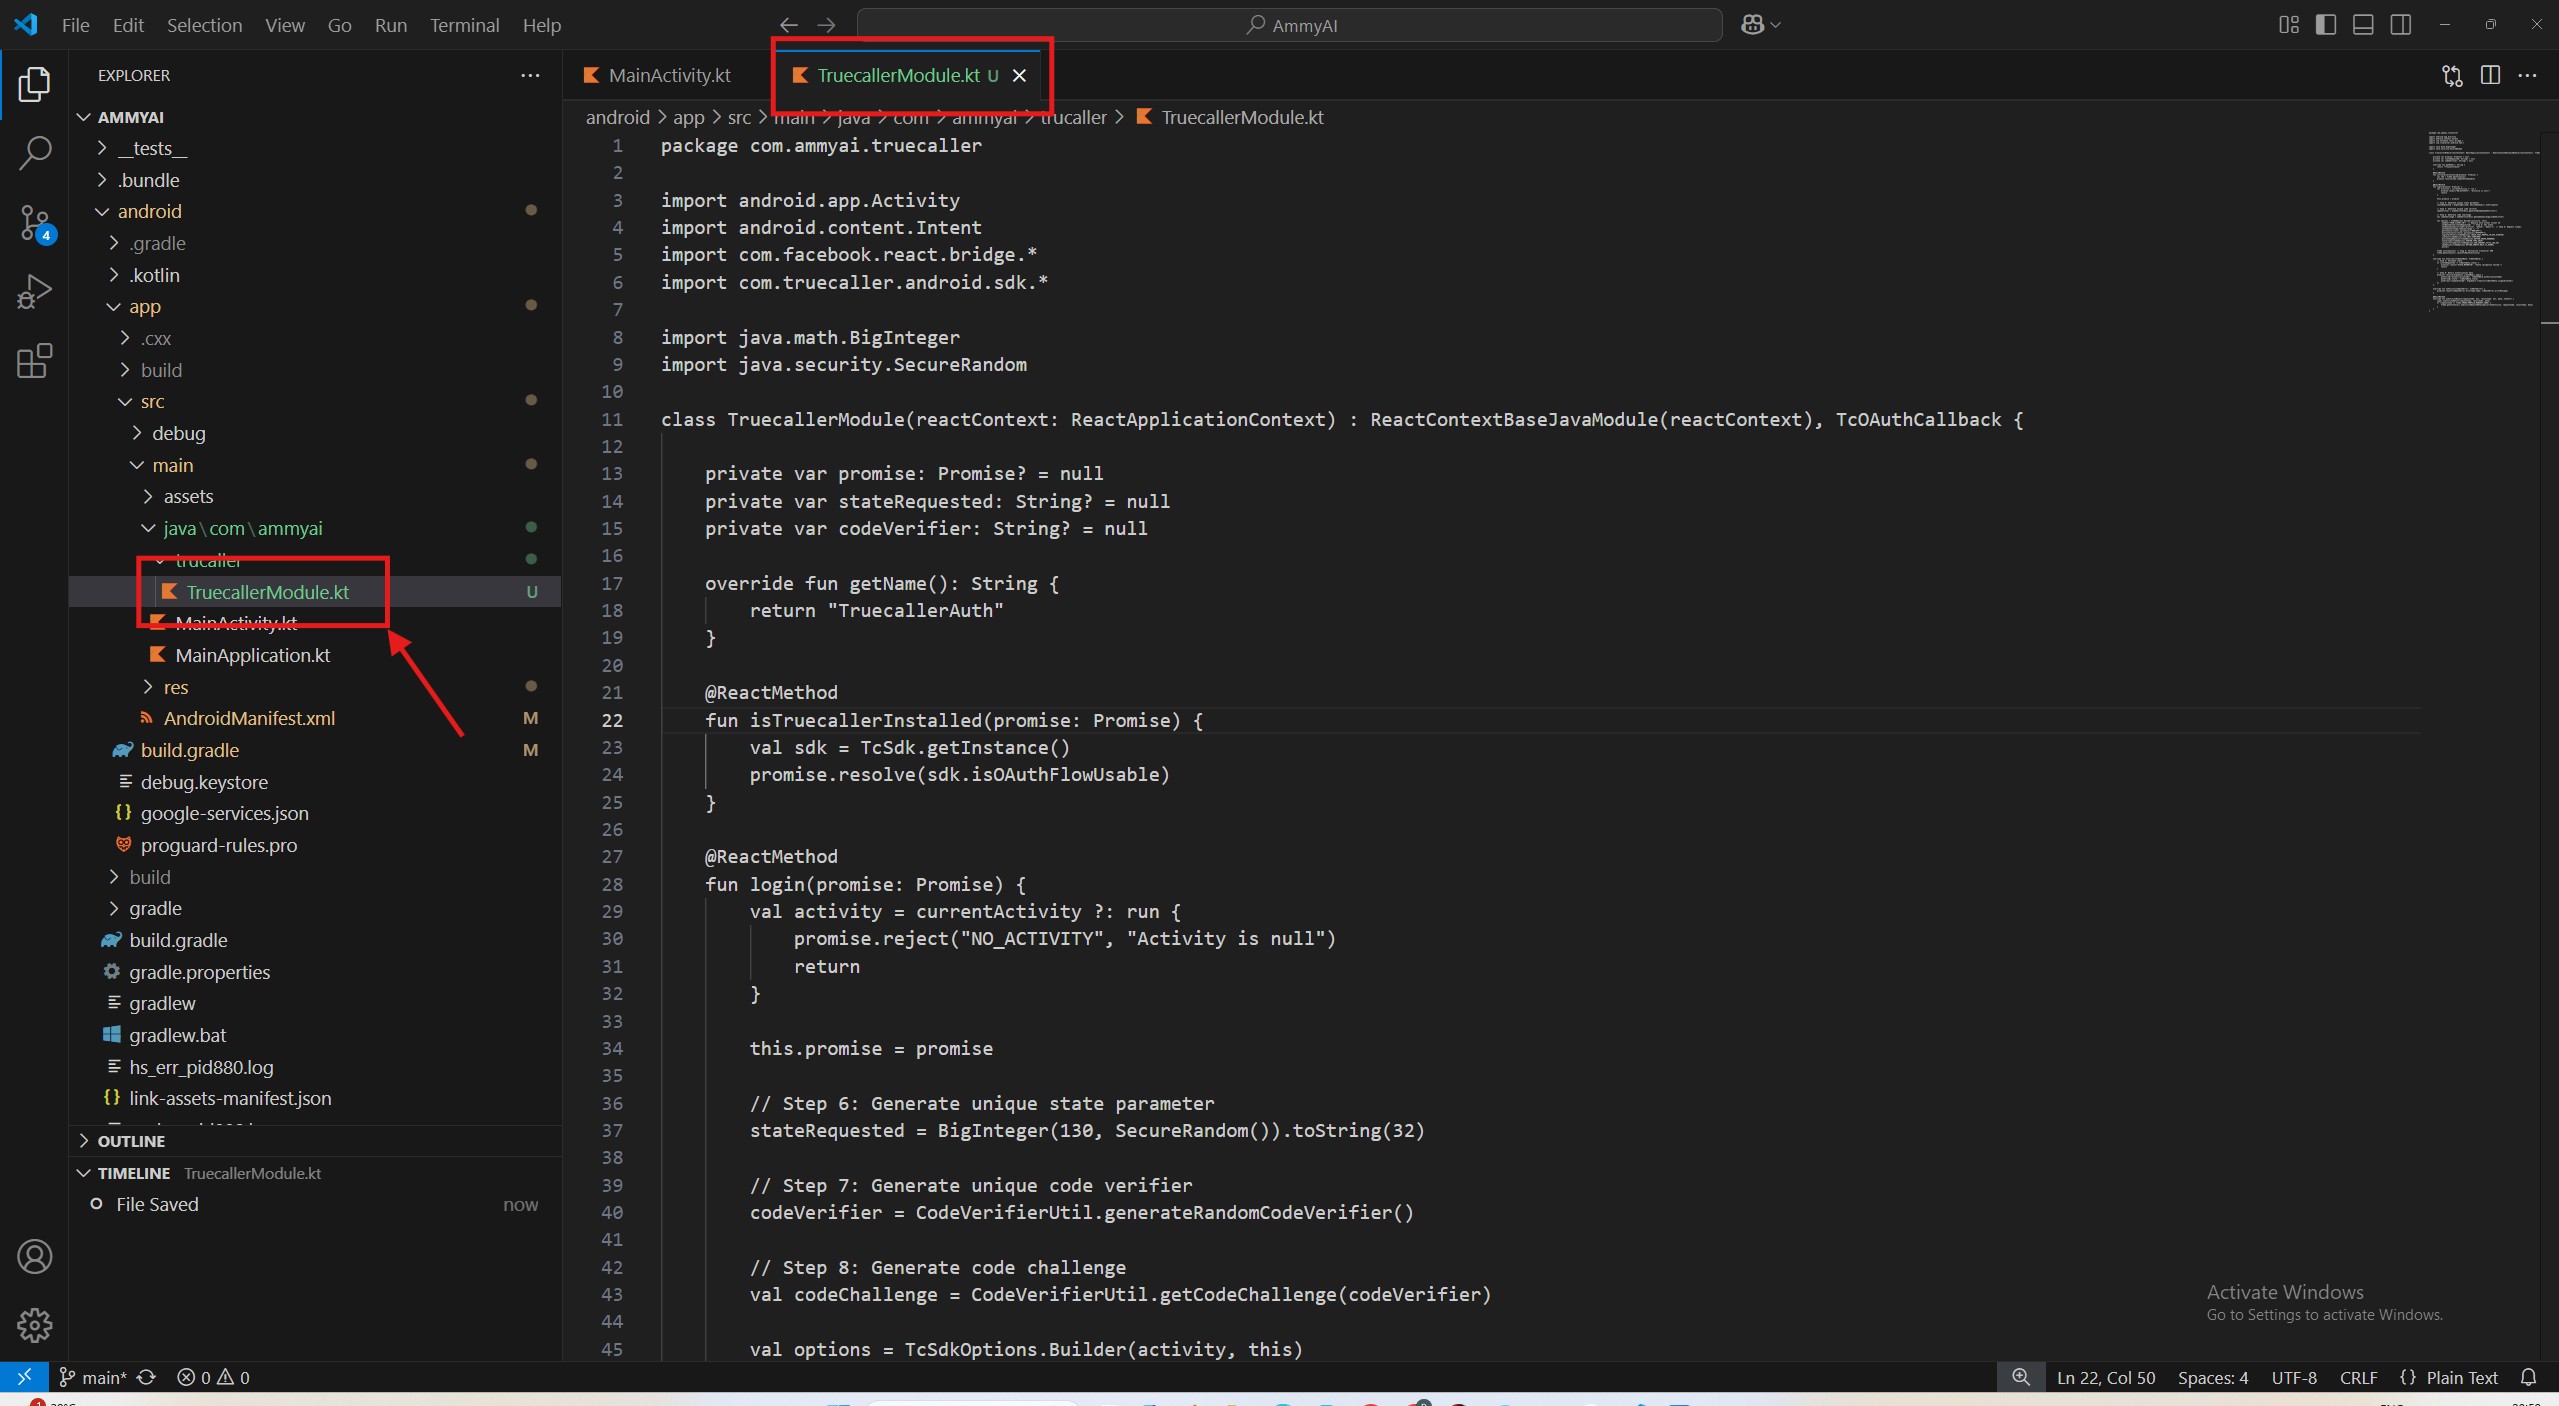
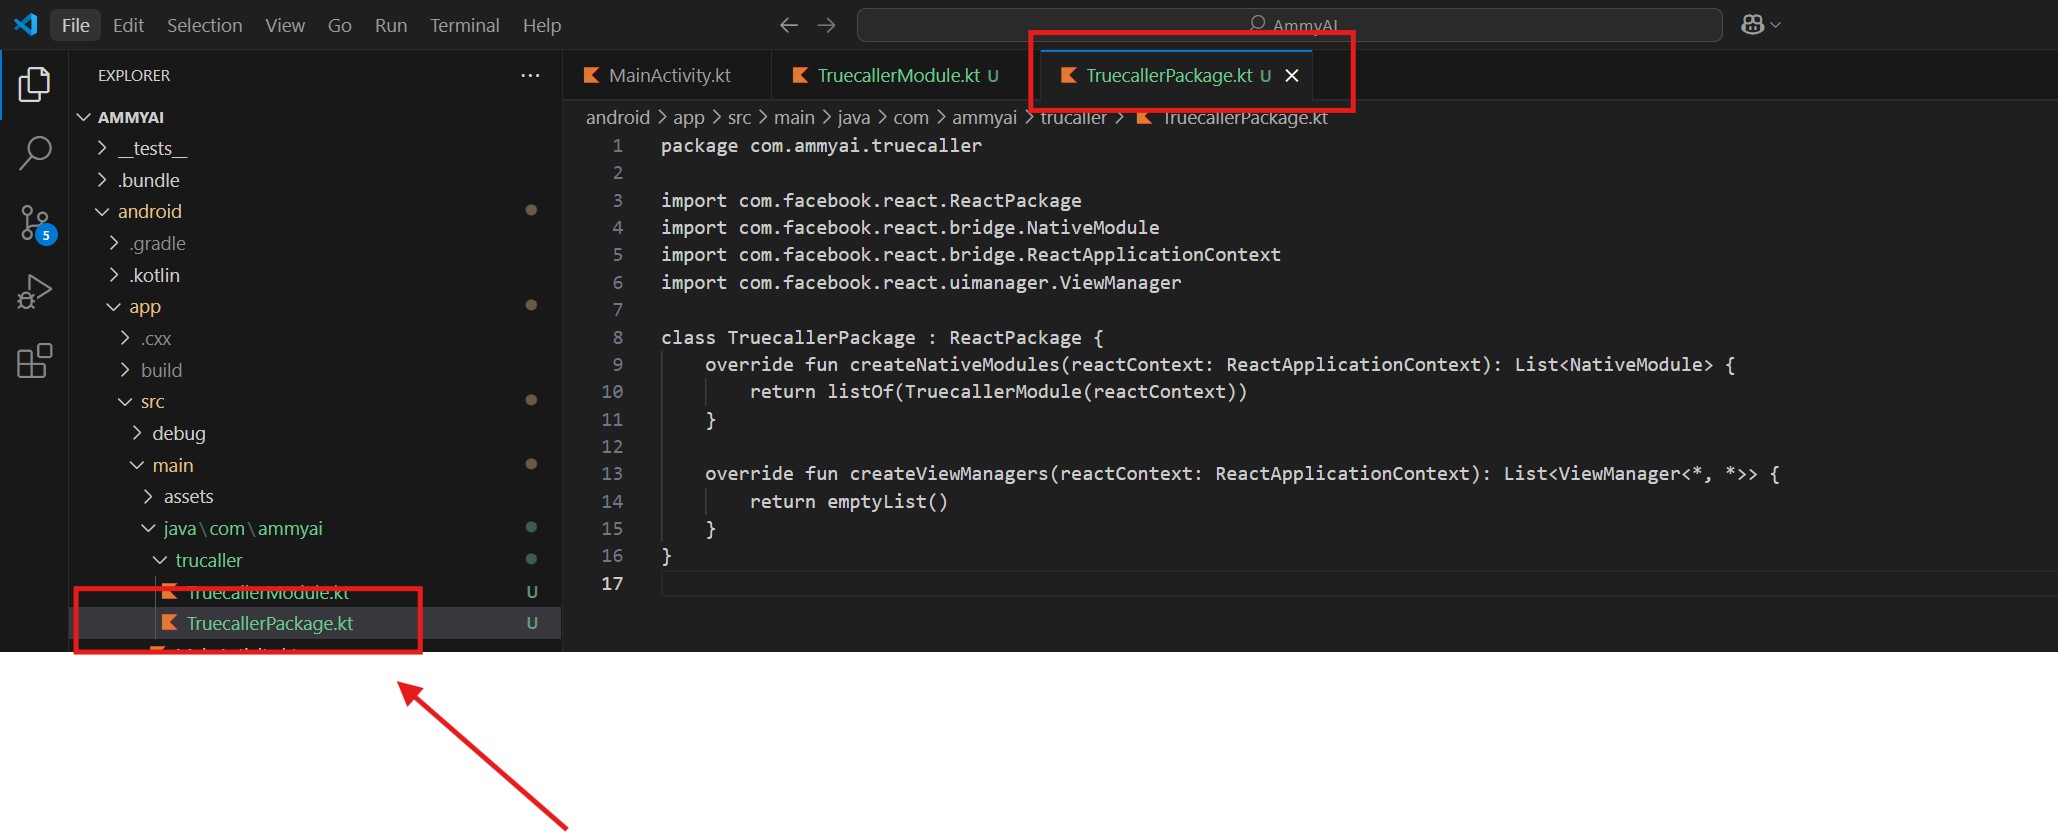
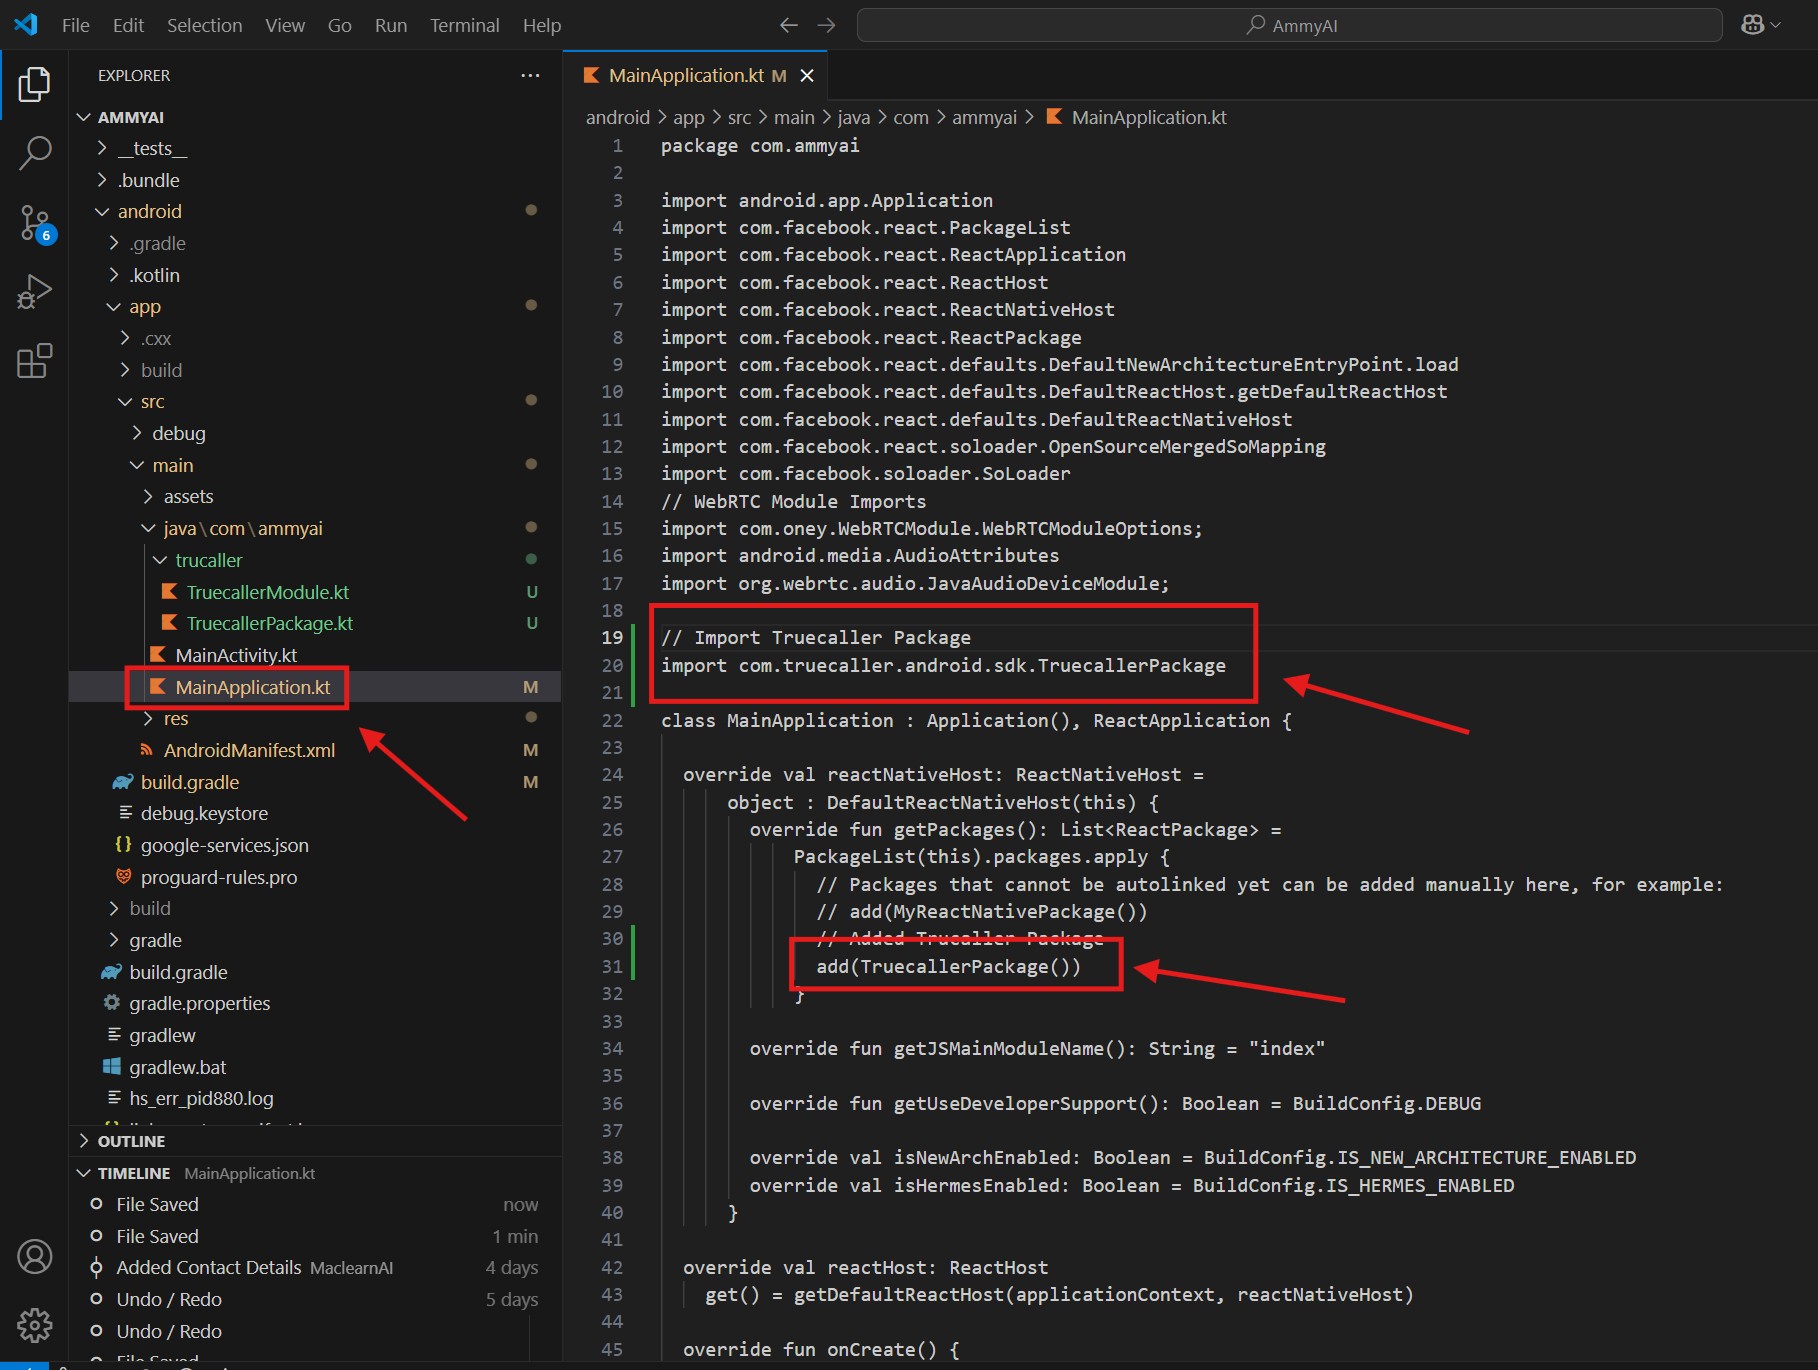
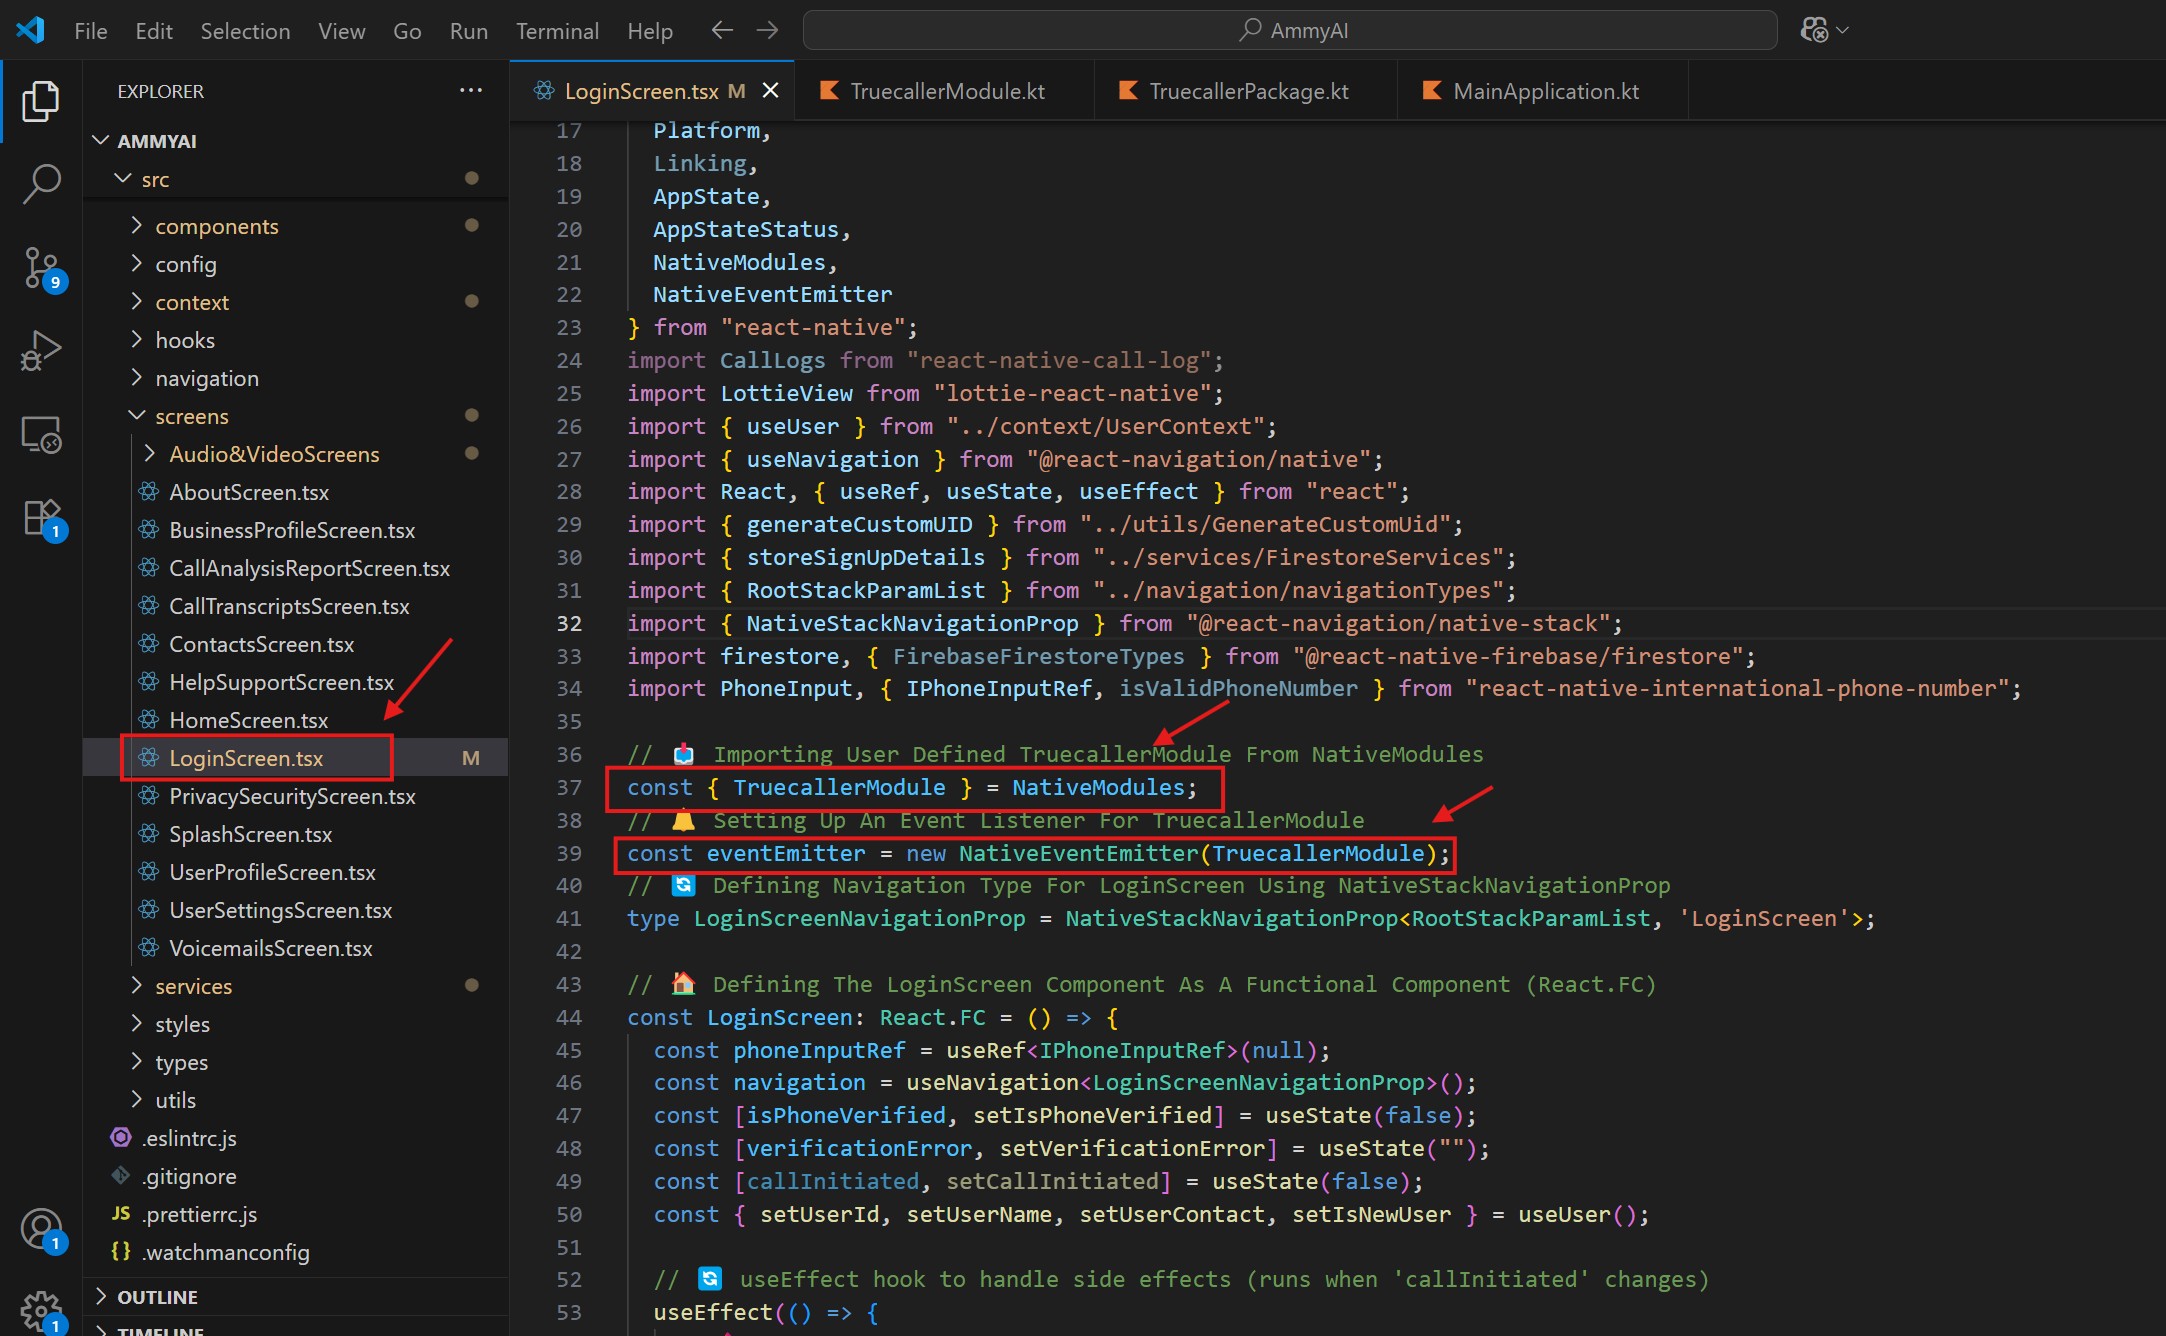
As Truecaller SDK is written in Kotlin language, to implement or to access the TrueCaller Modules we need to create a Custom Native module and this module will access the TrueCaller SDK functionality.
Interns we can use the custom native modules in ourReact Native app to access the TrueCaller Functionality.
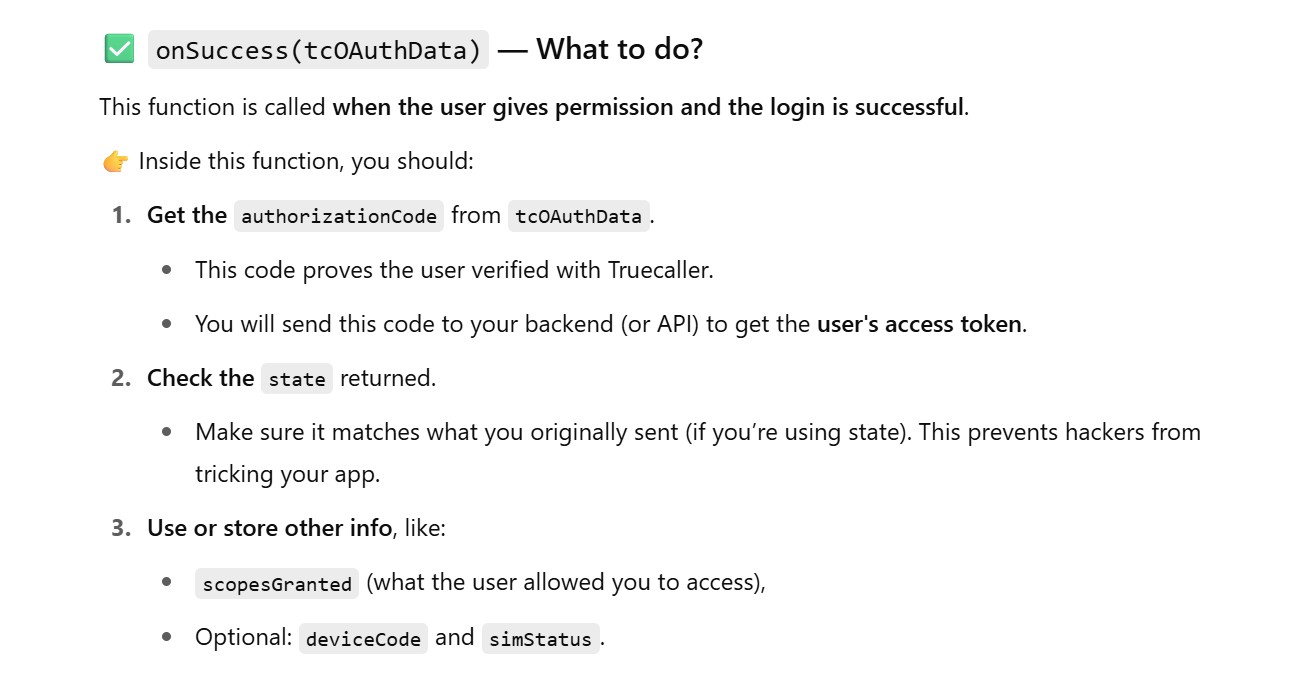
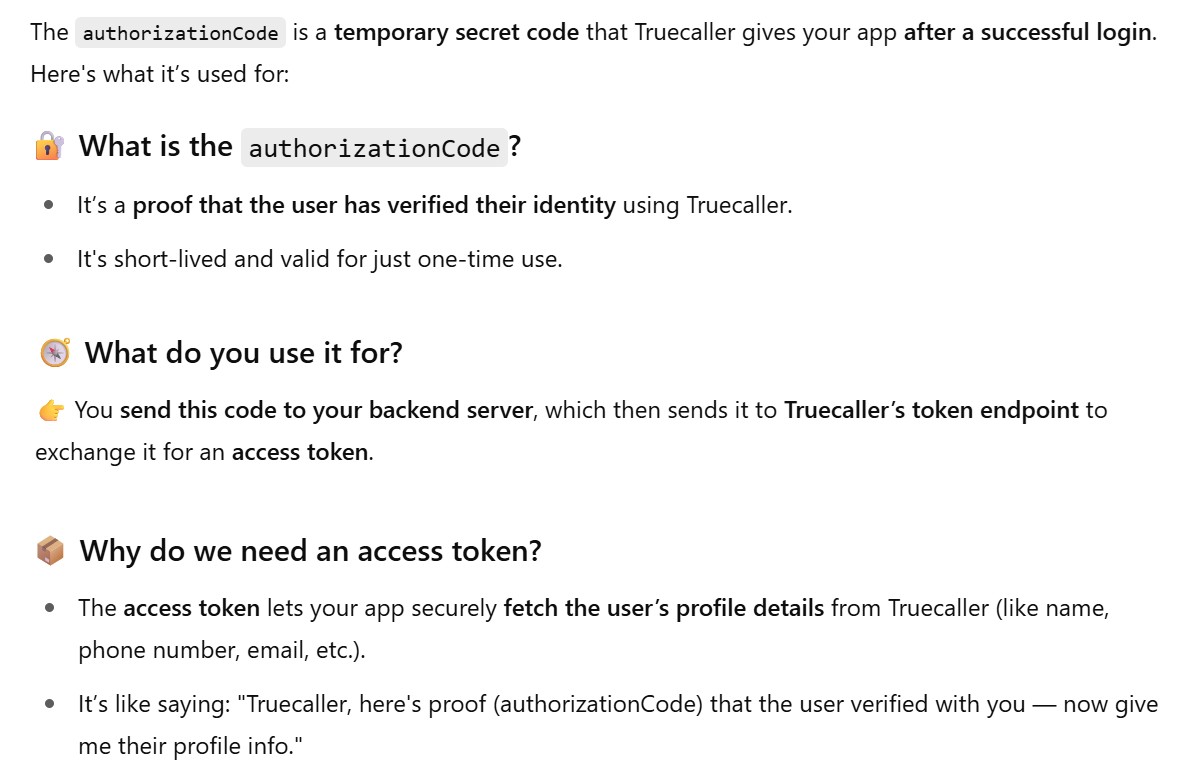
What To Do Inside The OnSuccess() and OnFailure() Method?